
1. Flat-panel wrap with crisp corners and a faux-leather edge
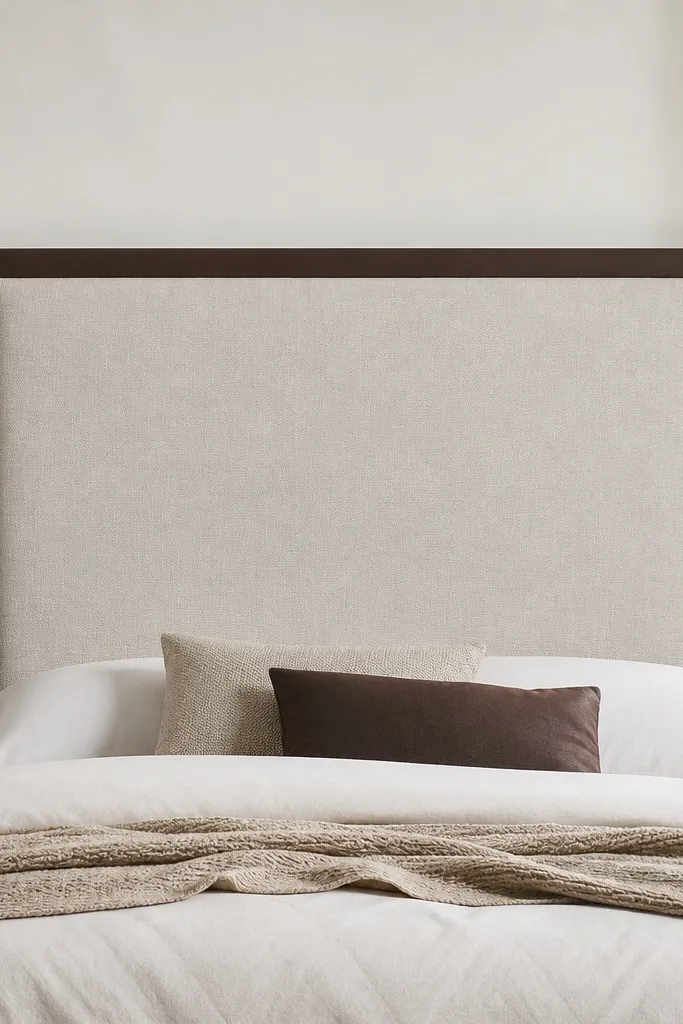
This look is all about tension. You build a flat plywood core, glue 1-inch foam to the face, add a thin batting layer, then pull the upholstery fabric tight so the corners stay square instead of rounded. The faux-leather edge gives you that store-bought “frame” effect without having to build a full wood frame. I like it in neutral rooms because the border reads like furniture, not a soft pillow.
Cut plywood to the exact headboard size you want, then sand edges lightly so fabric doesn’t snag. Use contact adhesive for foam (I spread thin, wait a minute, then press) and staple the fabric on the back with a consistent pull every 2 to 3 inches. Wrap the perimeter with a faux-leather strip about 2 inches wide, and finish the corners with mitered folds so you don’t get bulky seams.
Add a welt cord under the faux-leather strip if you want the edge to look extra crisp in photos. It makes the border look thicker without adding much bulk.
Avoid stretchy knit upholstery for this — it skews as you staple and you end up with wavy corners.
2. Sofa-style channel look using foam blocks (no sewing buttons)
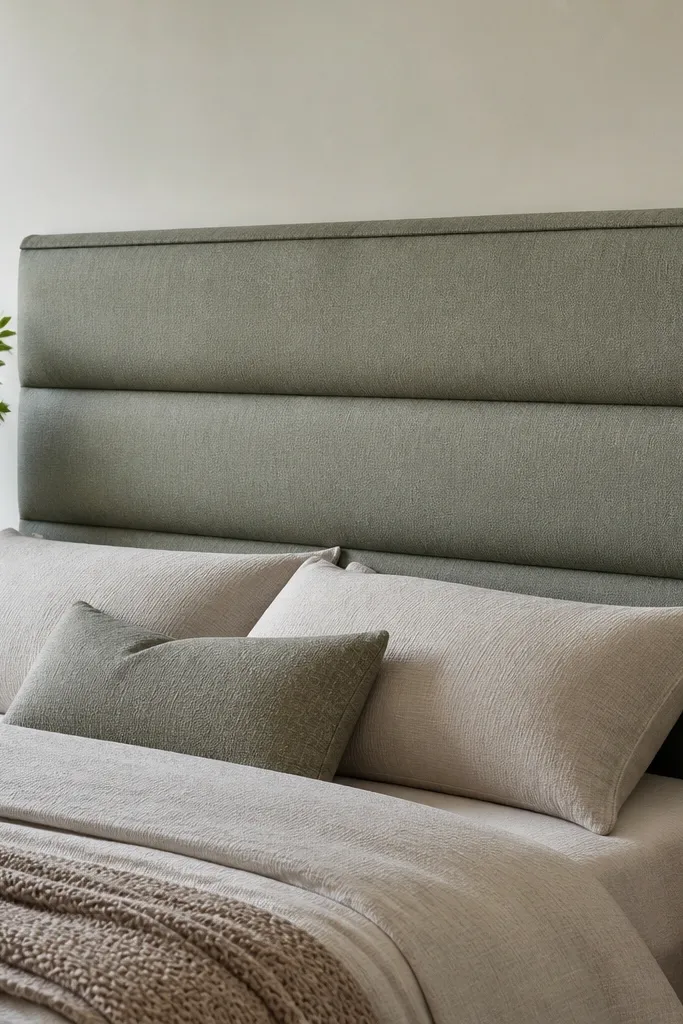
Channels hide small DIY sins because the lines pull the eye away from minor staple marks. Instead of sewing buttons, you create the channels by placing foam blocks under the batting where the dips should be. The fabric then stretches over the shape and reads like a tailored sofa. This works especially well for woven fabrics that hold creases nicely.
Mark three horizontal lines across the plywood using a measuring tape and a pencil. Glue 1-inch foam strips or blocks along those lines, then cover everything with a continuous batting layer before upholstering. Place the channel heights so the middle channel sits around the center of your headboard — for a 52-inch-tall piece, that’s about 24 to 26 inches from the floor if your bed is standard height.
Quick tipUse a long straightedge to press the batting into the channel lines before stapling. A quick, firm press makes the dips look intentional.
One warningDon’t skip the batting — foam alone telegraphs bumps and makes the channels look lumpy.
3. Buttonless tufted panel with a "tucked" center grid
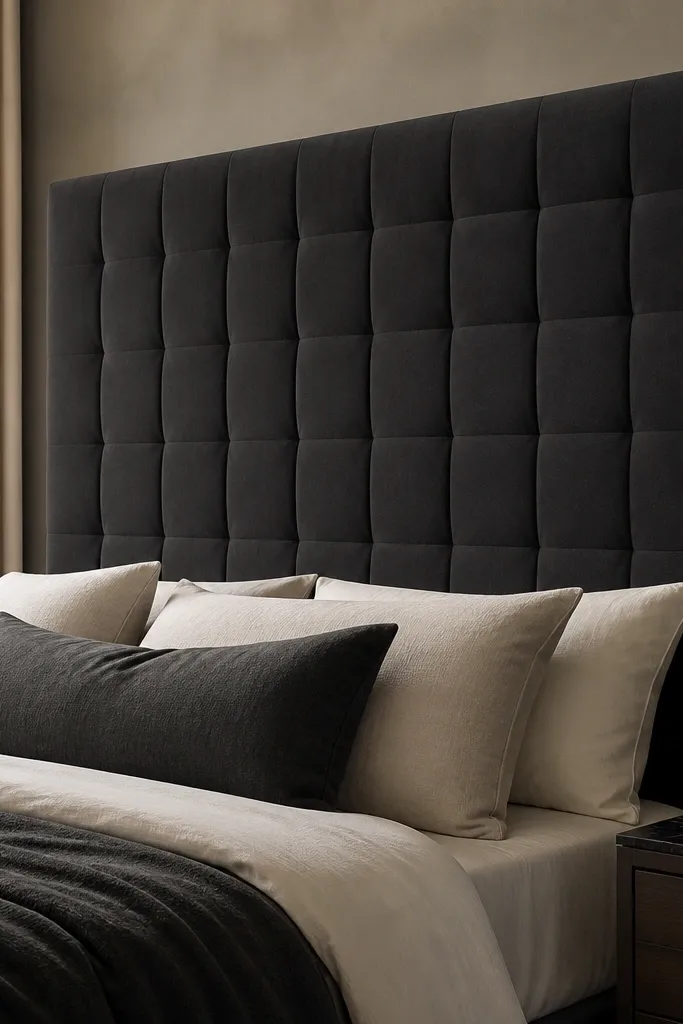
You get that tufted depth without buying buttons or doing heavy hand stitching. The trick is to use a backing method that pulls the fabric inward at fixed points, then seals those points so they don’t relax. I’ve made this using dowel pegs and string tied to the back — it creates consistent puckers you can measure. Charcoal performance velvet hides the staple lines and makes the indent pattern look expensive.
Plan your grid spacing first. For a standard 60-inch-wide headboard, I use 4 columns and 4 rows of indents, spacing about 12 inches apart. Drill shallow pilot holes in the plywood at each indent point, add dowel pegs, then tie strong twine to each peg and pull the fabric inward before stapling around the perimeter. Cover with batting so the indents are soft, not sharp.
Quick tipDo a dry run with painter’s tape on the front to check symmetry before you tie anything. I’ve wasted fabric once because I assumed the grid looked even.
One warningAvoid thin, slippery fabric — it won’t hold the pucker and your “tuft” turns into sag.
4. Linen-wrapped frame with an inner "floating" panel
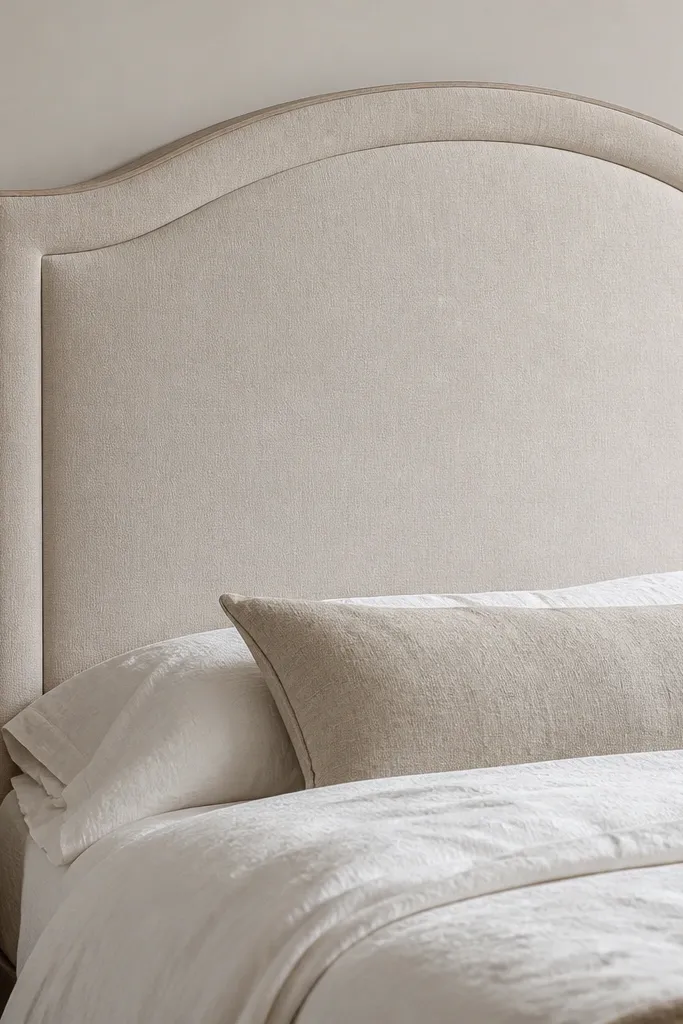
This is the headboard look that makes people ask where you bought it. You build a frame that’s visible from the sides, then you upholster an inner panel so the face looks like it’s set back. It’s a DIY-friendly way to create dimension without complex tufting. When you use the same fabric for both layers, the contrast comes from tightness and seam placement, not from color.
Build the frame with 1x2 wood rails. Leave an inset opening of about 1.5 to 2 inches so the inner panel can sit back slightly. Upholster the inner panel separately with foam and batting, then attach it to the frame from the back using screws and fabric-safe washers. Wrap the outer rails in linen and finish the corners with neatly folded miter seams.
Quick tipUse a slightly heavier linen for the frame and a smoother weave for the inner panel. The frame can handle folds; the inner panel needs a clean face.
One warningDon’t make the inset too small — if it’s under 1 inch, it reads flat and you lose the floating effect.
5. Upholstered pegboard-backed headboard for strength and easy mounting
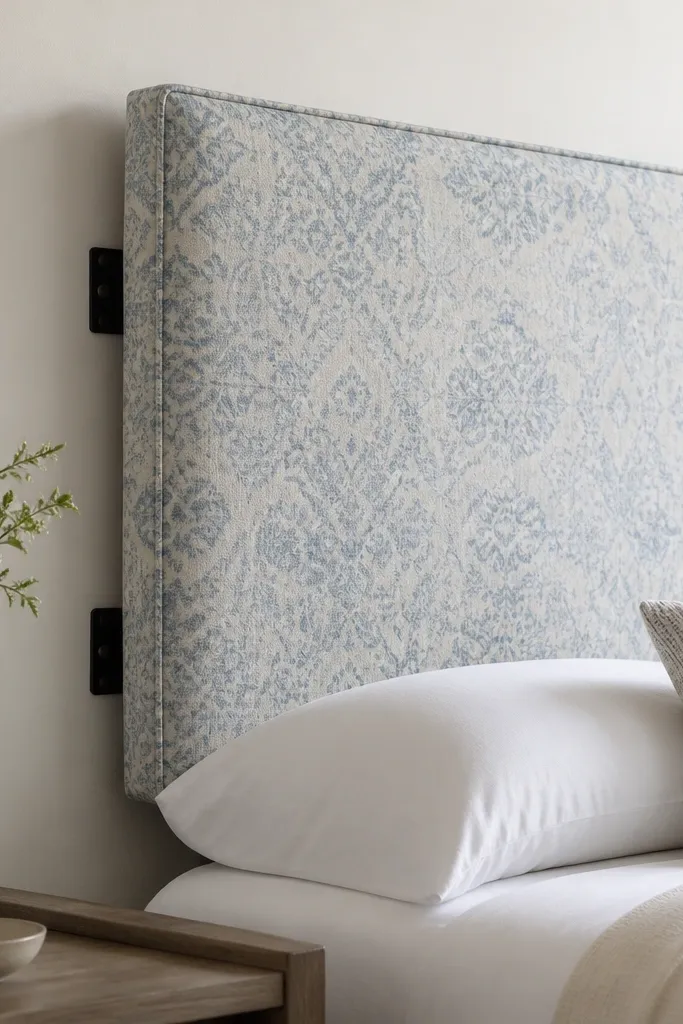
This method solves the wobble problem that happens when people mount a plywood core directly to a bed frame. I’ve used pegboard (hardboard grid) behind the foam to spread load and give you mounting holes in a predictable grid. The front still looks clean and simple, but the structure holds up when you push against it in real life. It’s also easier to hang because you have lots of screw points.
Cut pegboard to your headboard size and screw it to a basic perimeter wood frame. Add foam and batting to the front, then upholster with staples. For mounting, install two to three support rails across the back so the headboard doesn’t flex; align them with your bed’s mounting brackets.
Pre-drill screw holes into the wood frame where you’ll mount the headboard — it prevents splitting and keeps everything square.
Don’t rely on pegboard alone as the structural backing — it needs a perimeter frame.
6. Performance velvet headboard with a waterfall top edge
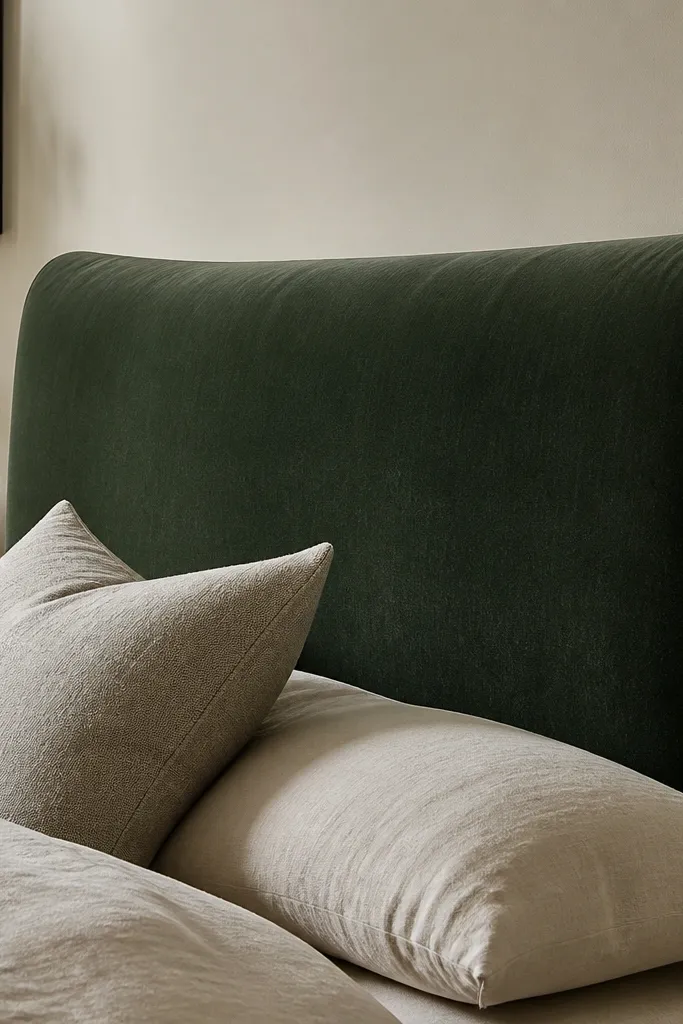
A waterfall top edge makes even a flat panel feel custom. You still do a standard foam + batting build, but you cut the top to create a gentle arc and let the fabric drape over the curve cleanly. Velvet helps because the nap hides tiny irregularities and the sheen looks consistent. This is a great option if you want something softer than sharp corners.
Use a flexible curve template for the top edge — I trace a dinner plate for a small radius, then adjust to fit the width. Cut foam to match the curve, then add batting so the curve looks plush instead of stiff. Upholster and staple on the back, then trim any excess around the curve with a sharp rotary cutter so the fabric lies flat.
Quick tipCut your velvet fabric with the nap direction marked using painter’s tape. If you flip it accidentally, the sheen will look patchy across the top.
One warningAvoid thick batting layers on velvet — it makes the nap look fuzzy in the highlights.
7. Patterned fabric headboard with a matched seam and centered motif
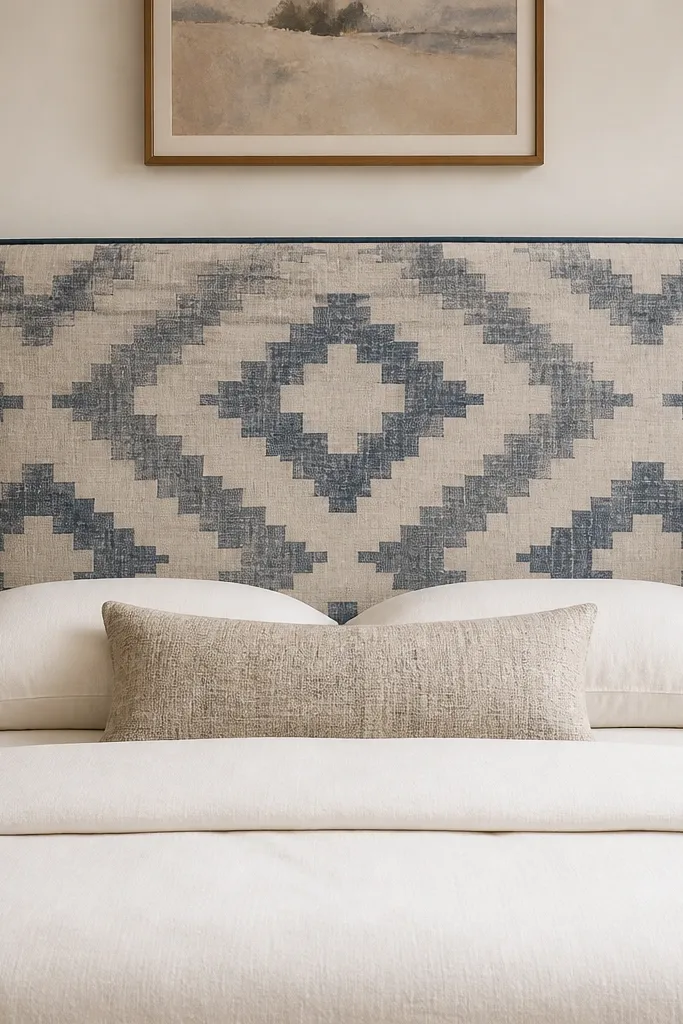
Pattern matching is what makes DIY look like it was made for your room. I’ve learned that when you center the motif and keep the pattern lines straight, people assume it came from a store. You create a clean visual by planning seam placement so the pattern doesn’t break where your eye goes when you sit up. Contrasting piping frames the pattern so the edges look deliberate.
Buy extra yardage. For many patterned upholstery fabrics, you need 1.5 to 2 times the yardage you’d use for solids to match repeats. Mark your fabric repeat on the floor, then position the pattern so the center line lands at the center of your headboard. Place seams behind the thickest frame areas or along the back so they don’t show through from the front.
Quick tipUse tailor’s chalk and a long ruler to keep pattern alignment while you staple. A 1/8-inch drift shows up instantly on geometric prints.
One warningDon’t cut the fabric first and hope — pattern repeat errors happen before you even start stapling.
8. Tufted-looking border using fabric ties and a simple top rail
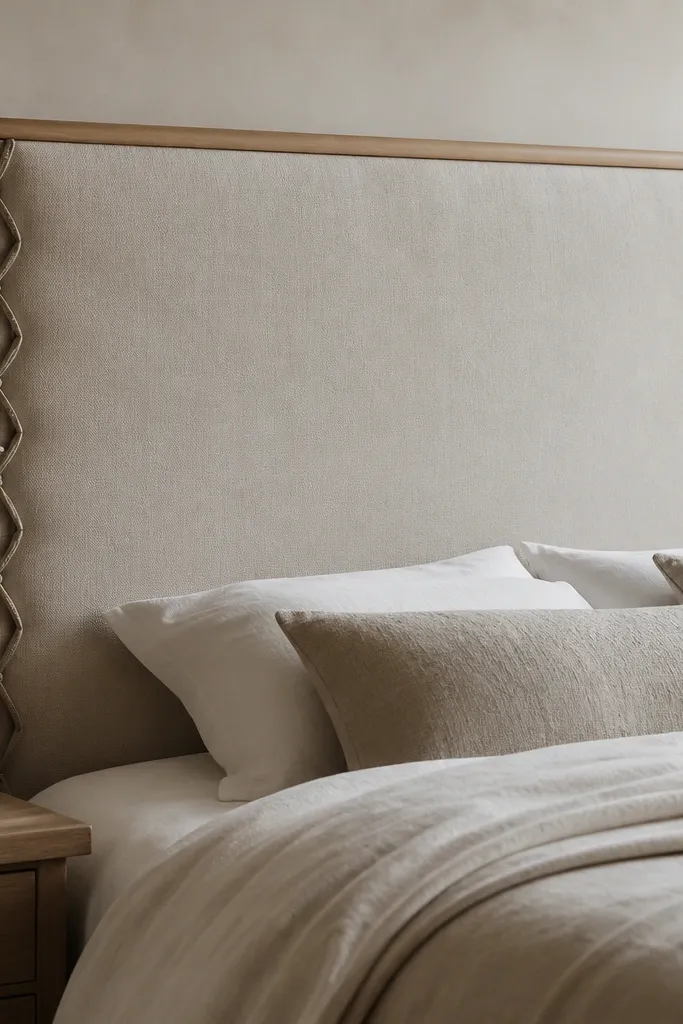
This gives you a tufted vibe without committing to a full tufted face. The border pattern sits where your eyes land while sitting, so it reads as intentional decoration. I’ve used this with solid fabrics like oatmeal boucle or textured tweed because the ties create shadows that look like hardware. The top rail adds a bit of structure so the headboard looks furniture-grade.
Build a simple perimeter frame and upholster the face flat. For the border, install small eyelets or hooks on the back at evenly spaced points, then tie fabric strips to pull slight dips from the front. Keep the dips shallow — around 1/2 inch — so the fabric doesn’t look overworked.
Pre-cut tie strips from the same fabric and label left/right so you don’t reverse the nap or texture mid-run.
Don’t pull the ties too deep — deep dips on boucle look like stretched fabric instead of decorative shadow.
9. Jeweled nail trim with a linen base (real hardware, real shine)
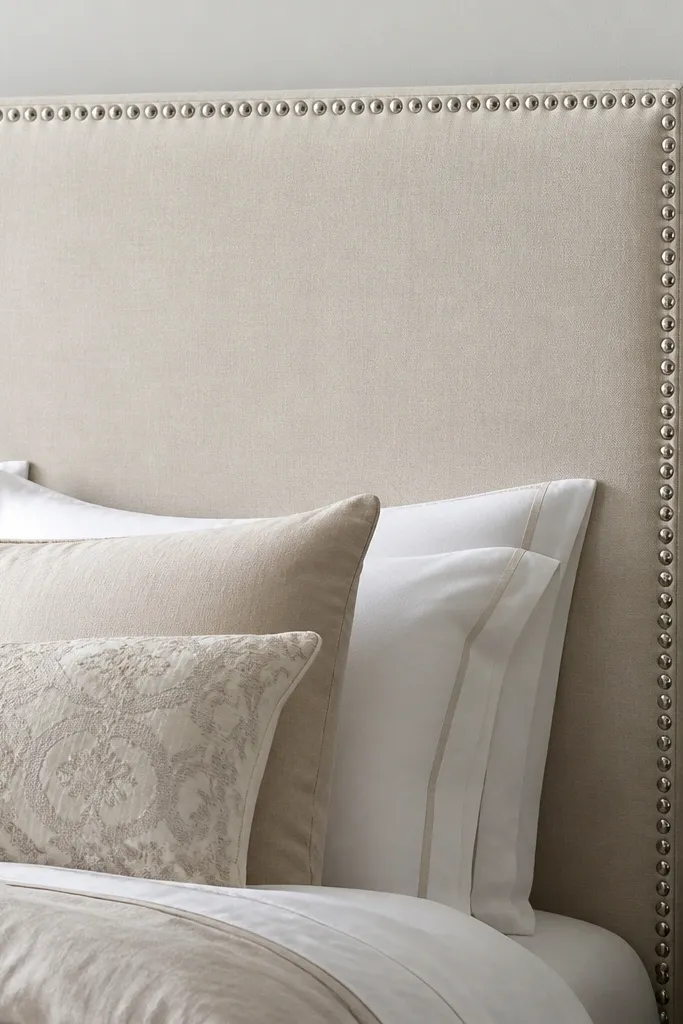
Hardware framing changes the whole read of a DIY headboard. Even with a simple flat-panel build, nail trim tells your brain “this is furniture.” I like using small, consistent nail sizes and a linen base because the contrast makes the trim look like a design choice instead of a workaround. If your room is neutral, this is the quickest way to add detail without changing your entire palette.
Use a flat plywood core with foam and batting, then upholster. Install nail trim along the edges after fabric is fully secured — I press the trim into place and mark holes lightly before hammering. Keep spacing consistent by using the nail package spacing guide and re-check every few nails so it doesn’t drift.
Hammer nails straight down, then stop and adjust if one starts to angle. Fixing one nail early looks better than correcting the whole line later.
Avoid cheap, irregular nail trims — the uneven heads show up fast in daylight.
10. Slipcover-style upholstered headboard for easy cleaning
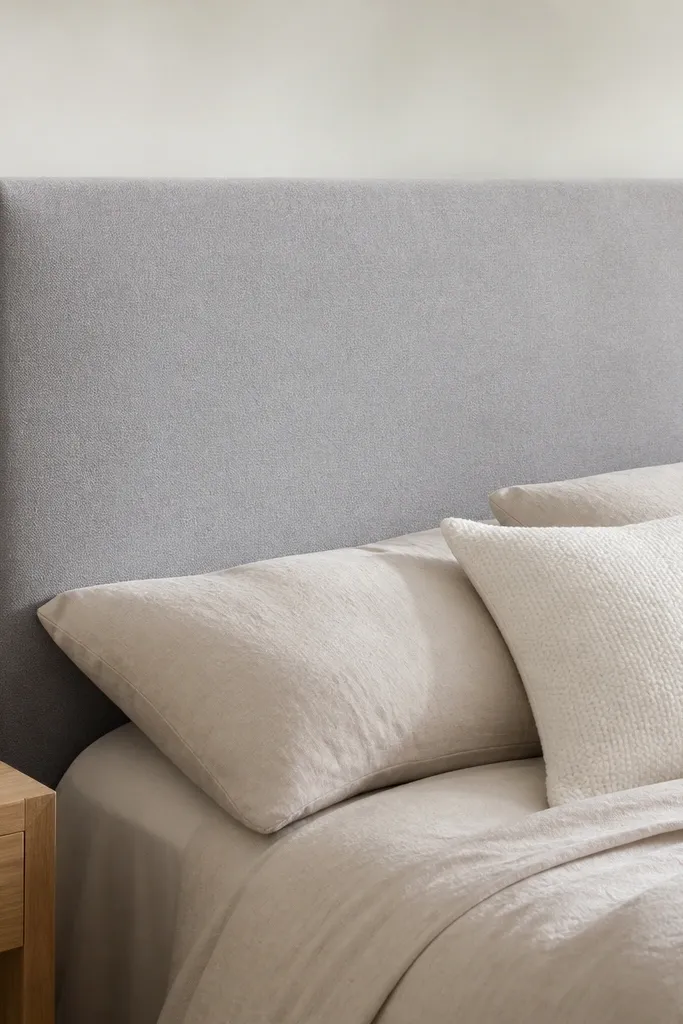
If you lean on your headboard with hair products, pets, or kid messes, a removable cover is the smartest DIY upgrade. You still build a padded core, but you upholster the cover as a “shell” that you can remove seasonally. I’ve used it with washable cotton blends and it holds up better than trying to spot-clean velvet every week. The look is soft and lived-in, not stiff.
Build the core with foam and batting like a flat-panel headboard. Then cover it with a fitted slipcover using an upholstery-weight fabric that has enough structure. Hide a zipper on the back edge or use covered buttons. Measure your core thickness including foam so the cover fits without pulling.
Pre-wash your cover fabric so it doesn’t shrink after you first remove it and re-fit it.
Don’t use a fabric that stretches unpredictably — the cover will sag and look sloppy after the first few removals.



