
1. No-Sew Linen Look Headboard Pillow Wall Panels
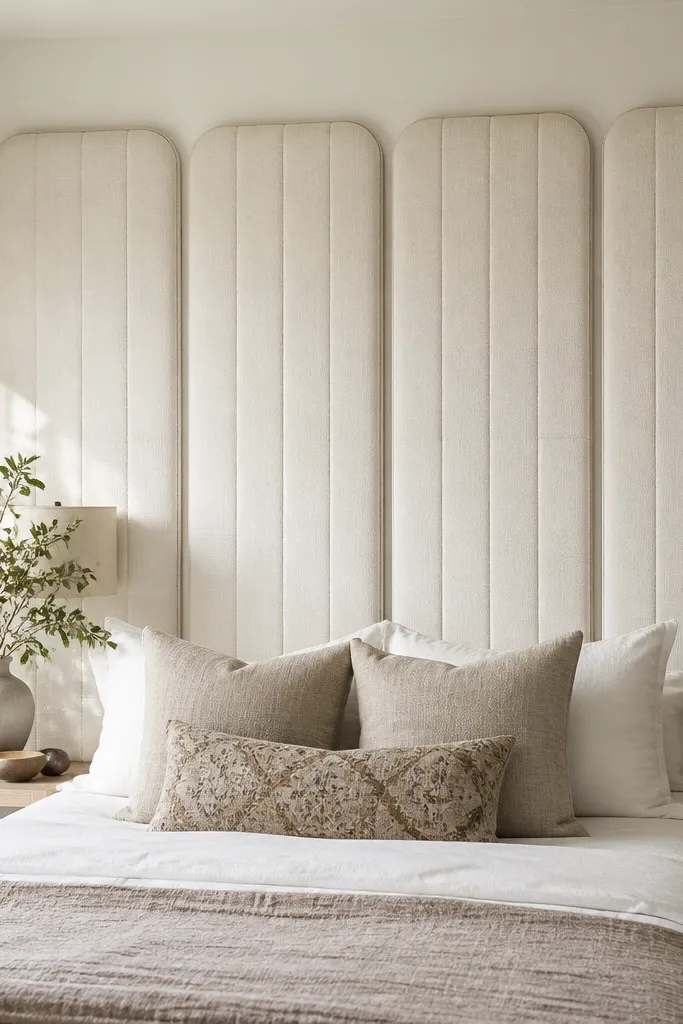
Cut foam sheets to 20x30 inch rectangles, then wrap with faux linen and secure the back with fabric adhesive or a staple gun. Leave a 1 inch overlap at the seams so the edges look finished. Mount panels using heavy-duty picture hanging strips so you can remove them later.
This gives you a tall, soft headboard look without wrestling with furniture. The faux linen channels catch light and hide small wall imperfections. I like off-white with warm undertones because it makes the bed area look brighter even in evening light. Add one slim accent strip in muted terracotta or dusty sage for a gentle contrast.
One warningSkipping foam thickness makes the panels look like flat wall stickers.
Quick tipPress the fabric flat with a cloth and low heat from an iron before wrapping so the surface stays smooth in photos.
2. Gallery Rail Above Bed With Fabric Ties
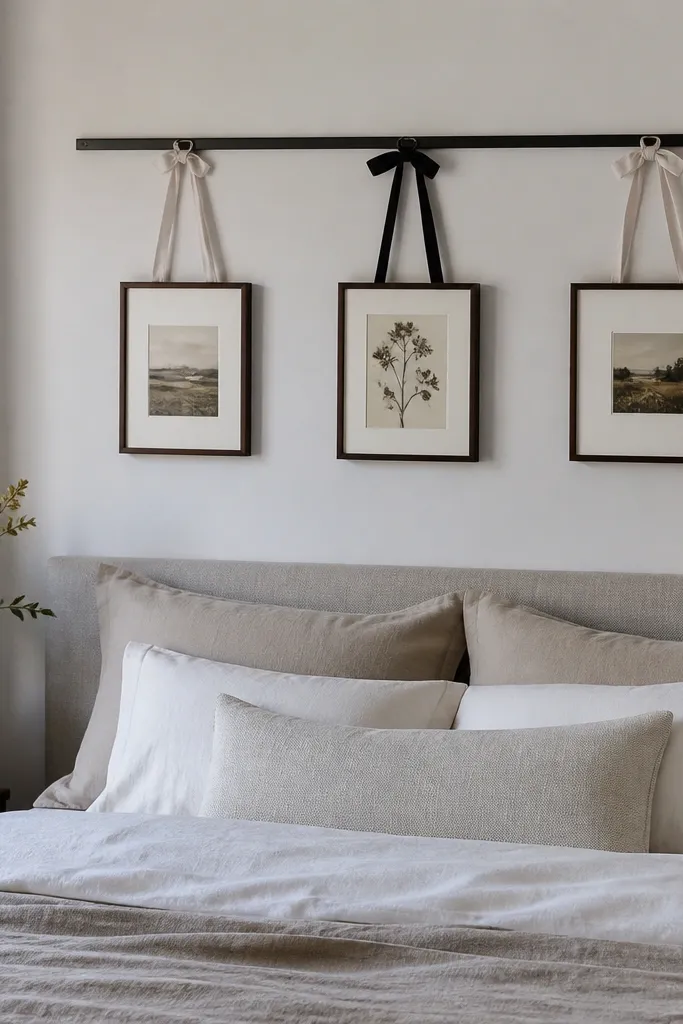
Install a 24 to 36 inch picture rail level with a stud finder. Hang two frames with 4 inch fabric ties and one slightly lower frame with 6 inch ties for a staggered rhythm. Keep frame colors consistent: matte black or natural wood.
A rail creates instant “curated wall” energy without drilling into the whole wall. Fabric ties soften the look compared to rigid hooks. Use small frames (8x10 or 5x7) so the wall doesn’t swallow your bed. The rail also lets you swap seasonal prints without changing hardware.
One warningHanging frames at random heights makes the wall look cluttered, not styled.
Quick tipTuck a thin strip of washi tape behind one tie as a temporary spacer while you line everything up.
3. Hexagon Shelf Cluster for Nightstand Corners
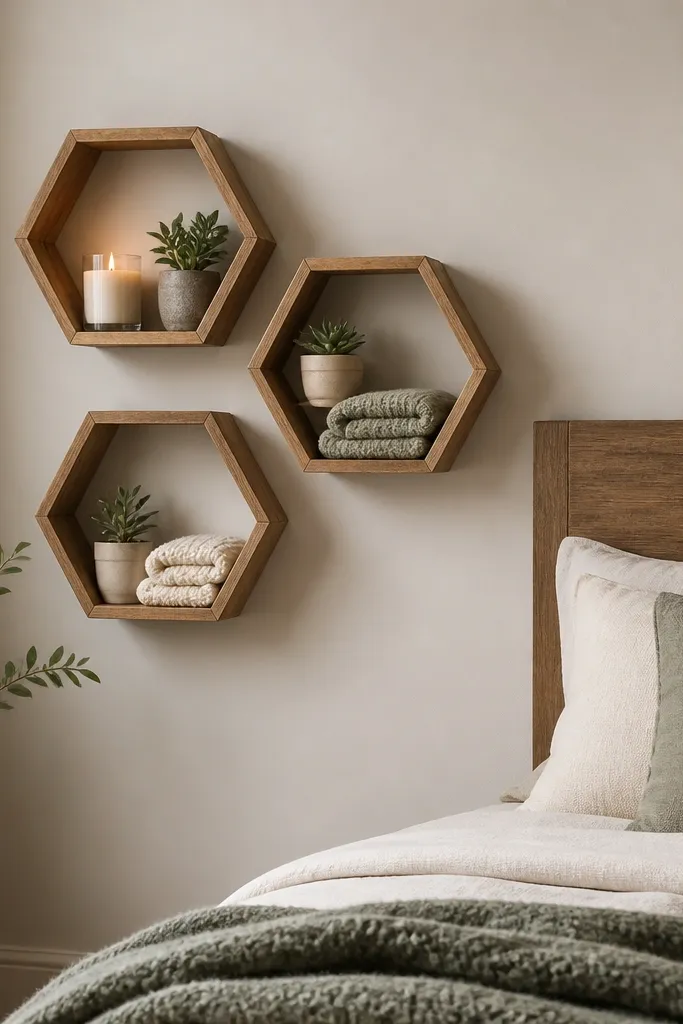
Hex shelves use odd space well because they sit in corners without feeling bulky. The angled faces create shadow depth, so the arrangement looks dimensional even with simple objects. I use one shelf for vertical height, one for flat decor, and one for a small “glow” item like a candle.
Buy three unfinished hex shelves (about 6-8 inches wide). Stain one shade darker than your nightstand — I like walnut stain over light pine — and seal with matte polyurethane. Mount them with level marks so the cluster points inward toward the bed.
Use the same finish on every shelf so the cluster looks like one set, not three separate buys.
Overstuffing makes shelves look like storage instead of decor.
4. Chalkboard Pantry-Style Bedside Organizer
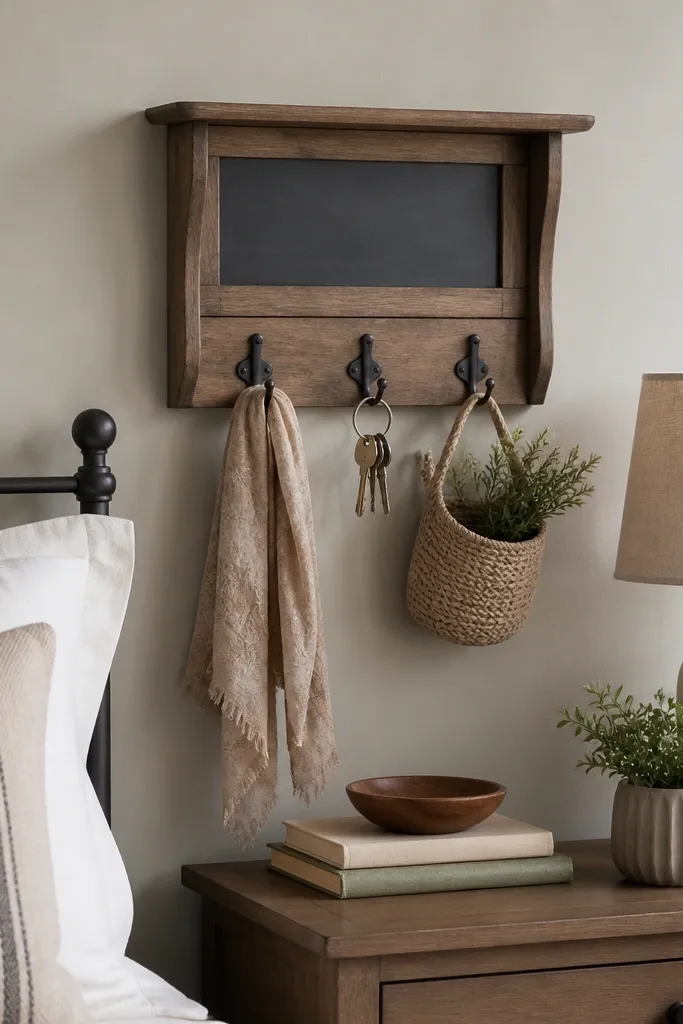
Use a 12x18 inch wood board, paint the label area with chalkboard paint, and add two rows of hooks (about 5 inches apart). Mount near the nightstand at 44 inches from the floor. Paint the rest of the board in matte black or deep charcoal and seal the wood edges.
This is decor that also solves the “where do I put my stuff” problem. The chalkboard label adds a graphic element that looks intentional. Hooks give you a place for a robe belt, a tote, or headphones, keeping surfaces tidy. Because it’s dark and matte, it also hides scuffs better than bright paint.
One warningUsing glossy paint makes every fingerprint and smudge obvious.
Quick tipWrite your labels with white chalk and then erase once a week so it always looks crisp.
5. Rope-Wrapped Mirror Frame Hack
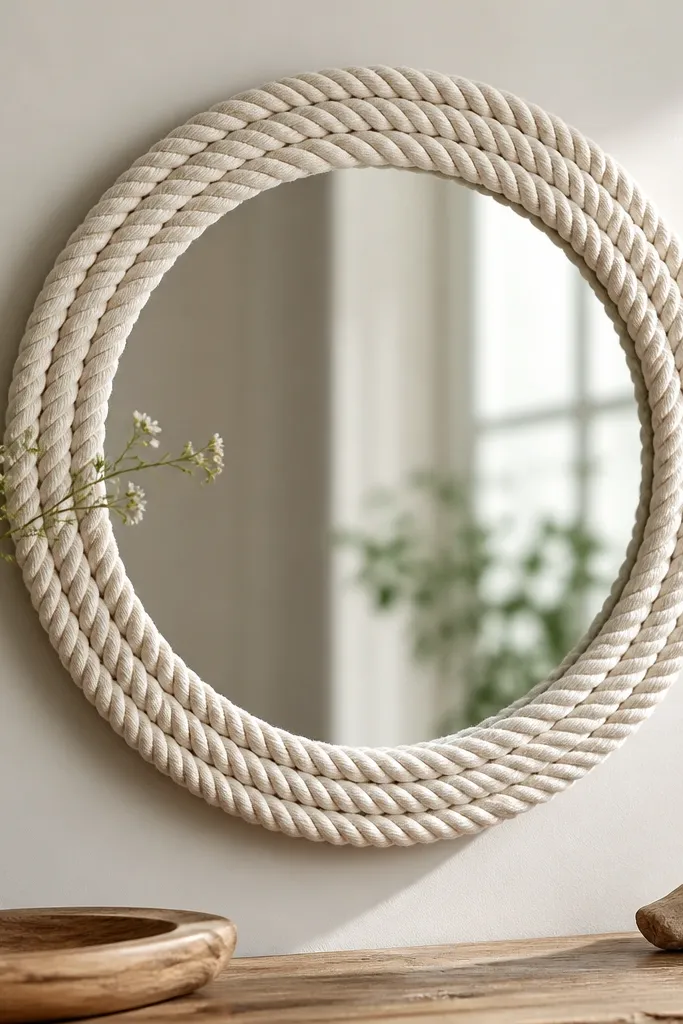
Take a cheap round mirror and remove any plastic frame if present. Start at the back edge with hot glue, then wrap rope in tight spirals, keeping tension even. Finish with a second glue line at the back edge and trim the rope with a sharp blade.
A rope-wrapped frame looks coastal without going full beach house. The texture makes the mirror catch light and it frames your face in a softer way. I keep the mirror size around 10-14 inches so it sits nicely on a dresser or shelf. Rope color matters — off-white reads warm and modern, not yellowed.
One warningLoose gaps between coils makes it look like craft-store mess.
Quick tipMist the rope lightly with water before wrapping so it tightens as it dries.
6. Macrame-Inspired Cotton Cord Wall Curtain
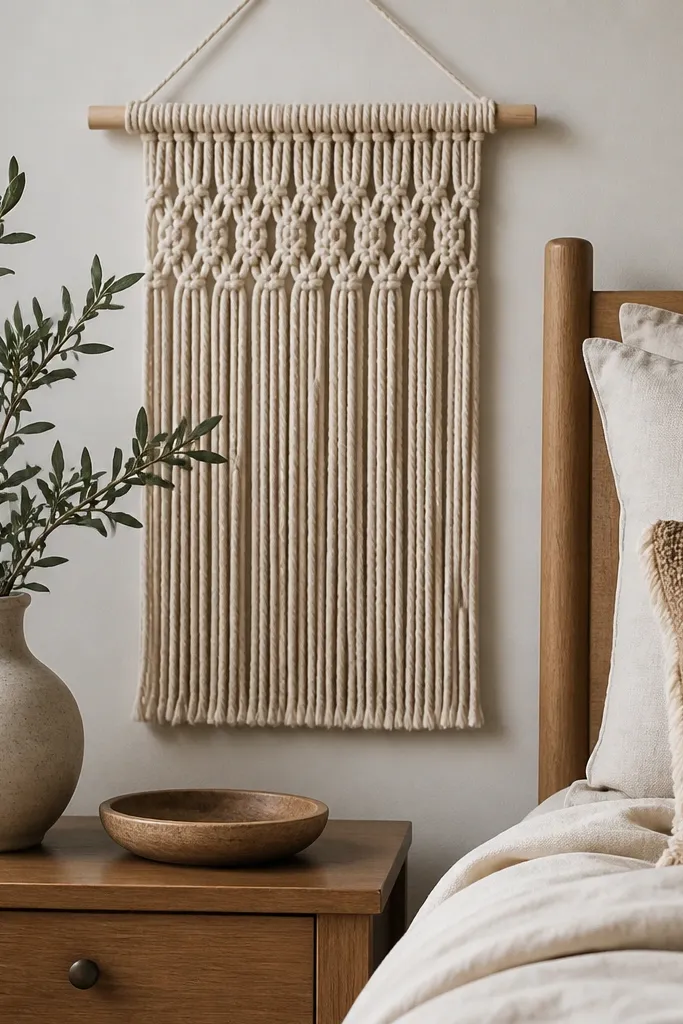
This adds softness to the bed wall and breaks up hard paint lines. The cord fringe creates movement when the door opens or the fan runs. I like cotton cord in natural or oatmeal because it looks warm and pairs with most bedding colors. Keep the design simple so it reads modern, not boho-heavy.
Cut 18 to 24 strands of cotton cord to 28 inches each. Tie them over a 1-inch wooden dowel using alternating knot spacing. Leave 2 to 3 inches of tassel length at the top for the knot area and trim fringes to even lengths.
Steam the finished curtain on low heat and hang it overnight so strands settle straight.
Using slippery synthetic cord makes the knots loosen over time.
7. Painted Dresser Drawer Liner Wall Art
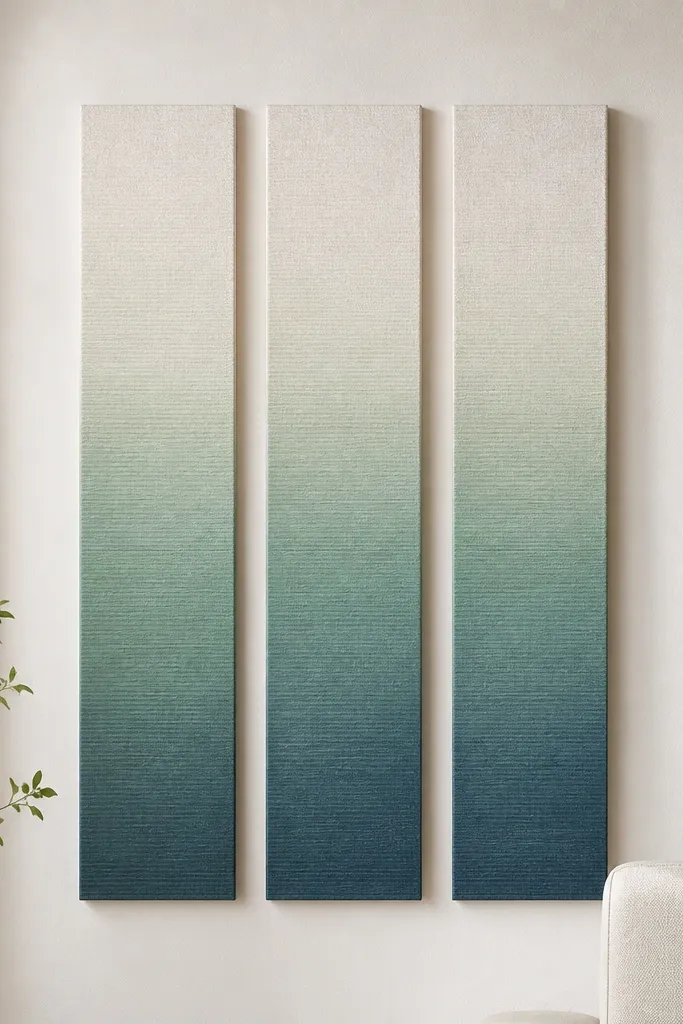
Cut liner into three panels: 10x18 inches, 8x16 inches, and 6x14 inches. Paint the edges with acrylic in a color that matches your accent pillow. Mount using removable poster strips, and frame with thin wood trim if you want a cleaner border.
This turns leftover drawer liner or shelf paper into wall decor with a custom look. The liner has a slight texture, so it doesn’t look flat like printed wallpaper. I’ve used this when I can’t commit to a full mural but want color behind a bed. It’s also easy to match your duvet color exactly.
One warningSkipping edge finishing makes the liner look like a craft scrap.
Quick tipUse painter’s tape to mask a soft gradient — start dark at the bottom, blend with a damp sponge upward.
8. Fabric Covered Foam Cloud Wall Piece
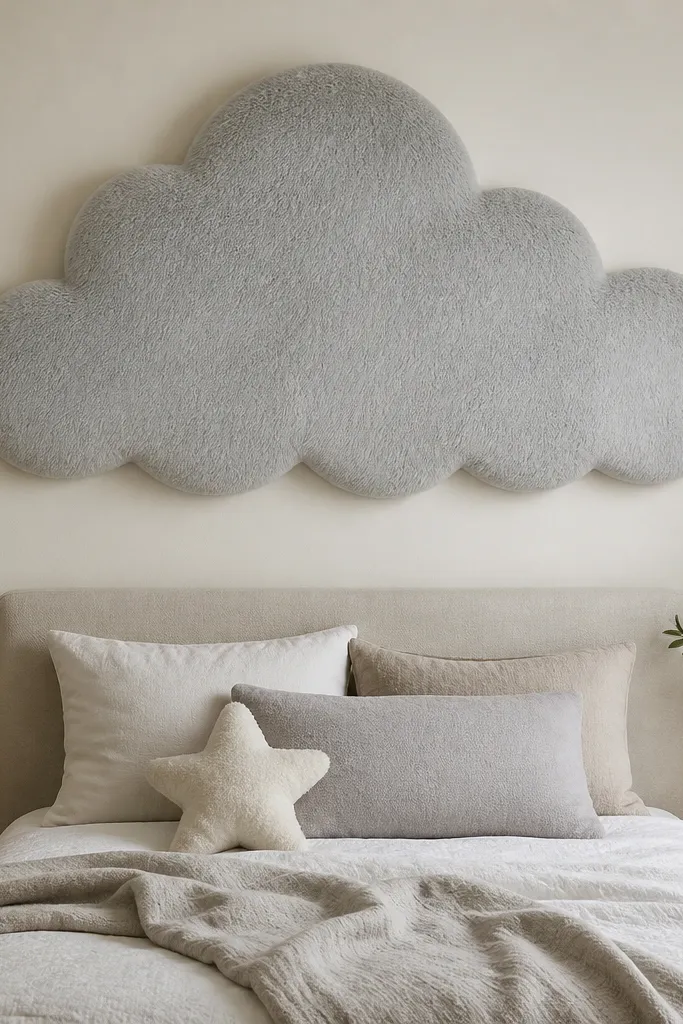
A cloud shape is playful, but the trick is keeping the fabric upscale. Faux fur in pale gray or warm cream looks cozy without looking childish. It also creates a focal point that makes your bed area feel finished. This works great above a toddler bed or a guest room where you want comfort first.
Cut a cloud template from cardboard, then trace on 1.5 inch foam. Wrap with faux fur, pin the fabric at the back, and glue along edges. Mount with two heavy-duty hooks centered on the foam back.
Trim fur gently with small scissors along the seam lines so edges stay clean.
Using thin felt makes the cloud sag and look droopy.
9. Wallpaper Accent Strip Behind Nightstand
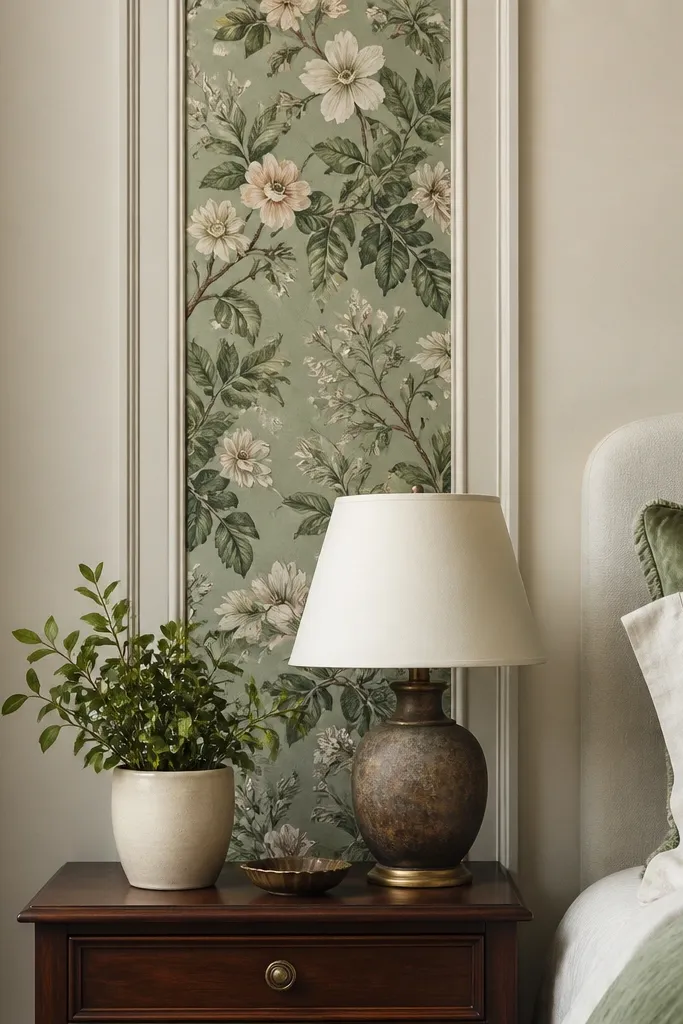
Cut wallpaper to a 16-20 inch wide strip that matches your nightstand height. Use a level line and apply with paste if it’s non-paste wallpaper, or use the correct adhesive for peel-and-stick. Paint two borders of 1.5 inches around it in matte cream and seal lightly if needed.
A single vertical strip gives you pattern without turning the whole room loud. Framing it with paint makes it look like designer wallpaper panels. Choose a botanical pattern with muted greens or a subtle stripe for a calm look. This also hides outlet covers and wall patches behind furniture.
One warningTrying to stretch wallpaper around corners leaves bubbles and wrinkles.
Quick tipMatch the wallpaper pattern at the top edge even if you cut it — the alignment makes it look intentional.
10. Bedside Lighting With DIY Fabric Shade Covers
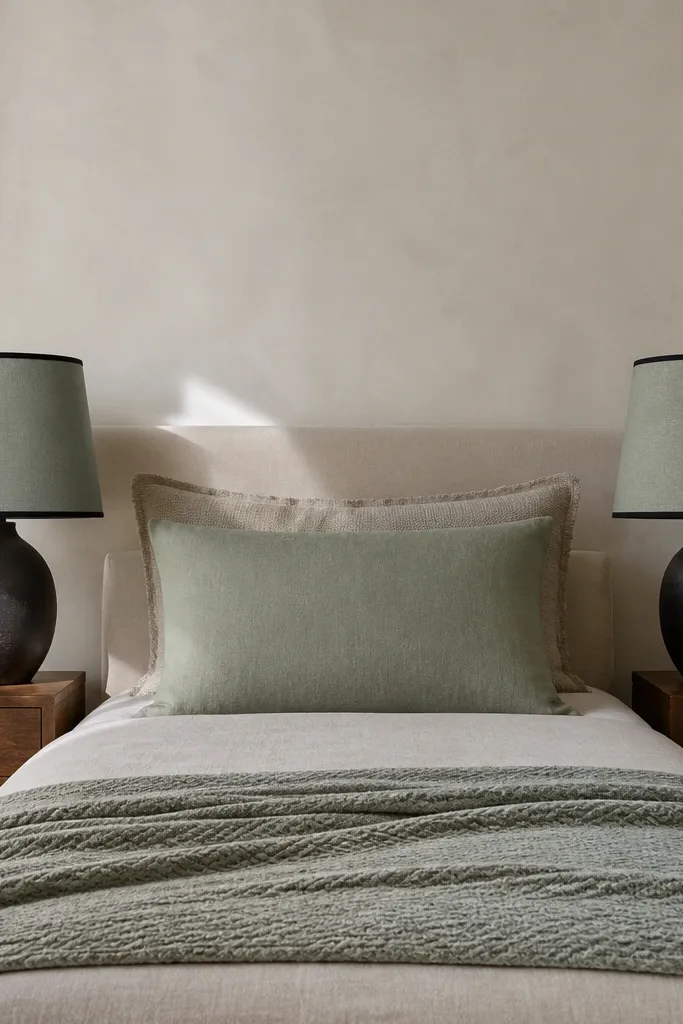
If your lamps look plain, fabric covers change everything. The shade color controls the whole mood, especially at night. Dusty sage or warm oatmeal makes light feel softer on skin and bedding. I add a 0.5 inch trim strip so the shade edges look professional.
Measure the shade circumference and height, then wrap fabric with a little extra seam allowance. Use iron-on fusible interfacing if your fabric is thin. Glue the seam inside and add trim with fabric glue along the top and bottom edges.
Use a fabric that blocks light slightly more — it keeps the room from looking washed out.
Choosing a super thin fabric makes the lamp look like a DIY bag.
11. String Light Curtain for Closet Door or Corner
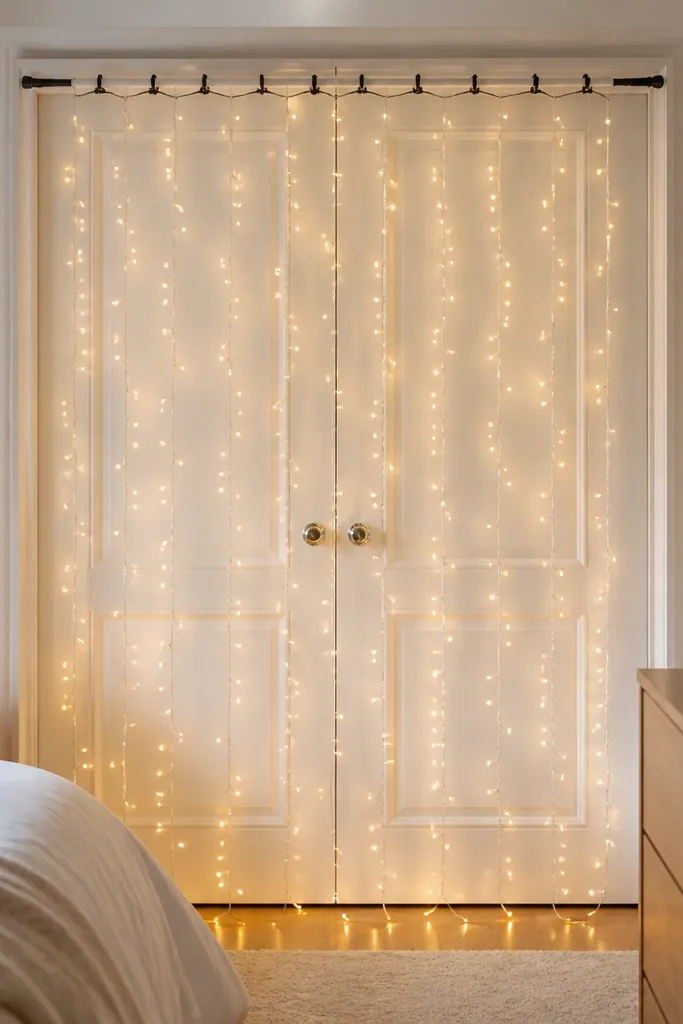
Use a tension rod or a lightweight curtain rod above the closet. Add small plastic or fabric clips spaced every 6 inches and attach the light strand. Keep slack between clips so the lights drape, not hang straight.
A string light curtain creates a soft glow that makes the room feel finished even without wall art. I prefer warm white (2700K) so it doesn’t look like a desk lamp. Clip-on installation means you can move it for holidays. The curtain also hides the visual clutter of a door or shelving.
One warningUsing cool blue bulbs makes the whole bedroom look harsh.
Quick tipTest the strand plug and length in the room before you mount clips so you don’t end up with a short run.
12. Sanded Pallet Wood Headboard Slat Panel
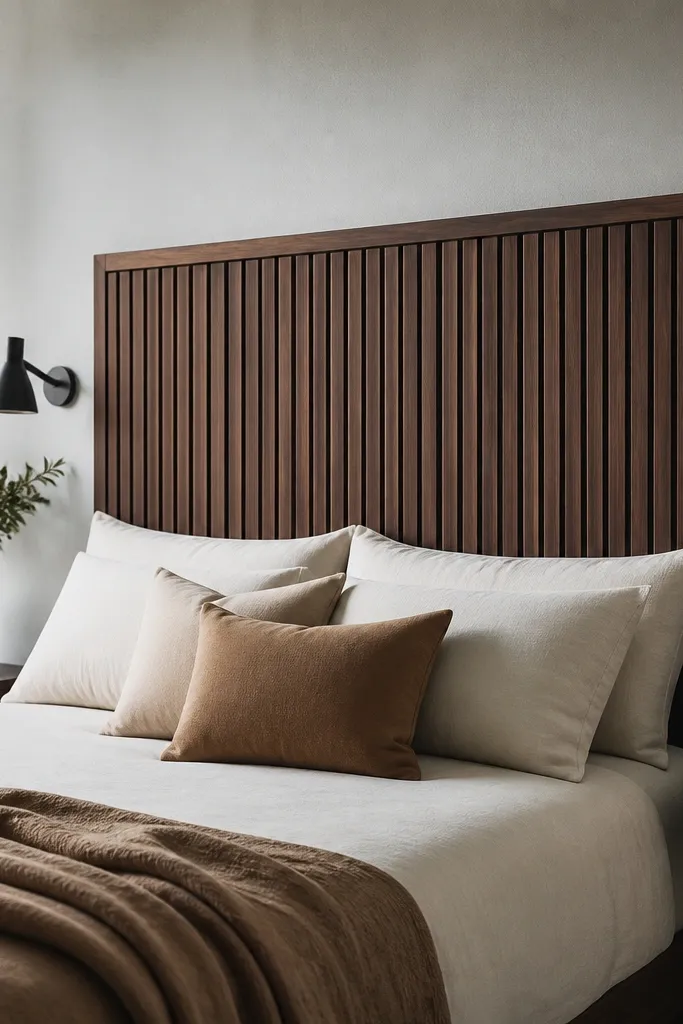
Wood slats add texture and height without needing a full bed frame upgrade. The dark walnut stain makes bedding look richer and hides minor imperfections. I like a slat spacing of about 1.25 inches so it looks airy, not chunky. It also gives your wall a strong horizontal anchor.
Cut pallet boards into 6-8 inch wide slats, then sand to remove rough edges. Frame the back with 1x2 wood so you can mount with screws into studs. Stain with dark walnut and seal with satin clear coat to reduce glare.
Dry-fit slats on the floor and mark spacing with painter’s tape before you drill.
Skipping sanding makes the stain blotchy and the surface feels scratchy.
13. Linen Rope Tie-Back for Window Sheers
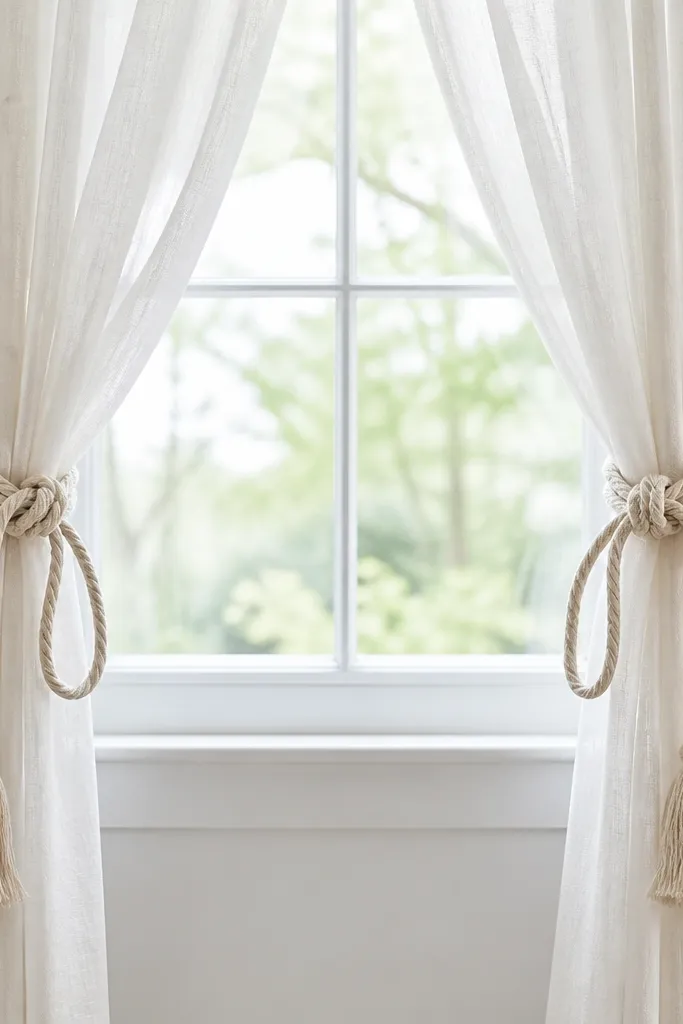
Tie-backs look small, but they change how the whole window reads. Thick linen rope adds texture that matches natural wood and cotton bedding. The knot gives shape without buying a store-bought rod pocket valance. Keep the tie-back length short so the curtain doesn’t puddle.
Cut two rope lengths to about 28 inches each. Add a simple overhand knot at the center and loop the ends through curtain rings or sew small fabric loops into the sheer. Trim tassels to 3 inches and secure with a drop of fabric glue on the knot.
Use the same rope color in one other place — like a rope mirror frame or macrame piece — for consistency.
Using thin twine makes the tie-back look flimsy and uneven.
14. DIY Concrete Look Planter Shelf for Scented Candles
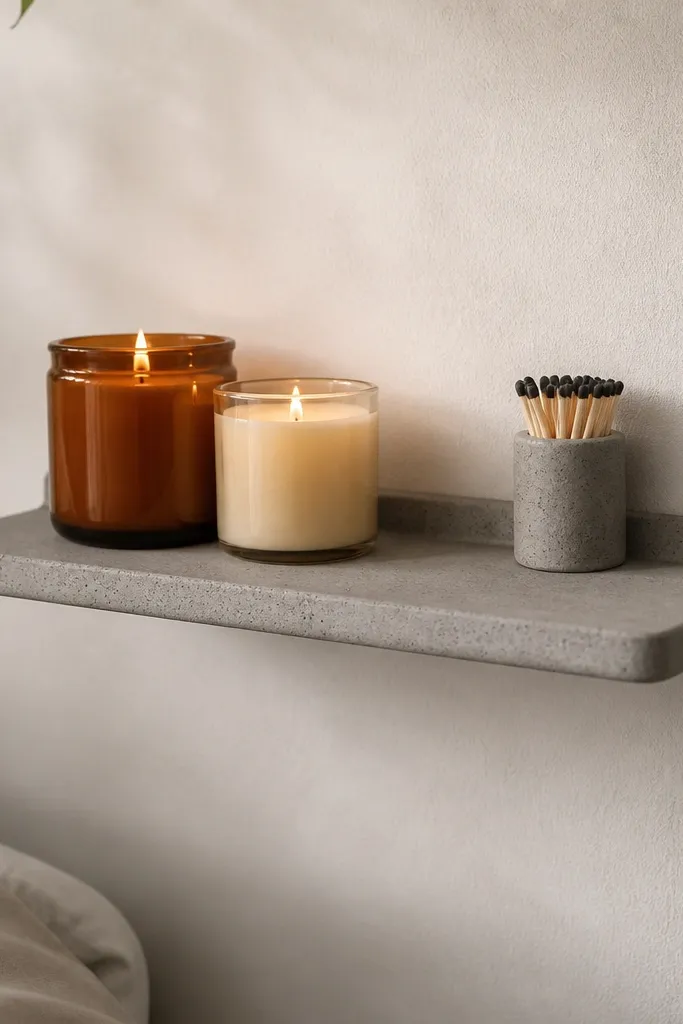
A faux concrete finish makes simple decor look architectural. It’s a great trick if your bedroom has lots of warm wood and you want one cool, modern surface. The speckle hides tiny chips and looks like real cement. Use it for candles and small jars so the shelf feels intentional, not empty.
Mix gray acrylic with a tiny amount of black and white, then add speckling using a toothbrush and lighter paint. Seal with matte clear coat. Mount a 10-12 inch shelf at 52 inches from the floor so it sits above eye level.
Spray a light mist of matte sealer after the first coat so the speckles don’t smear while you work.
Skipping sealing lets the finish pick up candle soot and looks dull.
15. Thrifted Frame + Fabric Pin Board Behind Bed
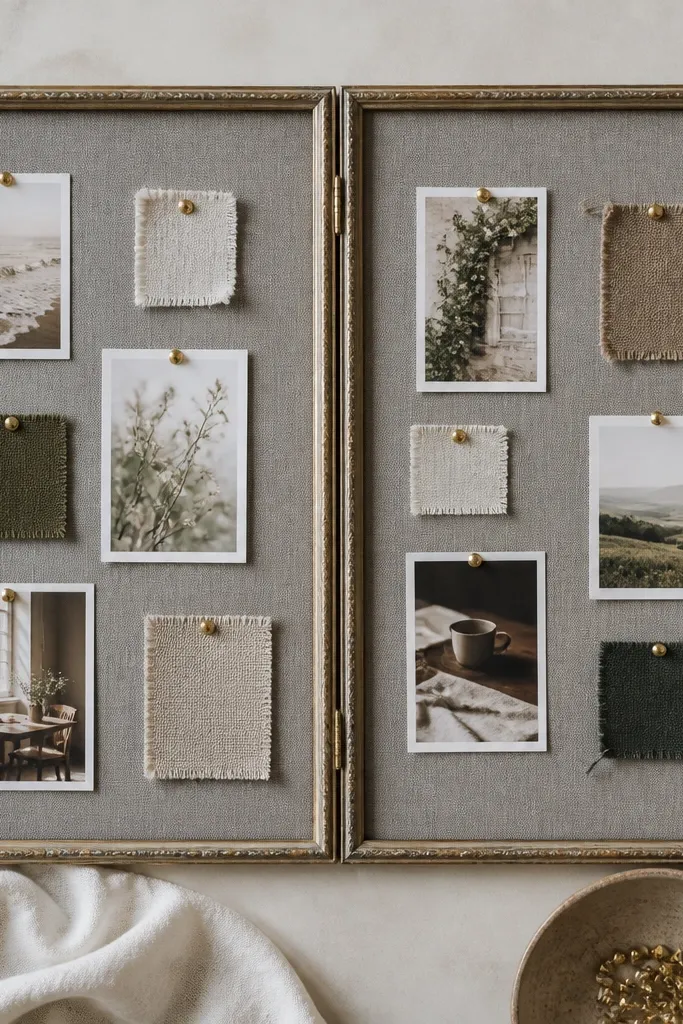
Remove the backing from a large frame and replace it with stretched fabric. Use a staple gun on the back, then reattach. Pin with straight push pins and keep pins spaced so you don’t tear the fabric.
This is functional wall decor that makes your bed wall feel active. Fabric pin boards soften the look of metal push pins and they hide the “tack holes” mess. I like gray or oatmeal fabric because it doesn’t compete with your bedding pattern. Add a few pinned swatches so the wall looks like a mood board.
One warningUsing a bright patterned fabric makes the board look busy.
Quick tipUse fabric in the same color family as your accent pillow so the whole wall ties together.
16. Clothespin Photo Strip on Bedside Wall
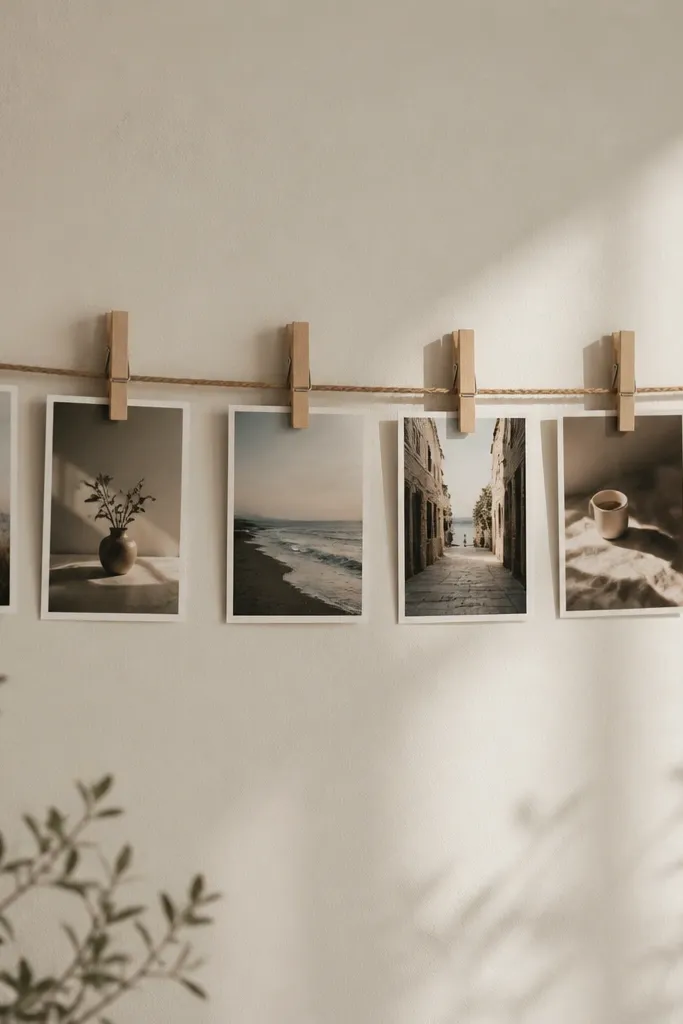
Mount two small eye hooks, stretch a jute rope line between them, and attach clothespins every 4-5 inches. Print photos in a consistent border style. If you want a cleaner look, paint clothespins matte black first and let them dry fully.
Photo strips look charming when they’re controlled. I use a limited set of photos in black and cream frames so it looks like decor, not a memory dump. Clothespins add a playful texture that matches farmhouse and modern bedrooms alike. Keep the photo strip length around 36 inches so it balances the bed.
One warningUsing mixed photo sizes creates uneven spacing and looks chaotic.
Quick tipClip the photos on while the rope is level, then adjust each pin height before you commit to placement.
17. Woven Basket Wall Install for Throw Blanket Storage
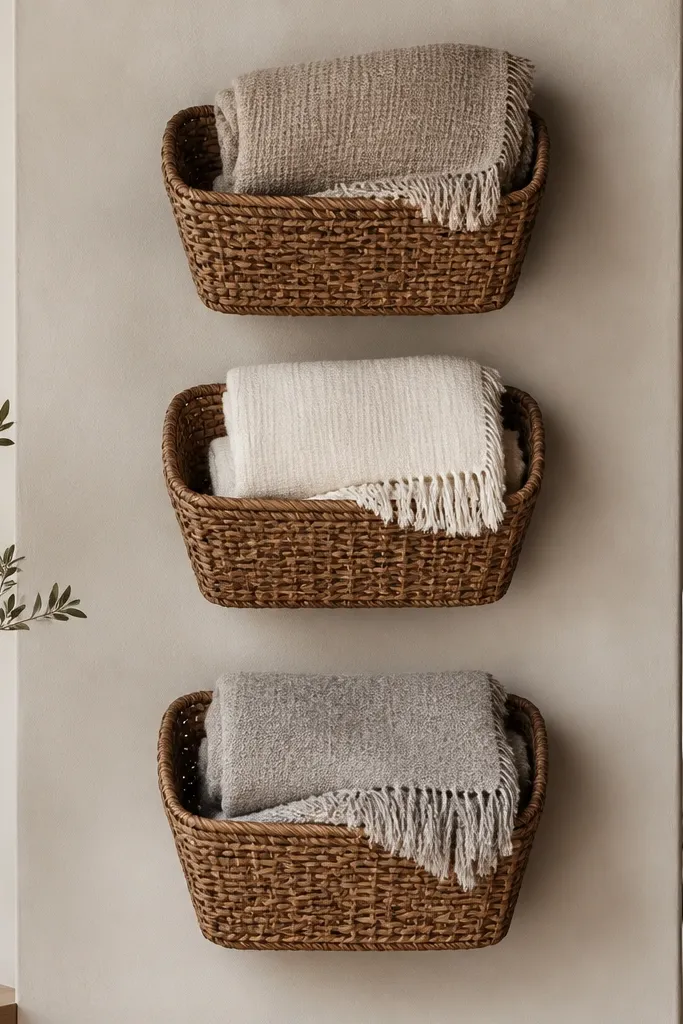
Wall baskets keep your throws visible and tidy, which makes a bedroom look lived-in in a good way. Woven textures add warmth and hide the harshness of blank drywall. I like using three baskets with one consistent fold style so the color blocks look intentional. This also frees up dresser space.
Choose baskets with similar sizes — around 10-12 inches wide. Mount with screws into studs or strong wall anchors. Fold throws into rectangles and place them so the top edge aligns across baskets.
Use the same fabric fold for every throw: roll the top edge 2 inches and keep the roll straight.
Overstuffed baskets sag and look messy.
18. Painted Step-Back Shadow Box for Books and Trinkets
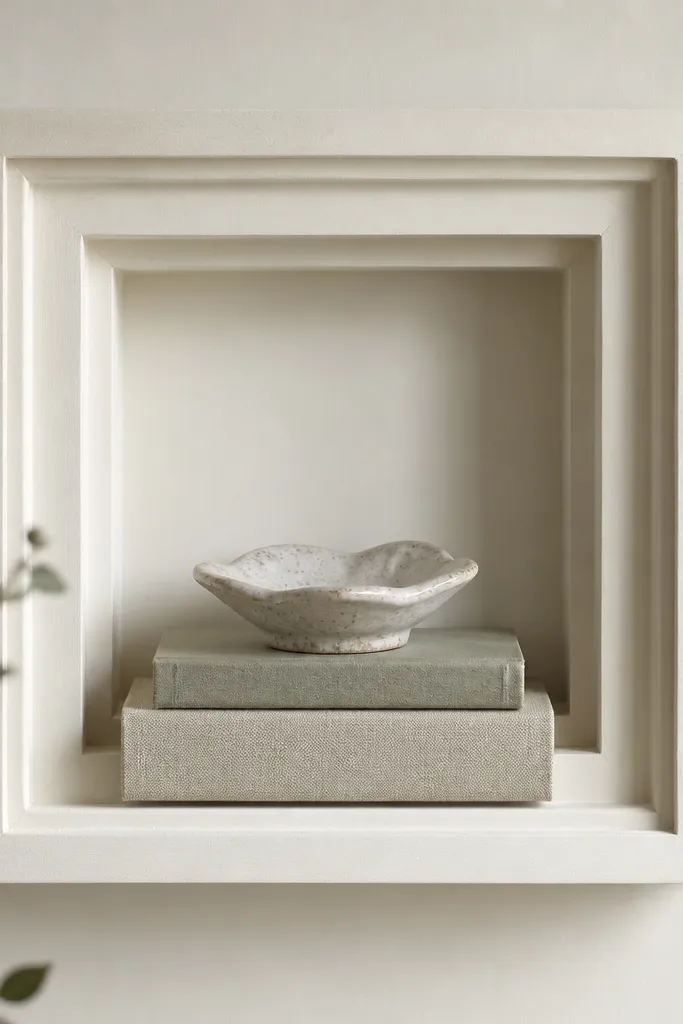
Use a store-bought shadow box or build from 1/2 inch MDF. Paint the outer frame off-white and paint the back wall charcoal. Add a second backing panel 2 inches behind the front to create the step-back shelf.
A shadow box with a step-back interior creates depth without needing complicated carpentry. It makes small items look like a still-life. Off-white paint keeps it airy, while a dark interior makes objects pop. This is perfect for a shelf above the bed where you want one “moment” but not clutter.
One warningUsing glossy paint inside makes photos glare.
Quick tipUse museum gel tabs or removable adhesive putty for small items so nothing shifts.
19. DIY Wall Planter With Felt Liner and Drain Holes
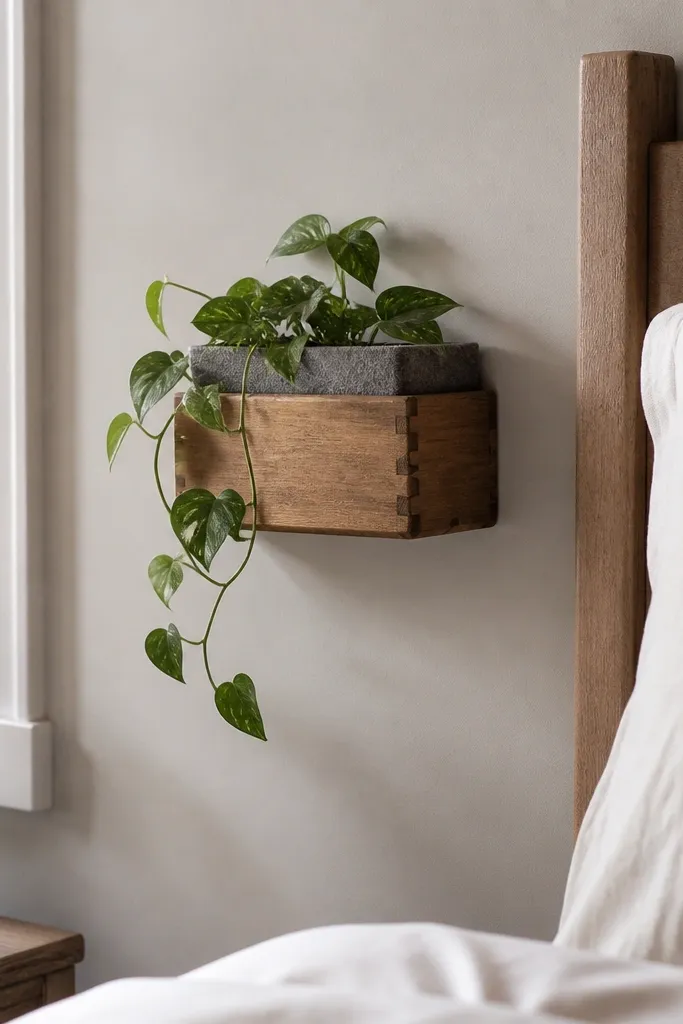
Plants make bedrooms feel calmer, but DIY planters look better when they’re practical. Felt liners soften the look and help retain moisture a bit. The drain holes keep the roots from sitting in water, which matters if you forget watering schedules. I use compact trailing plants so they drape over the edge like decor.
Build a small wooden planter box 6x10 inches with a back panel. Drill 4 drain holes in the bottom, line the interior with felt, and add a plastic pot insert if needed. Mount with two screws into studs and keep it at least 12 inches above the floor to reduce splash issues.
Use a saucer under the plant insert and empty it after watering so the wall stays clean.
Skipping drain holes turns the planter into a mold risk.
20. Reversible Quilt-Look Throw Cover From Flat Sheets
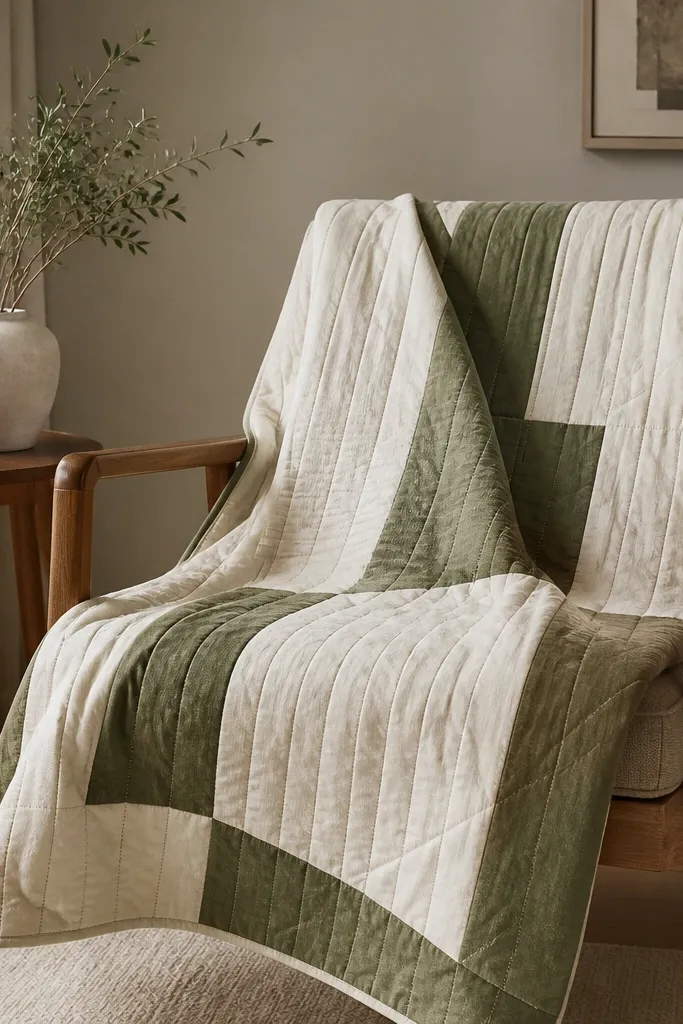
Cut two sheets to 60x80 inches, right sides together. Stitch a simple grid: mark 12 inch squares, then stitch lines with a 1/2 inch seam allowance. Bind edges with a strip of matching fabric and press seams flat.
Flat sheets are cheap fabric, and you can turn them into a quilt-like throw that looks styled on a bed. The key is using two sheets with complementary patterns or one solid and one subtle stripe. Stitching creates the grid lines that make the throw look custom. Make it reversible so you can match seasons without buying another blanket.
One warningUsing thin sheets without quilting lines makes the throw flop and look unfinished.
Quick tipWash and dry the sheets before cutting — shrinkage changes seam alignment if you skip this.
21. DIY Floating Vanity Tray for Perfume and Jewelry

A floating tray makes a dresser look styled without taking up drawer space. It also creates a clean “landing spot” for daily items, which keeps your surfaces from turning into piles. I like matte wood or clear acrylic with rounded edges so it doesn’t look sharp. Arrange items by height: one tall bottle, one medium bottle, one small dish.
Use a 10x14 inch wooden tray or a clear acrylic tray. Attach with hidden mounting brackets or strong adhesive tabs rated for the tray weight. Seal wood with matte varnish so fingerprints wipe off.
Group items in odd numbers — three pieces looks deliberate and doesn’t crowd the tray.
Mounting too low makes it awkward and leads to clutter on the floor.
22. Washi Tape Stripe Panel on Dresser Backdrop
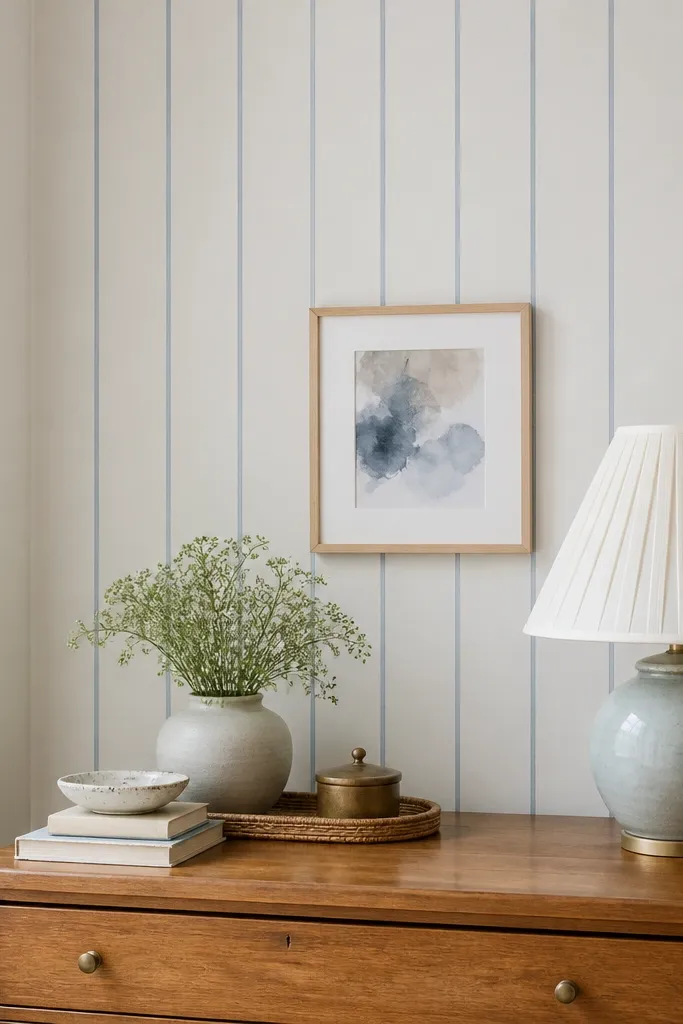
Washi tape stripes are the quickest way to add graphic structure behind a dresser or mirror. It’s strong enough to read in photos, but removable when you change your mind. Keep stripe widths consistent — 1 inch tape plus 1 inch gap works great. Choose tape colors that match your bedding: cream and muted charcoal for a calm look.
Clean the wall, then apply tape strips with painter’s tape as a guide line. Press each strip firmly with a plastic card. Center a small print above the stripe panel and remove the tape after you decide if you want it permanent.
Use a level and measure from the floor — crooked stripes are what make this method look amateur.
Putting tape on dusty walls causes peeling and ragged edges.
23. Hand-Painted Nightstand Drawer Front Accent
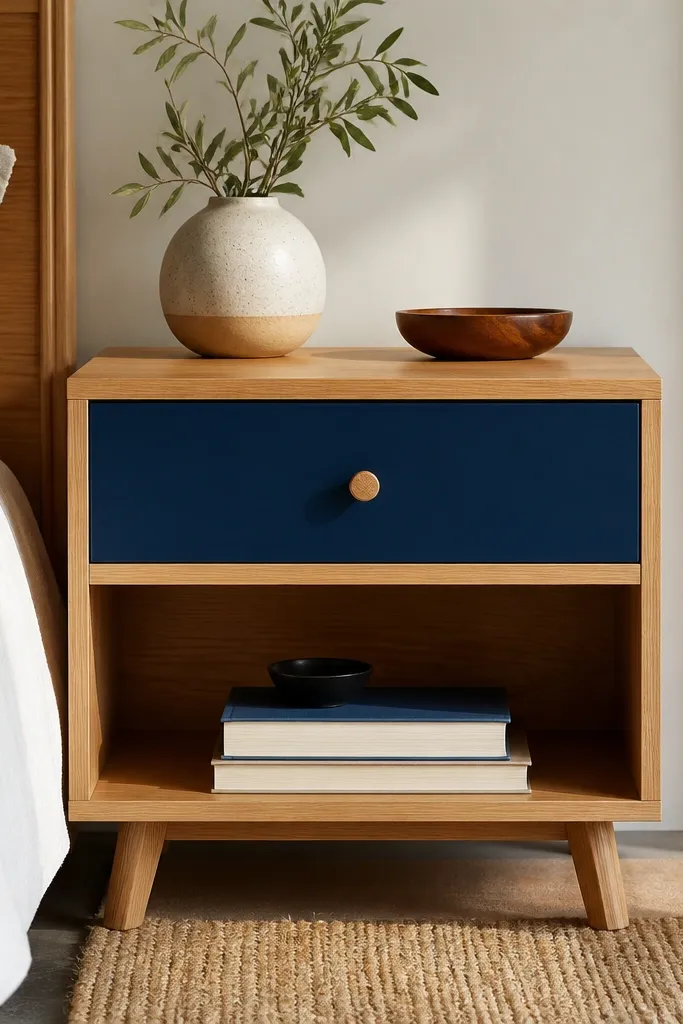
Sand the drawer front lightly, wipe with tack cloth, then tape around edges with painter’s tape. Use interior enamel paint and apply two thin coats. Remove tape while paint is still slightly tacky for razor-sharp lines.
A single accent drawer makes a nightstand look designed, not plain. Deep navy or forest green pairs with warm wood and neutral bedding. The contrast also makes the bed area look grounded. I like doing a drawer front accent because it stays visible every day.
One warningPainting over glossy varnish without sanding causes peeling later.
Quick tipPaint only the drawer front, not the sides, so the piece still looks clean when closed.
24. Fabric-Covered Rope Wall Hooks Set
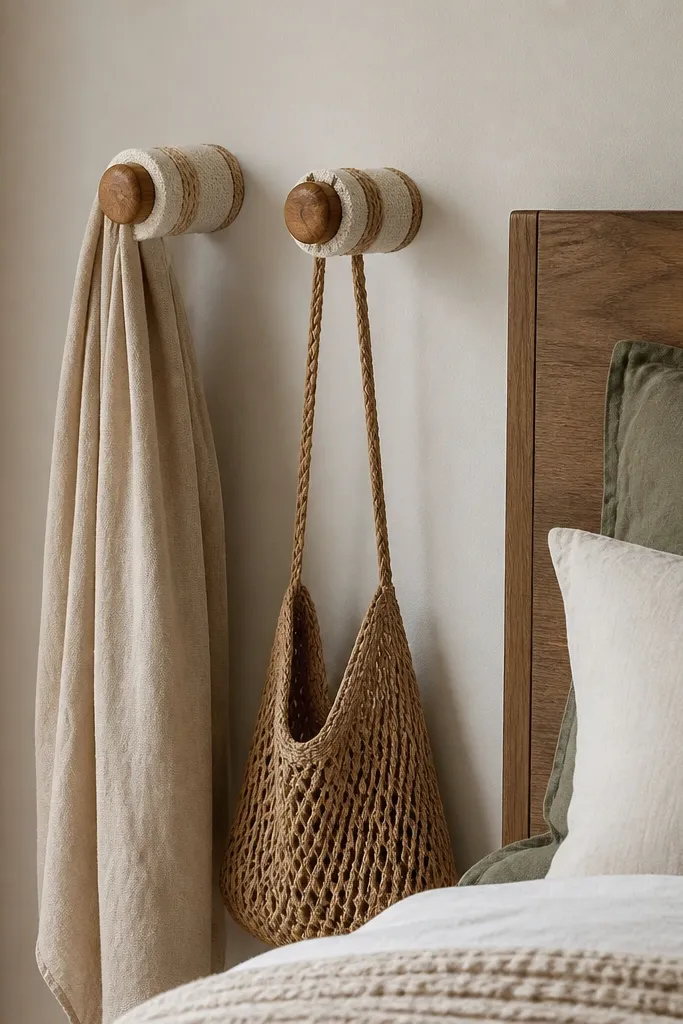
Wrap wooden hooks with fabric and secure with hot glue, then wrap a thin rope band around the top. Mount near the bed at around 48 inches from the floor. Add one hook for a robe and one for a small bag so the wall area stays useful.
These hooks add texture where you usually see blank wall. Wrapping pegs in fabric and rope makes them look custom and softens the hardware look. It’s a good choice if you want functionality but you don’t want shiny metal. Use neutral fabric like oatmeal canvas and pair with a darker rope for contrast.
One warningSkipping glue at the back makes the wrap slide over time.
Quick tipUse a fabric that doesn’t fray — pre-seal the cut edge with fabric glue before wrapping.
25. DIY Mirror Backplate With Framed Fabric Border
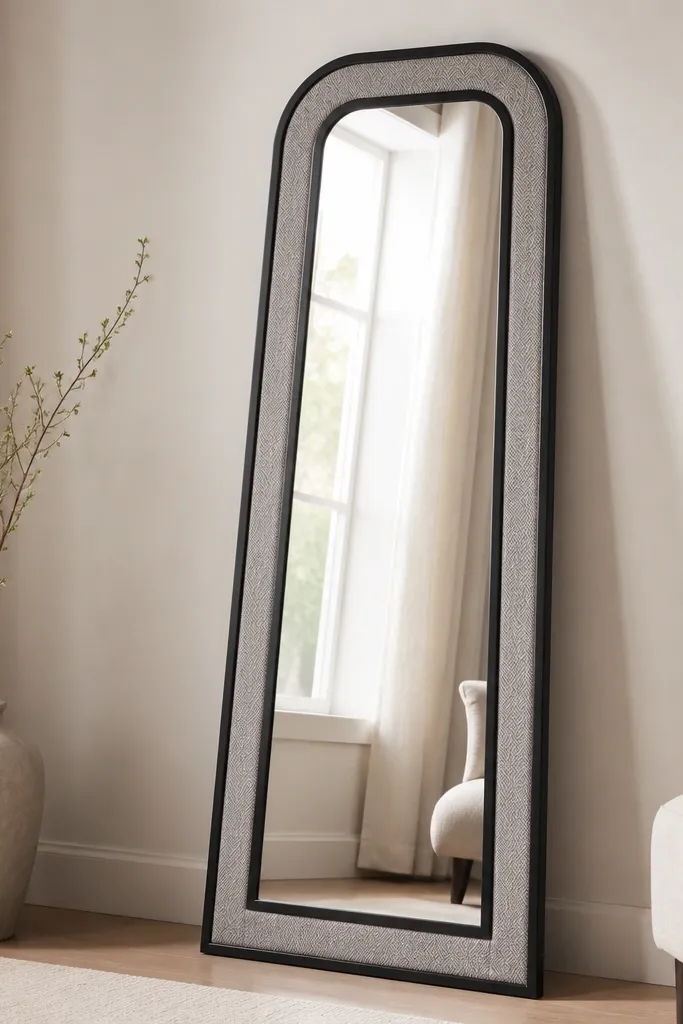
Take a mirror and remove the backing panel if possible. Cut fabric to the panel size and wrap around the edges, then glue to the back. Add a thin frame border with 1/2 inch strips painted black or stained dark.
Mirrors look better when the backplate has a finished border. A fabric insert makes it blend with bedding and curtains instead of looking like a random mirror. I’ve done this with black faux leather trim and oatmeal fabric for a modern look. It makes your reflection area feel like part of the room, not an accessory stuck on.
One warningGluing fabric directly to a glossy panel without scuffing can cause lifting.
Quick tipUse spray adhesive for the fabric so it lies flat without bubbles.



