
1. Map-Print Paper Circles on a Linen-Textured Backing
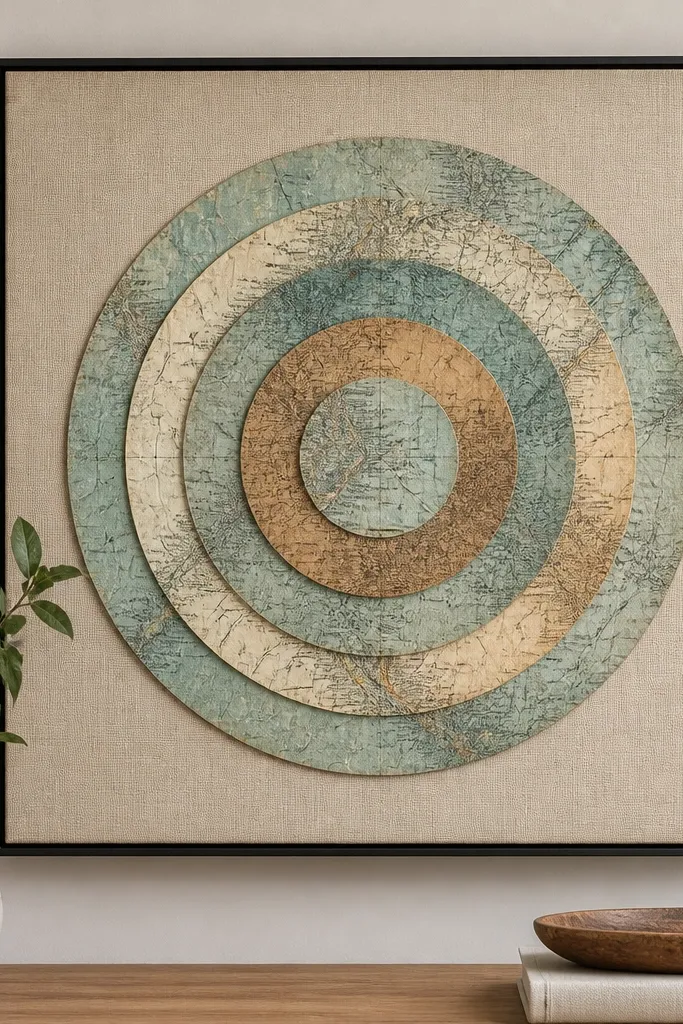
This one looks expensive because the circles create depth without needing heavy materials. I use map-print paper for the pattern, then keep the palette calm so it doesn’t fight your furniture. The linen-textured backing is the secret — it softens the paper and makes the whole piece look intentional. From across the room, it reads like a geometric print, not a craft.
Cut a backing panel from foam board or thin MDF to match your frame size, like 12x12 inches. Trace and cut 5 to 7 circles from map-print sheets, varying diameters from 2 to 6 inches. Glue circles starting with the largest at the bottom, then offset slightly so the edges look layered. Finish by framing or adding a 1-inch border mat from craft foam.
Use a craft knife + metal ruler for clean circle edges; uneven cuts show fast in daylight.
Don’t use bright neon paper — it makes the circles look like school project decor.
2. Wood Slice Chevron with Whitewash and Black Wash Lines
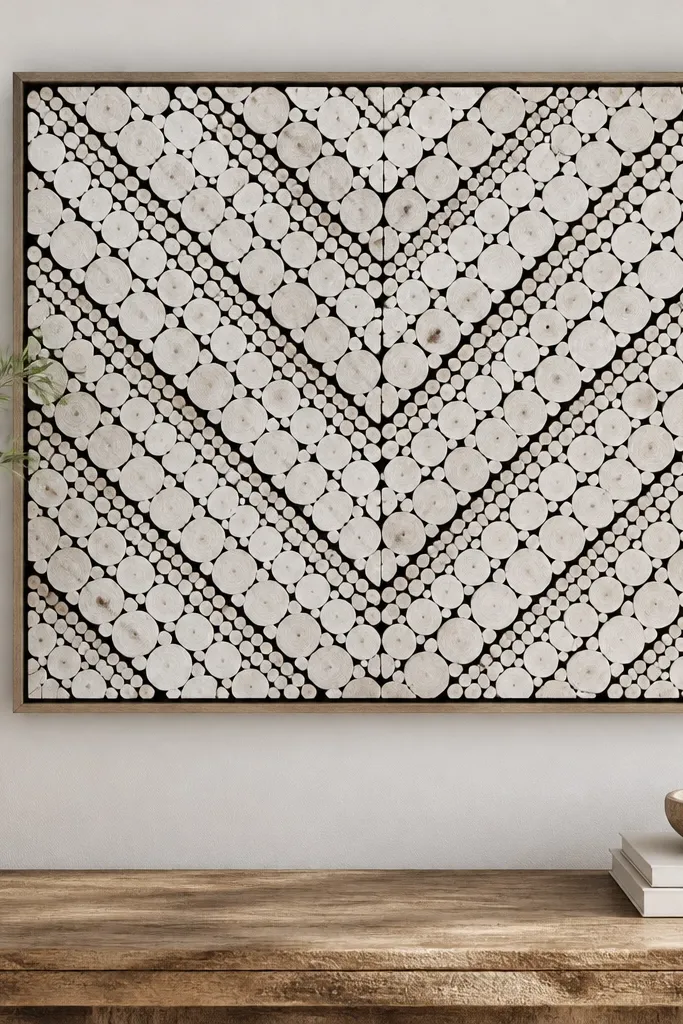
Wood slices add texture you can feel, even though the piece is flat. The chevron layout gives motion, and the whitewash keeps it from turning too rustic. I apply a black wash into the gaps so the pattern stays sharp. It looks great above a console table or in a hallway where you want something warm but structured.
Use craft wood slices (about 1.25 to 2 inches wide) and cut a backing board to 16x10 inches. Arrange slices in a chevron, then hot glue in place. Whitewash with watered-down white acrylic (about 1 part paint to 2 parts water), then wipe back before it fully dries. After it dries, dab a thin black acrylic wash into gaps with a small sponge.
Quick tipDry-fit the pattern on the floor first — chevrons only look clean when the angle is consistent.
One warningAvoid thick glue blobs; they create lumpy spots that catch shadows and look sloppy.
3. Fabric Scraps Braided into a Rope-Wrap Frame
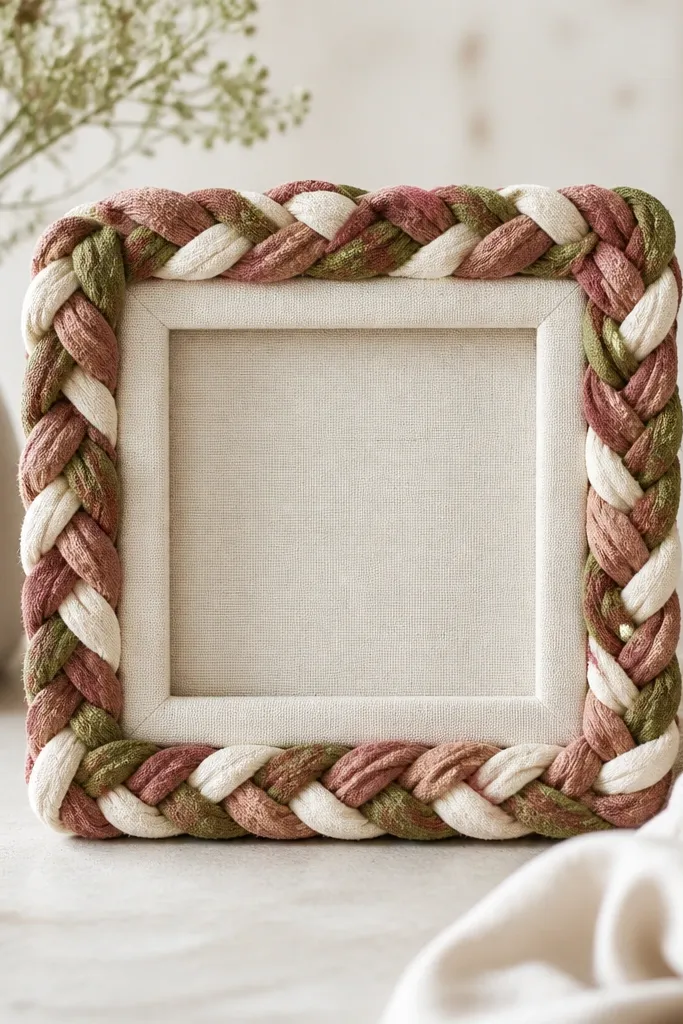
This is the fastest way to turn fabric leftovers into wall art that looks like decor, not a craft bin. Braiding creates a uniform texture, and rope-wrap framing makes it look “designed.” I like using a plain inner panel so the braid becomes the focal point. It’s soft visually, which works well in bedrooms and nurseries.
Cut fabric strips about 3/4 inch wide and 10 to 12 inches long, then join strips by tying or stitching ends. Braid 3 strands to form a rope, then wrap around a 10x10 inch frame backing. Glue with hot glue in small sections so it doesn’t slip. Cover the inside with a solid fabric panel or linen paper so you don’t see raw backing.
Quick tipPre-twist the strips slightly so the braid stays tight and doesn’t loosen as you wrap.
One warningDon’t use slippery satin scraps — the braid stretches and looks uneven.
4. Watercolor Wash Background with Cut-Word Vinyl Labels
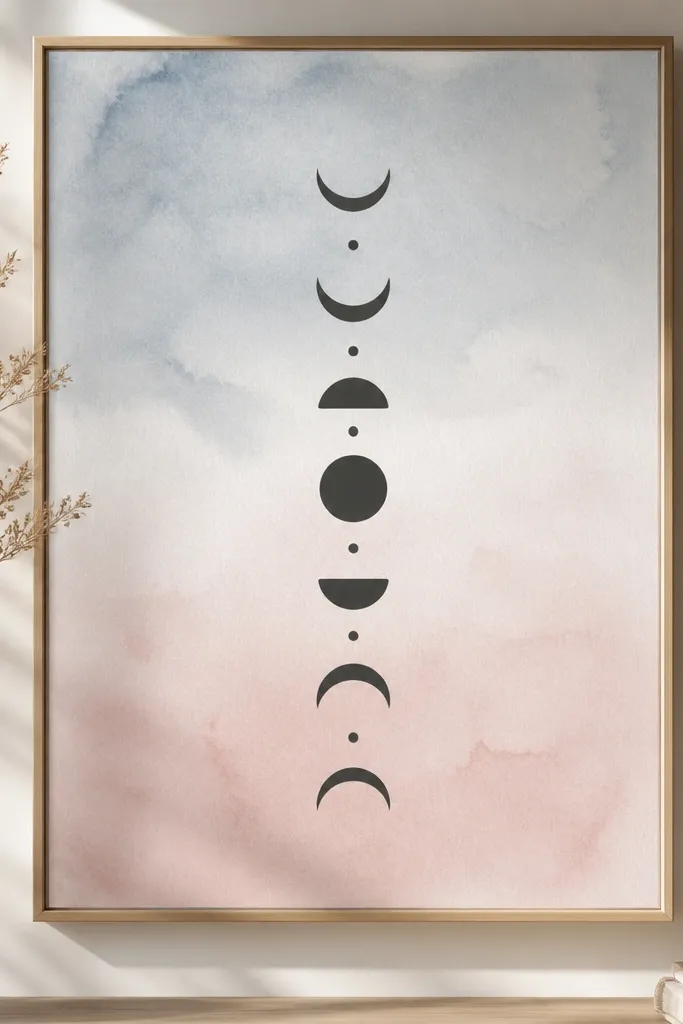
Watercolor washes give you that artsy look without hand-painting every detail. Vinyl words keep the text crisp, which makes the piece look clean instead of messy. I stick to one short phrase or a single word, then add a few tiny dot accents to balance the composition. It’s perfect for a reading nook or above a desk where you want something calm and motivating.
Paint a watercolor-style background on watercolor paper or cardstock using diluted acrylic ink or watercolor (about 3 to 4 tones blended). Let it dry completely. Cut a word or phrase from removable vinyl using a Cricut or silhouette, then press it down. Seal with a matte spray made for paper (light coats, 2 passes).
Quick tipKeep the letters large — aim for 3 to 4 inches tall for the main word so it reads from a distance.
One warningDon’t use glossy sealant; it causes glare and makes the vinyl edges look shiny.
5. Torn-Book Page Gradient Owls (No-Drawing Method)
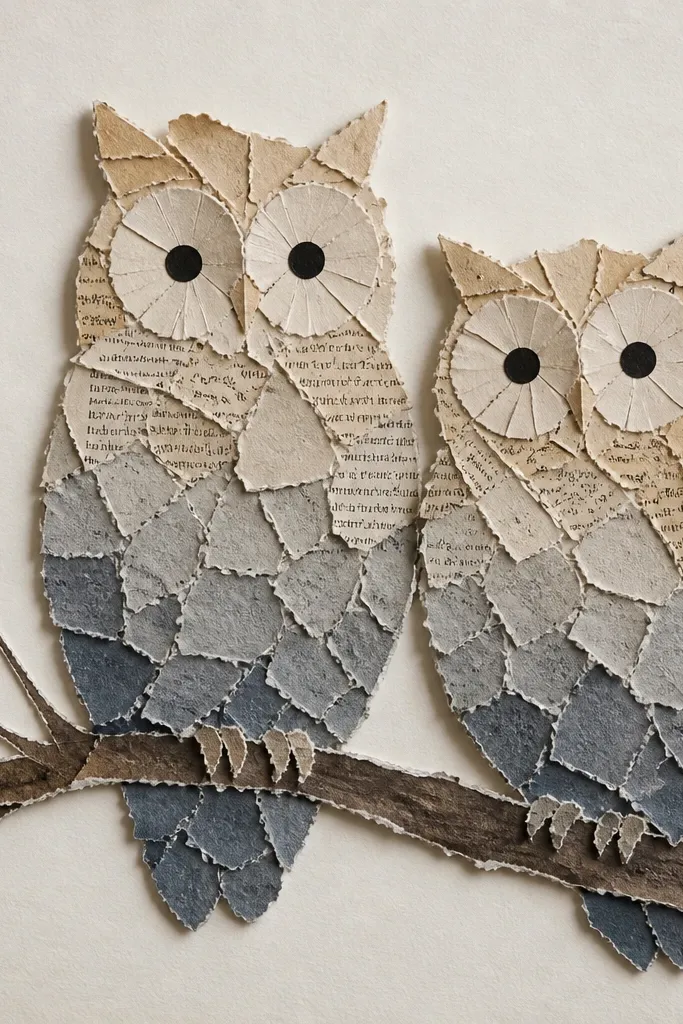
You don’t need drawing skills for this. The owl shape is made from torn pieces, and tearing naturally gives a soft edge that hides small mistakes. I build a gradient by mixing page tones, then anchor the eyes with solid black circles. The result looks artsy but still readable as a clear owl shape.
Print or trace an owl template onto paper, then place it under your backing. Tear book pages into small irregular sections and glue them over the template, starting with the darkest areas around the eyes. Build wings with medium tones, then fill the body with lighter pieces. Finish by adding two small black paper eye circles and a tiny beak triangle.
Tear larger pieces first, then fill gaps with smaller torn bits so the shape stays crisp.
Avoid wet glue directly on book pages; it warps paper and leaves bubbles.
6. Shadowbox of Buttons in a Geometric Grid
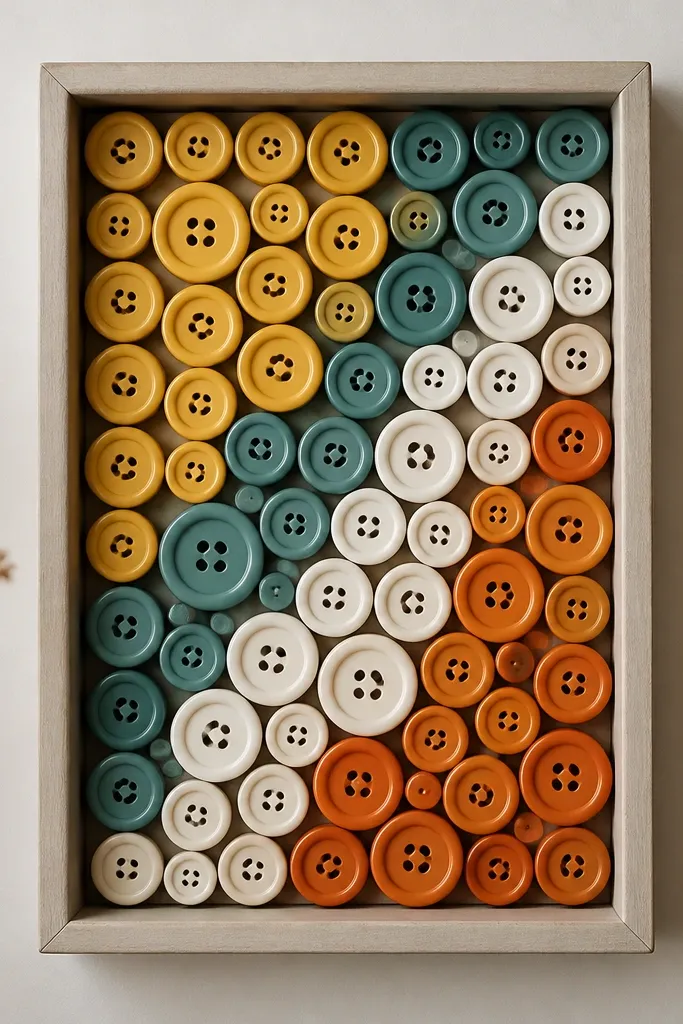
Buttons look playful up close, but a grid makes them look intentional. A shadowbox keeps them from looking like a pile and also protects them from dust. I like using a limited color set so the pattern doesn’t turn chaotic. This is one of the easiest ways to make a wall piece that pops in daylight.
Use a shallow shadowbox frame, like 12x8 inches. Plan a simple grid with painter’s tape on the back, then glue buttons one by one with strong craft glue. Arrange buttons by size — small buttons fill the corners and larger ones mark the diagonal. Add a solid background paper behind the buttons so the colors pop.
Sort buttons by size before you glue; it speeds up the build and keeps spacing even.
Don’t mix too many button shapes; odd shapes in a grid look messy.
7. Brass-Tape and Cork Pinboard Mini Gallery
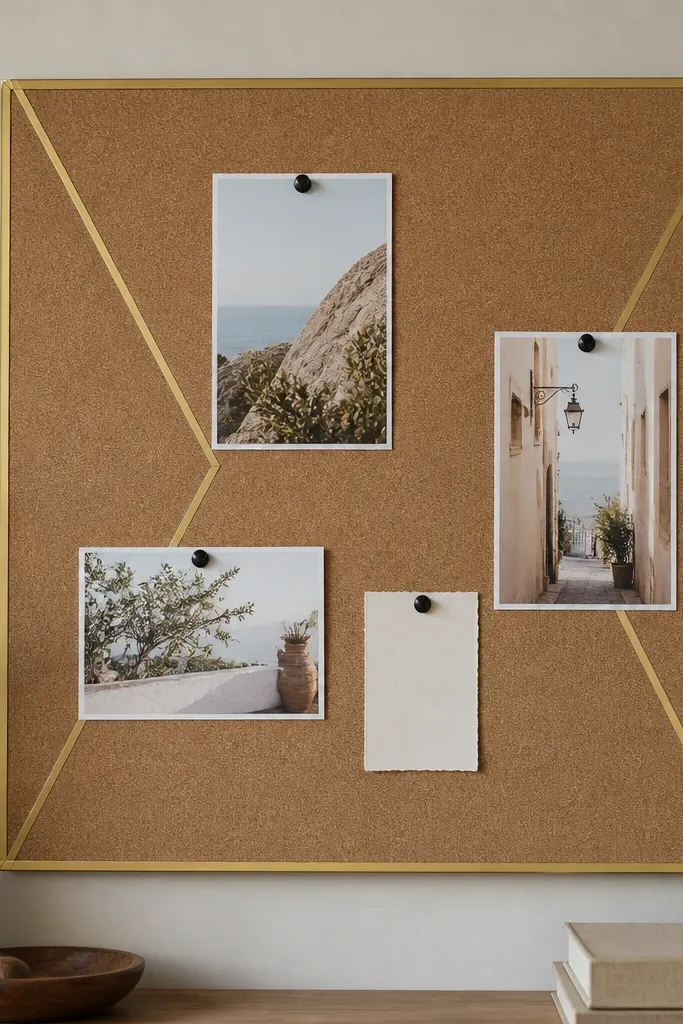
Cork is underrated for wall decor because it lets you swap art without redoing the whole piece. Brass tape gives you crisp lines that look like design hardware. I keep the photos small and consistent so the board reads like a gallery. It’s also practical — you can update seasonal prints in minutes.
Buy a cork panel, like 16x12 inches, and cut to size. Frame the edges with brass tape strips, then add internal lines for a simple layout (like two vertical bars and one horizontal line). Pin photos with black thumbtacks. For a cleaner look, use photo cardstock with white borders.
Quick tipPress brass tape down firmly along the edges with a plastic ruler to avoid lifting corners.
One warningDon’t overcrowd it; leave at least 1 inch of breathing space between pinned items.
8. DIY Faux Stained Glass with Clear Contact Film and Tissue
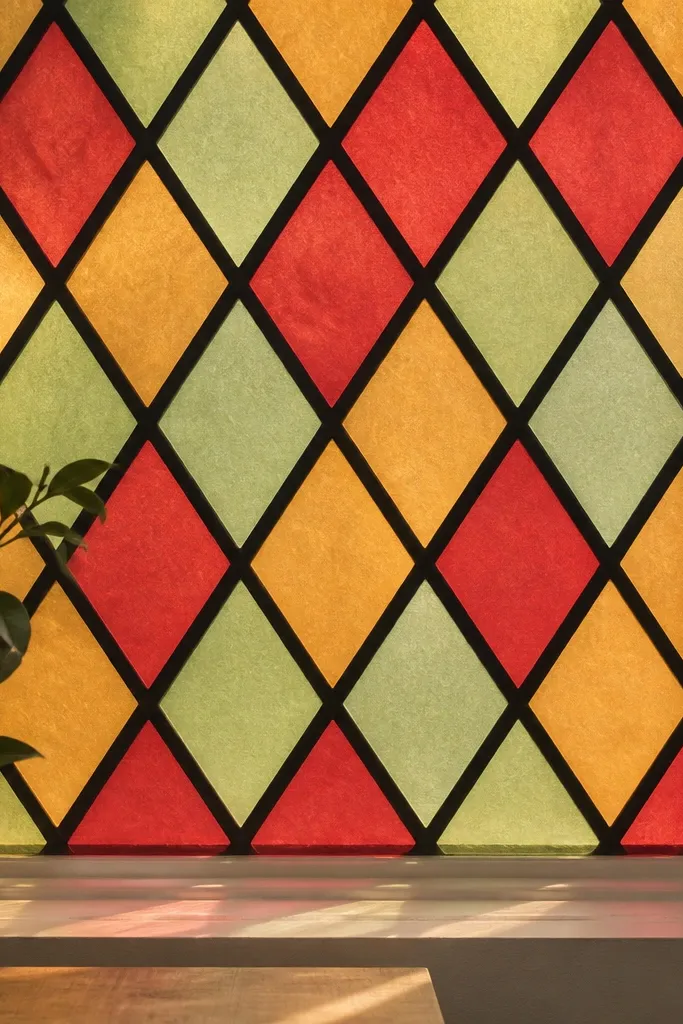
This looks like stained glass because it’s layered and translucent. The black separator lines make the colors read as separate panes, which is what people expect from stained glass. I use tissue paper because it diffuses light and gives that soft glow effect. Hang it where you get daylight and it turns your wall into a gentle light show.
Cut a clear acrylic sheet or use thick clear contact film as the base. Tape or stencil diamond sections on top, then apply colored tissue pieces inside each section. Seal with another layer of clear film so tissue edges don’t peel. Add a black vinyl line strip along the separators for a crisp outline.
Use tissue pieces slightly larger than each cell, then trim the excess once sealed.
Avoid thick paper; it blocks light and stops the stained-glass look.
9. Painted Pegboard with Removable Polaroid Clips
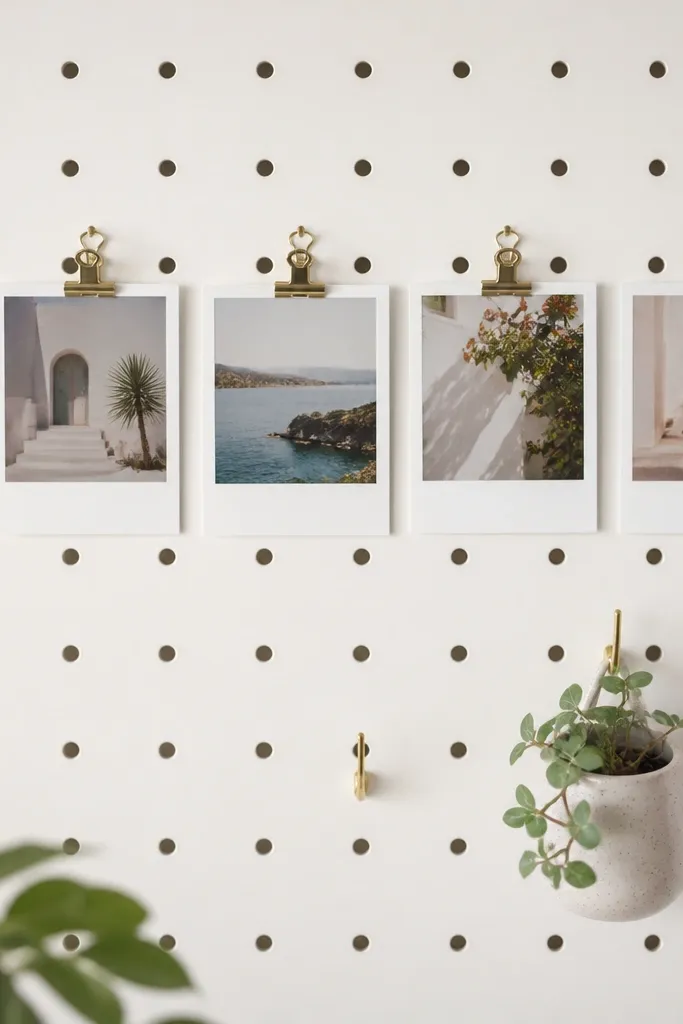
Pegboard gives you structure for rotating art, and it looks tidy even when you change what’s displayed. Paint makes it match your room instead of looking like a workshop. I use removable clips so you can swap photos or prints without glue or frames. It’s great for kids' rooms and entryways because it stays flexible.
Cut or buy a pegboard panel (around 18x12 inches). Paint with primer + satin white paint, then let it cure 24 hours. Insert clips or small binder-style photo clips into holes. Add a couple tiny hooks and hang a small plant or ornament to balance the photo row.
Mark clip placement with a paper template so the spacing stays even.
Don’t use high-gloss paint; glare makes the board look cheap in photos.
10. Minimal Line-Art Leaves Made from Black Paper Strips
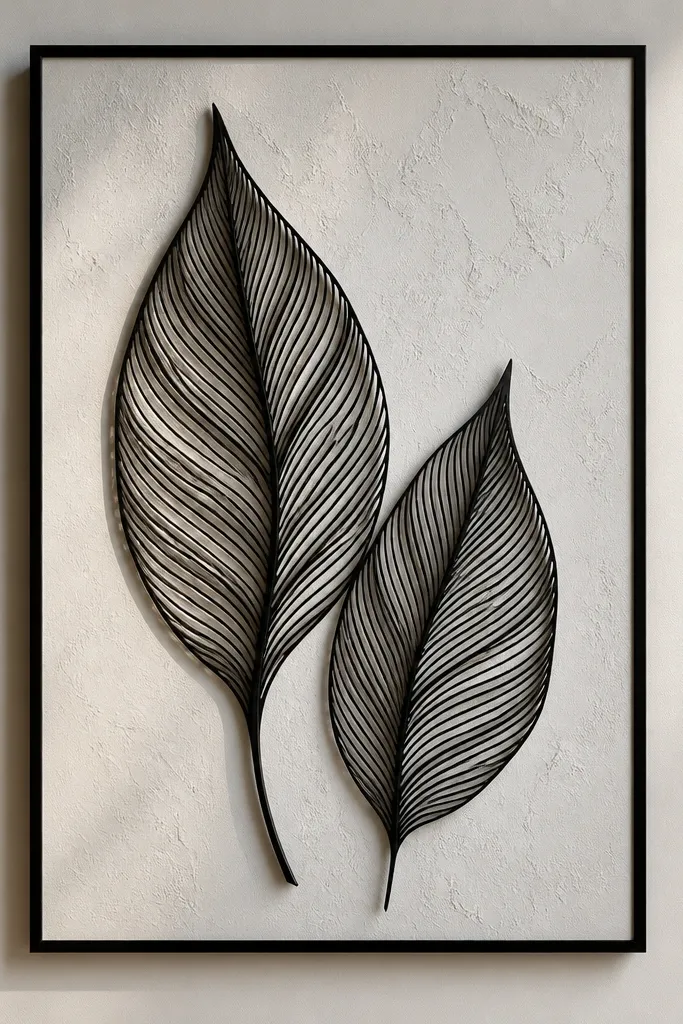
This style looks modern because it uses negative space. Thin strips create the illusion of veins and depth without bulky materials. I keep the leaves monochrome so they don’t compete with your furniture patterns. The off-white background makes the black strips crisp and readable.
Cut leaf outlines from cardstock as your template. Then cut thin strips (about 1/8 inch wide) for the veins and outer contour. Glue strips onto the off-white backing, starting from the edges inward. Leave a small margin around the leaf so it looks framed even without a frame.
Use tweezers for strip placement; it keeps lines straight.
Skip thick glue — it creates shiny lumps that ruin the clean line look.
11. Scrap Wood Letter Banner with Stain-Resist Wax
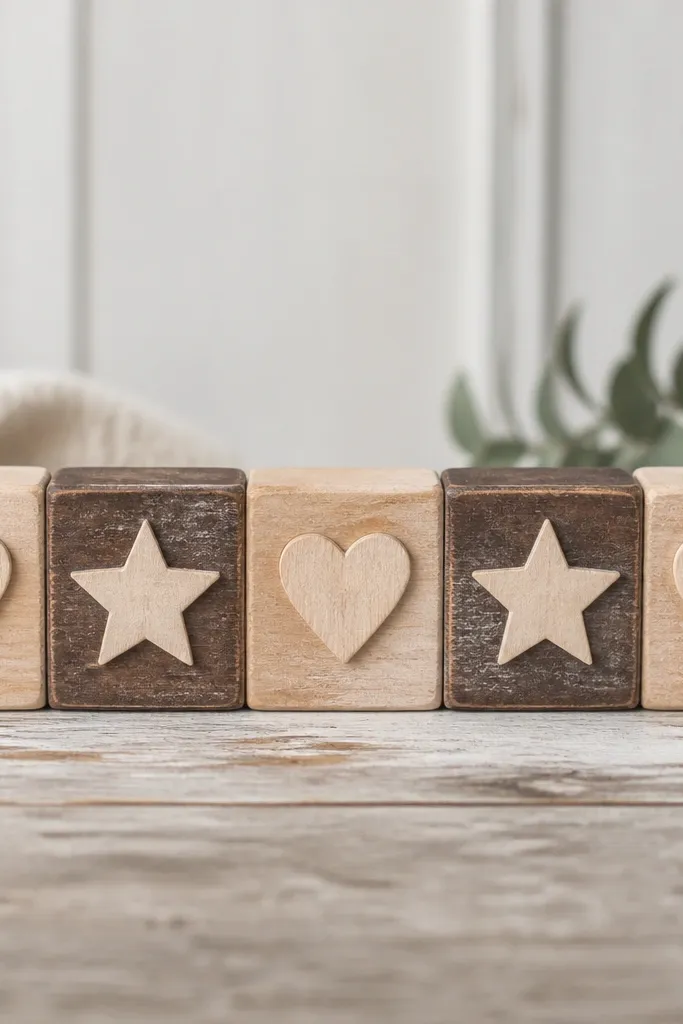
Wood blocks feel grounded, and stain-resist wax gives you that aged contrast. I like using a short word like “HOME” or “CALM” because it reads instantly. The waxy highlights make the letters pop without painting everything. Hang it over a mantel or shelf where it can be seen at eye level.
Cut scrap wood blocks to about 2x2 inches each. Sand smooth, then apply wax resist to the areas you want lighter (rub on with a cloth). Stain the whole piece with a dark wood stain, then wipe off excess. Carve or sand letters lightly on the lighter areas or paint only the letters with matte cream paint.
Seal with matte clear coat; shiny sealant makes wood look plastic.
Don’t skip sanding — rough blocks catch stain unevenly and look patchy.
12. Monochrome Photo Strip Wall with Twine and Clothespins
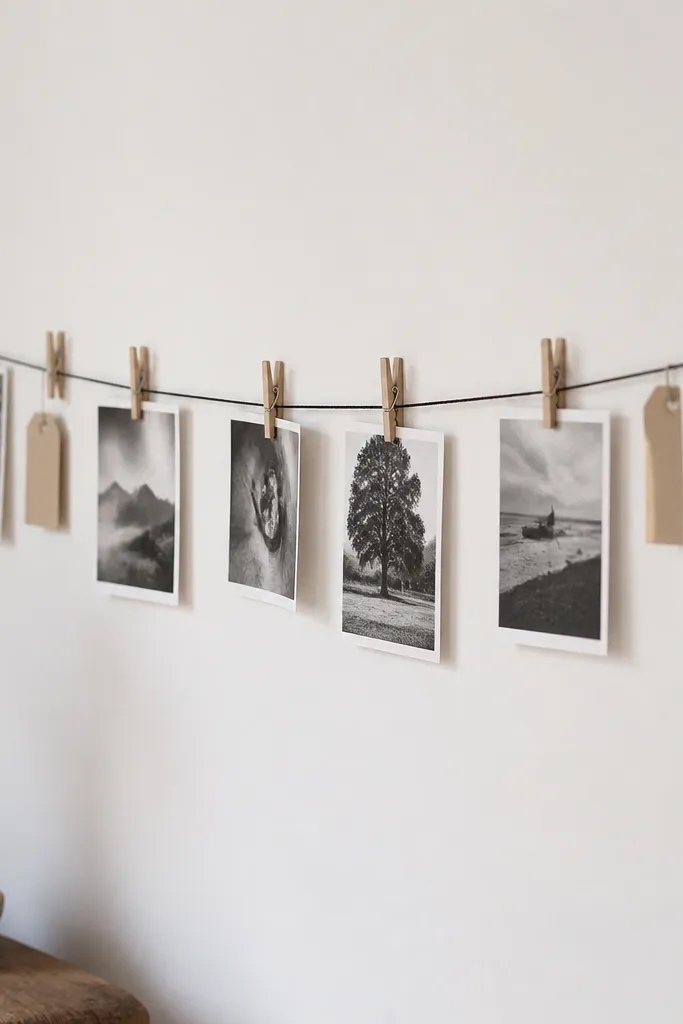
This is one of my go-to options when I want a personal touch without buying frames. The twine line gives a clean horizontal anchor, and clothespins create a consistent visual rhythm. Monochrome photos keep it looking designed instead of scrapbooky. I’ve used this in hallways where people pass by daily — it always looks alive.
Choose a wall strip width like 24-30 inches. Install two small picture hooks, then run black twine between them. Clip photos printed with white borders, about 3x4 inches each. Add small paper tags clipped to the top for dates or short captions.
Quick tipPrint photos with a consistent border size; mismatched borders make the line look messy.
One warningAvoid mixing different clothespin colors; paint them black or keep all natural.
13. 3D Paper Quilling-Style Loops without the Quiller
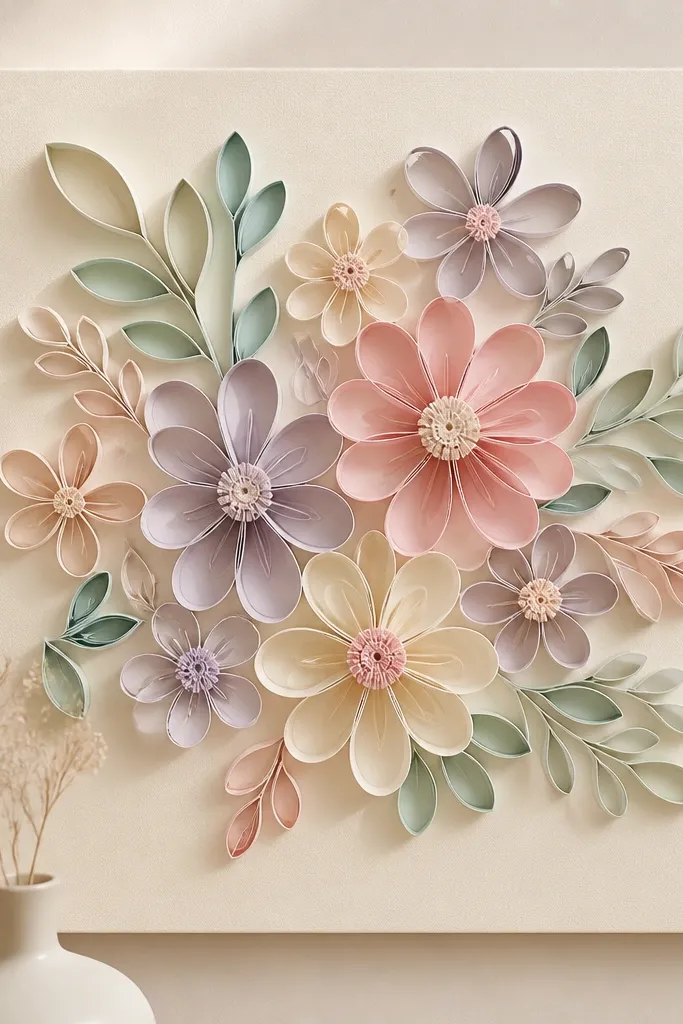
You get the quilling look without buying a specialized tool. Rolled loops create real dimension, and dimension is what makes paper art feel like decor. I use matte paper so the loops don’t look shiny or cheap. This works well for nurseries and bedrooms because it stays soft.
Use thin strips of craft paper, about 1/4 inch wide. Roll each strip tightly around a toothpick, then slide off and glue the end to hold the loop. Arrange loops into a flower shape on cardstock and glue them down. Add a small circle center made from crumpled paper or a punched paper dot.
Quick tipMake a few extra loops before you start gluing; it keeps your layout consistent.
One warningDon’t use glossy scrapbook paper; it reflects light and flattens the look.
14. Concrete-Effect Air-Dry Clay Dots in a Grid Frame
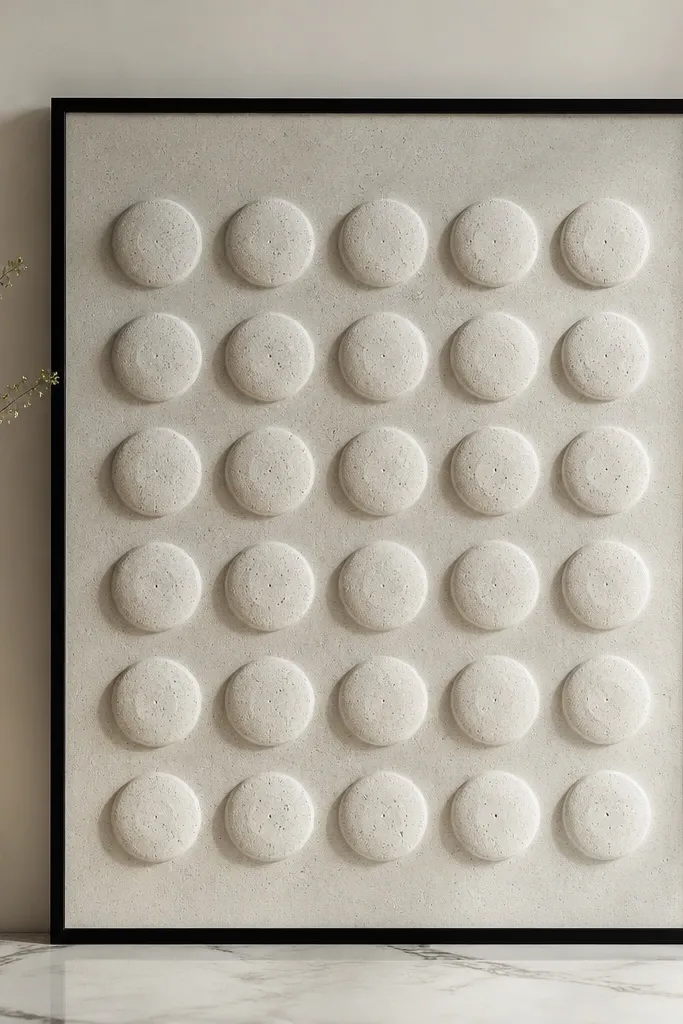
This gives you that modern “architectural” vibe with zero 3D printing. Air-dry clay dots look tactile, and the grid makes them feel intentional. I add a tiny speckle effect by lightly brushing diluted gray paint over the surface once the clay is dry. It looks great in offices and modern living rooms.
Press small clay balls, about 1/2 inch wide, onto a cardstock backing arranged in a 4x4 or 5x4 grid. Let it dry fully, then lightly sand high spots. Mix diluted gray paint with a bit of water and flick onto the dots for speckles. Frame the panel with a thin black frame or shadowbox.
Mark grid positions with a pencil dot guide before you add clay so spacing stays even.
Avoid moving pieces while clay is curing; dents show and look handmade in a bad way.
15. Palette Knife Acrylic Smears on Canvas Panel
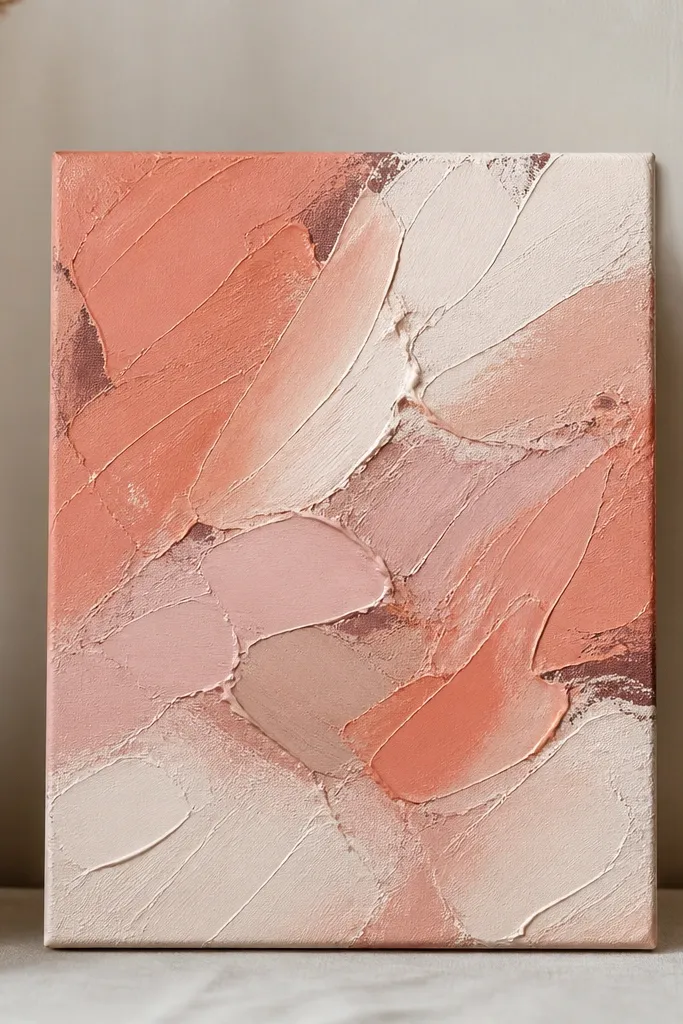
Thick smears look art-gallery enough because the texture catches light. Palette knife ridges create motion without any drawings or stencils. I keep the colors muted and let white do the breathing room. This is perfect when you want something abstract that still matches neutral furniture.
Use a small canvas panel like 12x16 inches. Apply a base coat of off-white acrylic, then layer thick paint with a palette knife in broad strokes. Drag the knife to create ridges, then wipe the knife with a rag between colors for clean transitions. Let dry 24-48 hours, then seal with matte medium.
Use a cheap palette knife for texture — the soft edge makes smoother ridges than a super-stiff one.
Don’t overwork the same area; repeated passes muddy the colors.
16. Rope-Wrapped Monogram on a Reclaimed Wood Backer
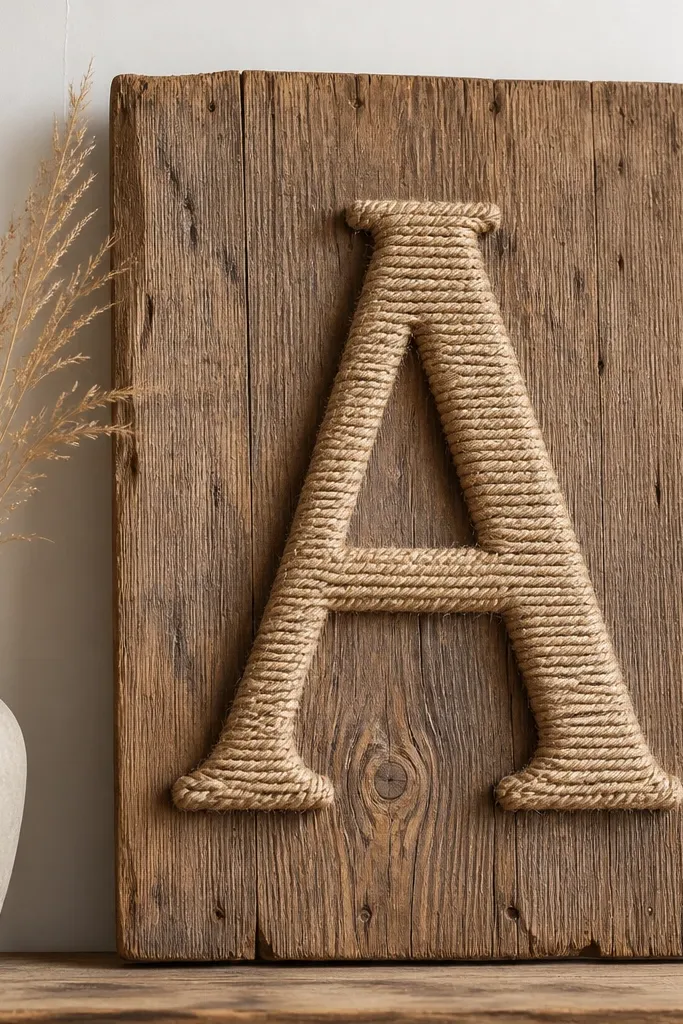
Monograms look personal and styled when the materials are tactile. Jute rope adds texture, and reclaimed wood adds depth without needing a bunch of layers. I like using one letter only — it keeps the wall calm and graphic. The contrast between rope fibers and weathered wood reads clearly from a distance.
Sand a reclaimed wood plank, then clean dust. Draw the letter in pencil and cover it with hot glue in small sections. Wrap jute rope tightly, pressing each loop against the previous one. Seal the rope with a matte clear spray so it doesn’t fray over time. Add a simple hanging wire on the back.
Quick tipWrap from the center outward so the edges don’t get lumpy.
One warningDon’t leave raw rope ends exposed; they unravel and make the whole piece look unfinished.
17. Pressed Flower Gallery Strip on Watercolor Paper
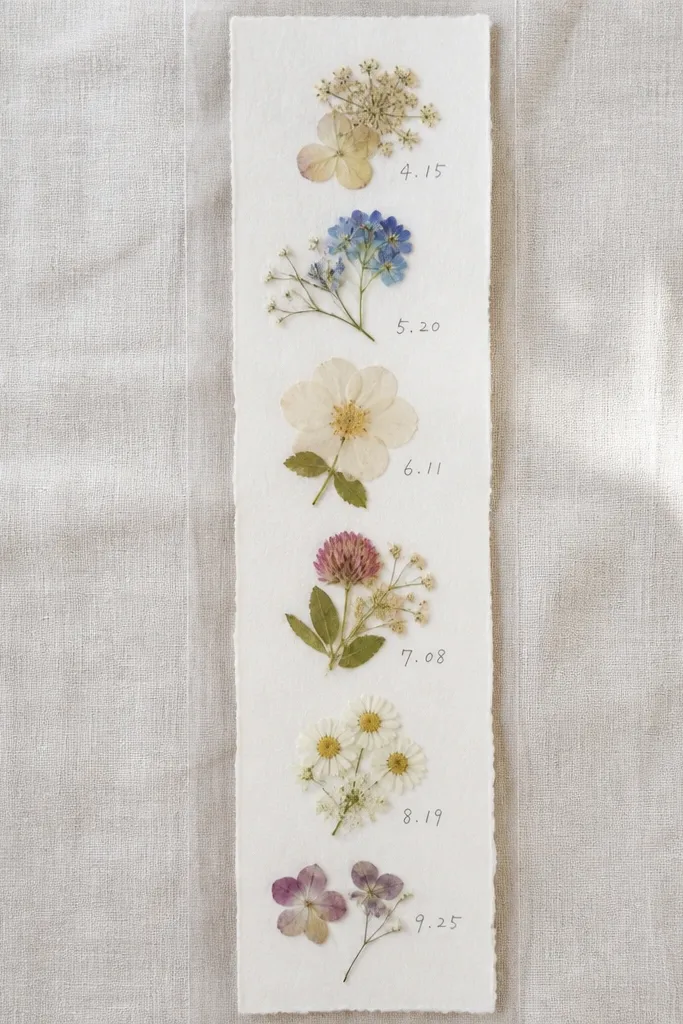
Pressed flowers look delicate, but the layout makes them feel modern. A vertical strip is easier than a full frame because you can control spacing and keep it narrow. I use watercolor paper because it holds flat botanicals better than plain printer paper. Clear seal film protects petals from dust and light wear.
Dry flowers between heavy books for 2-3 weeks. Place them on watercolor paper in a vertical line pattern with small gaps. Cover with a clear laminating sheet or clear self-adhesive film, smoothing from the center outward. Add tiny date labels with a fine-tip archival pen.
Quick tipChoose flowers with flat petals like pansies or baby’s breath for the cleanest results.
One warningAvoid thick flower stems; they create bumps under film and look uneven.
18. Stenciled Concentric Squares with Chalk Paint and Tape Masking
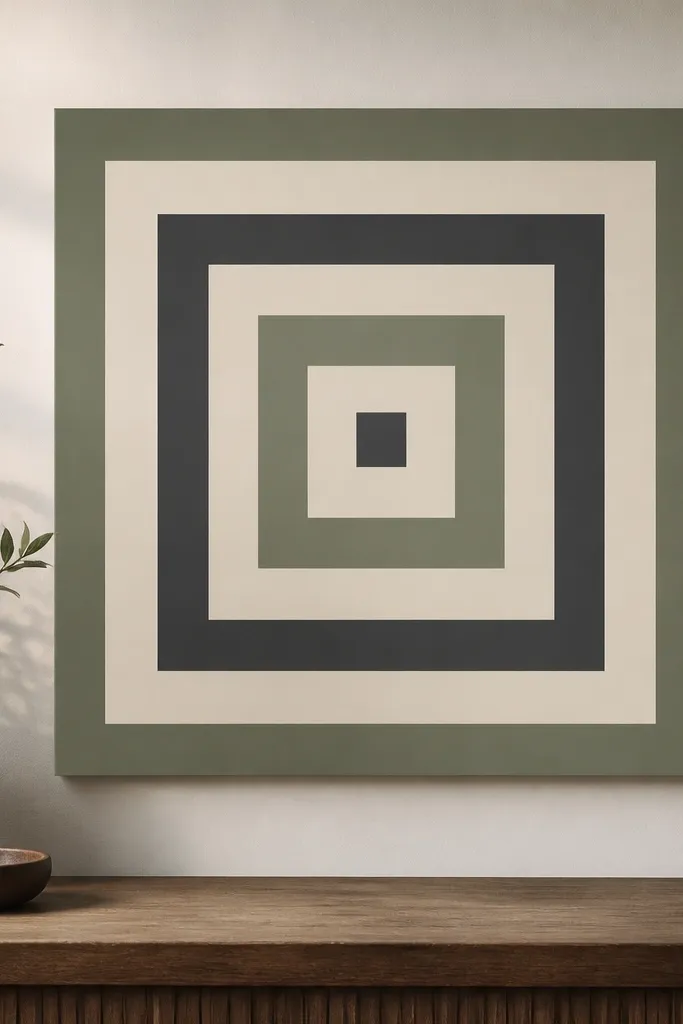
Tape masking makes crisp geometry without fancy stencils. Concentric squares create a calming, structured look that fits modern rooms. I use chalk paint because it stays matte and hides tiny brush marks. The palette stays neutral so the piece doesn’t overpower other decor.
Start with a 14x14 inch plywood or MDF board. Paint base cream and let dry. Apply painter’s tape strips to mask the next square, leaving consistent gaps like 1 inch. Paint sage on the first band, remove tape after the paint is set but not fully cured, then repeat for charcoal.
Remove tape while paint is slightly tacky; it prevents peeling chips on edges.
Don’t use cheap tape that bleeds; it ruins the sharp lines.
19. Vinyl Record Label Collage in a Circular Frame
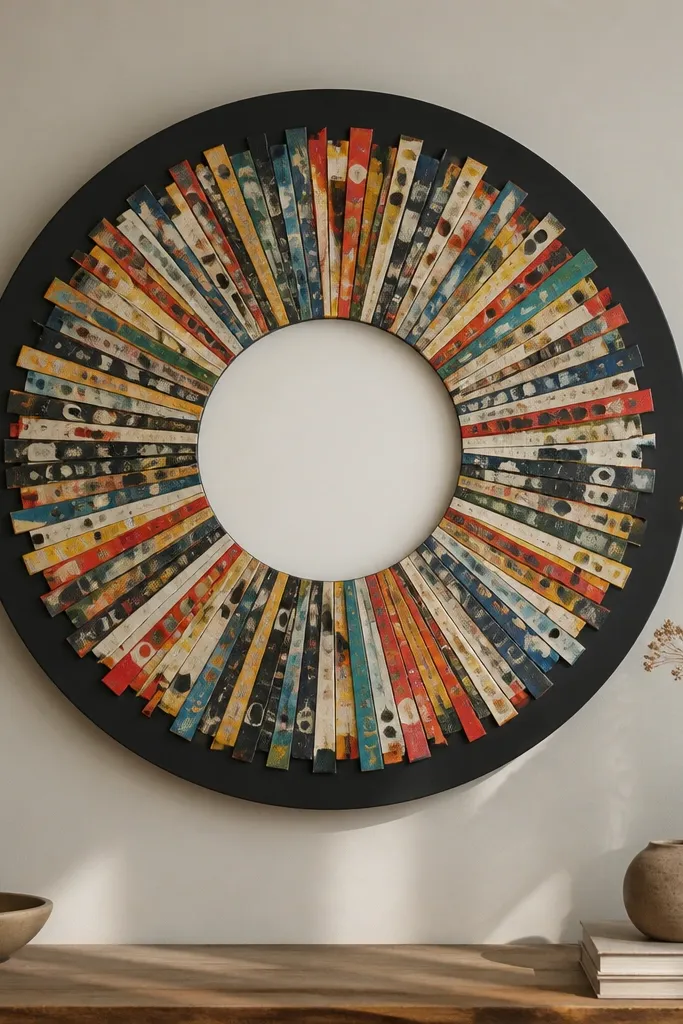
Record labels have built-in graphic design, so your collage looks styled even with simple cutting. The circular frame keeps it from looking like random clippings. I use a black center circle to make the labels read clearly. This works in music rooms, home offices, and hallways where you want personality.
Find old record sleeve labels or print label images on paper. Cut a circle backing (around 12 inches) from foam board, then trace a smaller center circle to leave blank. Glue label pieces around the ring, overlapping slightly for coverage. Seal with a matte decoupage medium so the paper doesn’t lift.
Trim edges with a craft knife against a cutting mat for clean circle lines.
Don’t glue labels directly on textured cardboard — it makes the surface uneven.
20. DIY Acrylic Paint Pour Stripes on a Wood Panel (Controlled, Not Messy)
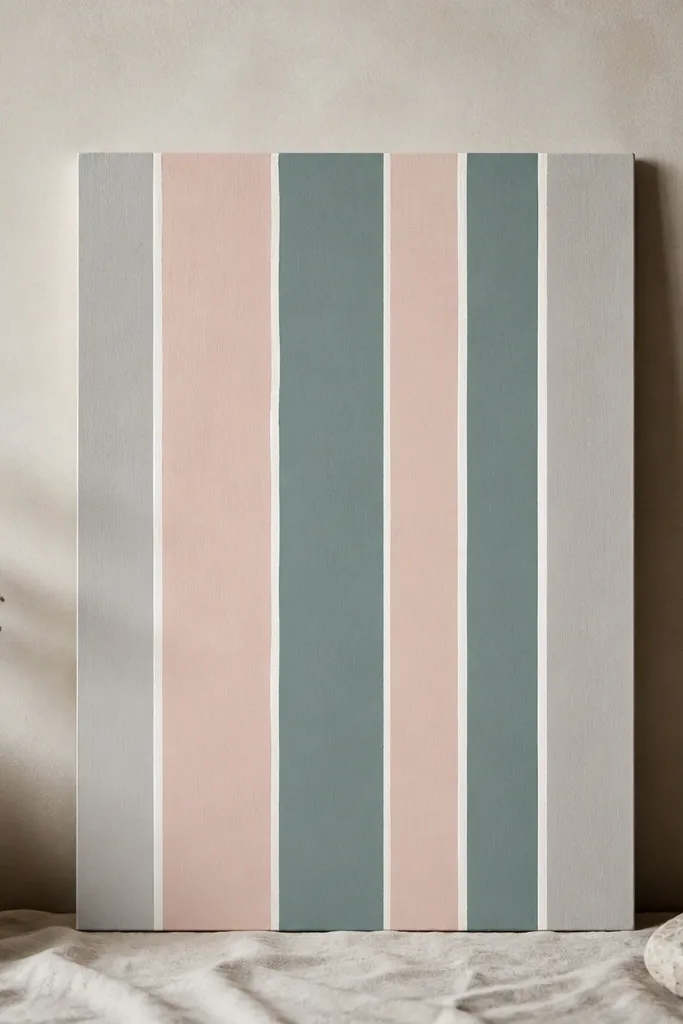
You get the fluid look of a paint pour, but with control. Vertical stripes create a modern rhythm, and a wood panel gives a sturdy base. I mix paint with a tiny amount of matte medium so it dries less glossy. It looks like abstract art without the chaotic puddles.
Sand a wood panel to 1/4 inch smooth, then seal with white gesso. Tape off the edges and draw faint vertical lines with pencil. Pour or squeeze paint along each line, then tilt slightly to spread within the taped borders. Pop bubbles with a toothpick, let dry, then remove tape after it’s set.
Use thin layers — thick pour stripes crack on wood if you rush drying.
Avoid pouring on bare wood; it soaks paint unevenly and creates patchy streaks.



