
1. Overhead toy bin labels that don't peel
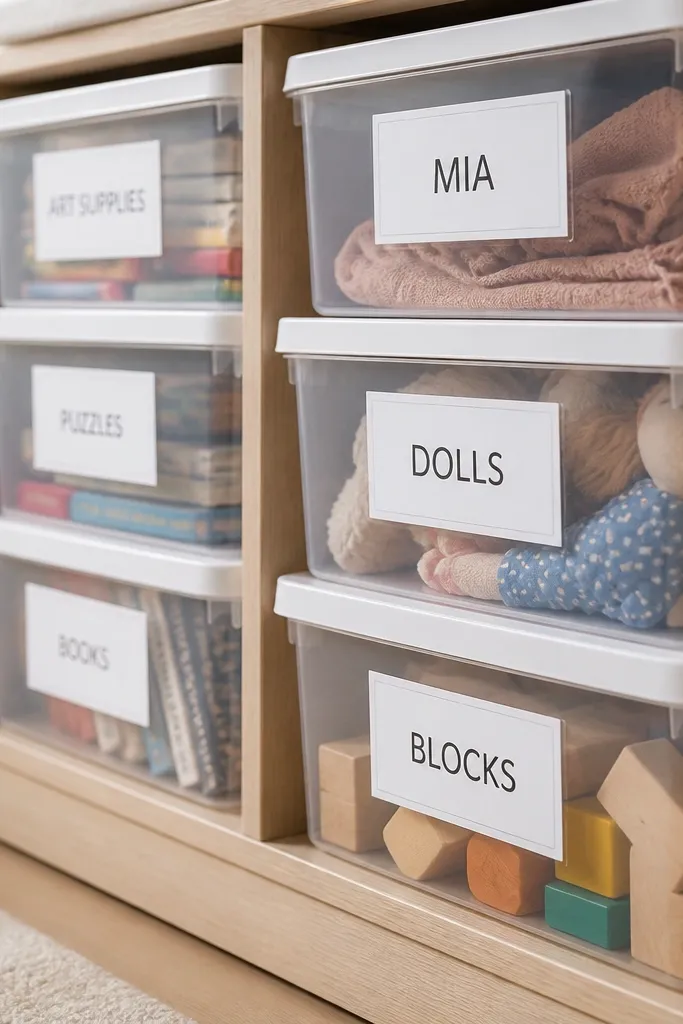
Start by cleaning the bin plastic with rubbing alcohol and letting it dry fully so adhesive sticks. Then print labels on paper, cut them with a clean border, and laminate using a laminator pouch that gives a tight, smooth edge. Place the label where you want it, press firmly from the center outward, and use a plastic scraper or old gift card to eliminate bubbles. Finally, seal the corners with a tiny dab of clear tape if your bin gets sun from a window.
This is one of my favorite “small but huge” DIY wins because it fixes the mess problem and the visual clutter at the same time. I use laminated label sheets with a matte finish so the glare doesn’t scream for attention. The labels sit on the front of clear bins at about chest height for a kid, so they actually use them. For color, I keep the label background white or light cream and use one accent color that matches the room (navy, rust, or sage). It works for any kid age, but it’s especially helpful for toddlers and early readers because the labels guide behavior, not just decoration.
One warningAvoid paper labels that you just tape on — they curl, peel, and look messy within a week.
Quick tipUse matte laminate, not glossy, so the label stays readable under different lighting.
2. A name sign made from scrap boards with sealed vinyl

Start with two small scrap boards or one larger board, sand to a smooth finish, and wipe off dust. Paint the center with a matte wall paint or craft acrylic, then let it cure overnight before you apply vinyl. Cut vinyl letters, weed the excess, press them in place, and use a heat tool to set the adhesive evenly. Finish by sealing over the vinyl with a thin clear coat made for indoor use, then hang it with a sturdy picture hook so it sits flat.
A name sign is personal, but it can look either gallery-polished or like a craft store impulse buy. I like using two-tone wood — a lightly stained edge and a painted center — because it looks finished without needing fancy tools. Heat-set vinyl gives you sharp letter edges, and sealing it keeps it from lifting when sticky fingers touch it. I keep the letters thick (think rounded block fonts) because thin script looks messy when the wall is busy. This looks great in kids rooms with neutral walls and works for most skin tones because it’s not dependent on “matching” anything human — it’s just clean, readable color.
One warningAvoid leaving vinyl unsealed — it lifts at corners and looks worn fast.
Quick tipPick one background color and one letter color — two colors max looks intentional.
3. Gallery wall that uses one frame size
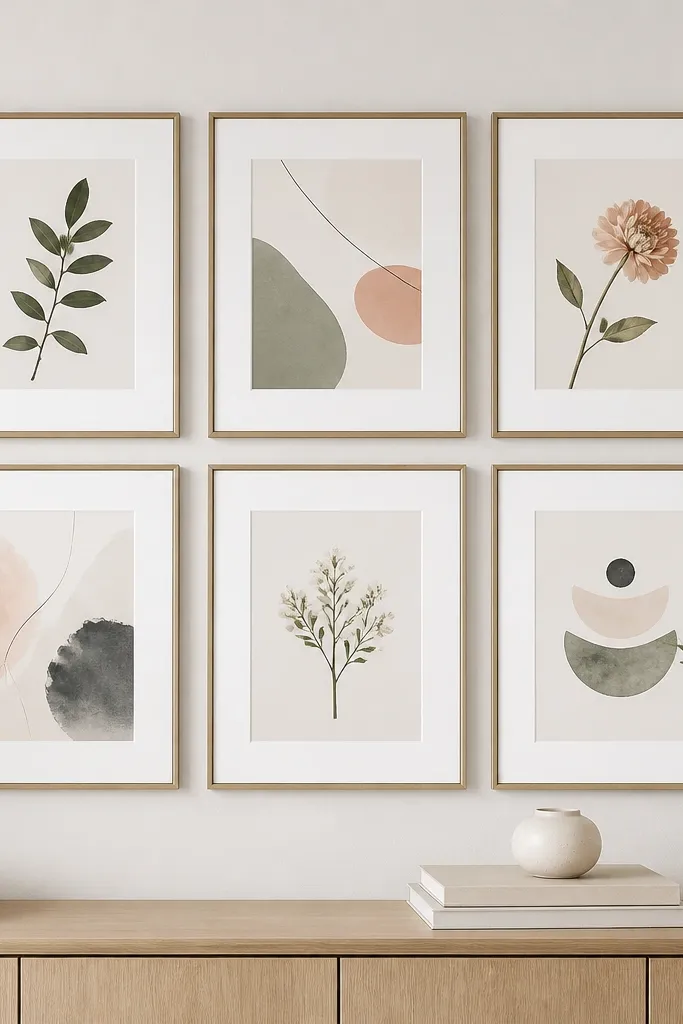
Gallery walls are where DIY goes wrong for a lot of people. The fix I use is boring in the best way: one frame size, one spacing rule. When frames match, your eye reads order, and the room looks designed even if the prints are simple. I keep the matting white to make colors pop without changing the whole palette. This works especially well for kids because it creates a predictable visual area where they can point and talk, instead of a chaotic mix of sizes that feels cluttered.
Pick one frame size that fits your wall — for example, 11x14 or 8x10 — and commit. Print your images to match the inner opening, then add white mat boards if your frames allow it. Use painter’s tape to map the grid on the wall before hanging anything, and measure the spacing between frames with a ruler. Hang the bottom frame so it sits around the kid’s eye level (about 32-45 inches from the floor depending on height), then step back and check alignment under daylight and evening lamp light.
Use painter’s tape plus a level for the first row — if the top is crooked, everything looks off.
Avoid mixing random frame sizes and spacing — it reads “thrown together” no matter how cute the prints are.
4. Quilted wall hanging made from thrifted blankets
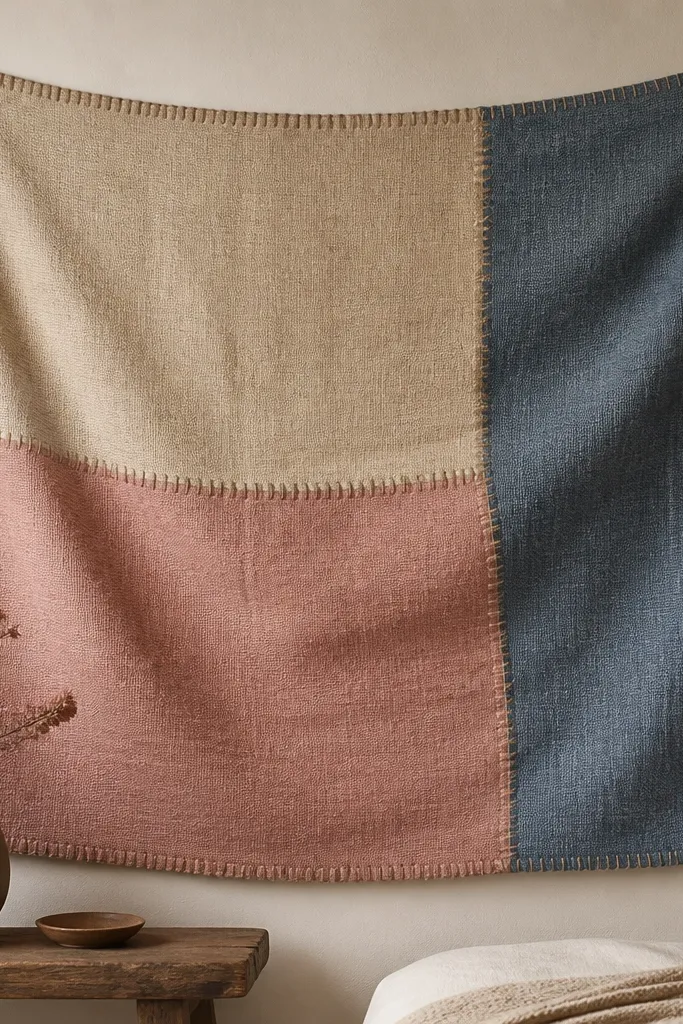
A quilted wall hanging is decor that also handles real life. It hides scuffs, softens sound, and makes the wall look cozy without needing nails everywhere. I make mine from thrifted blankets because the fabric already has a lived-in texture — it looks warmer than brand-new cotton quilting fabric. The patchwork colors should be in the same temperature family: either all warm (cream, terracotta, dusty rose) or all cool (oatmeal + denim + slate). This looks great in rooms with kids who like to jump on the bed because the textile takes the visual “impact” off the wall.
Start by washing and drying the blankets so they shrink before you cut. Cut squares using a rotary cutter and ruler, then lay out a pattern with a 1/2-inch seam allowance. Sew the squares into rows, press seams in one direction, and join rows into the full top. Add a simple backing fabric, quilt with straight lines using a walking foot if you have one, and finish the edges with bias tape so it doesn’t fray.
Quilt lines every 6-8 inches stop the fabric from wrinkling later.
Avoid thin, unlined fabric hung flat — it waves and looks unfinished.
5. Floating shelf with rounded corners and no flimsy brackets
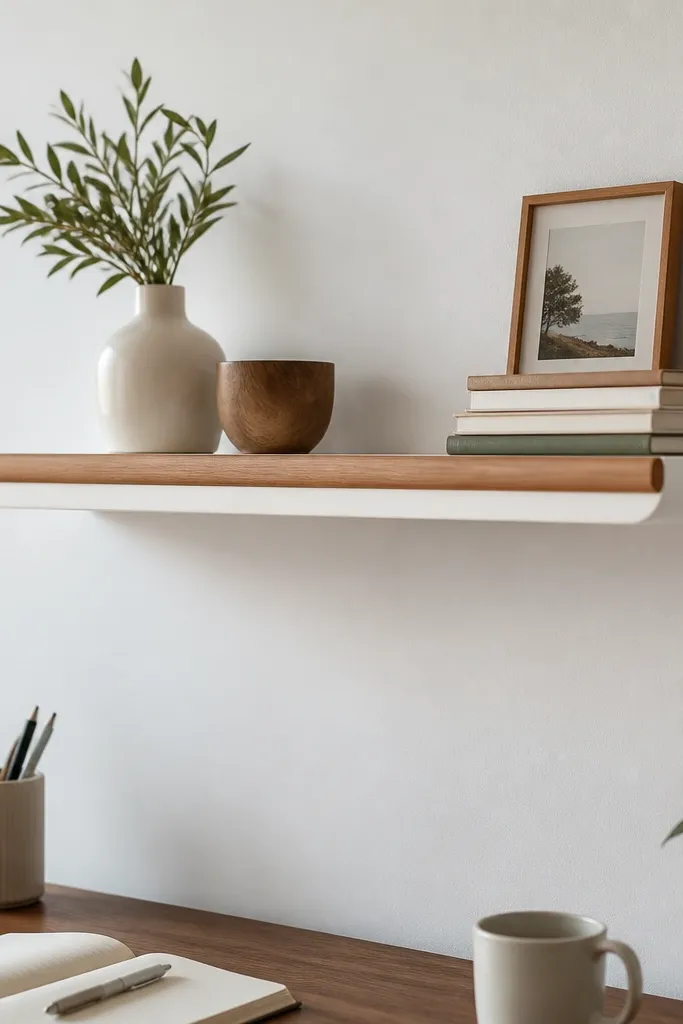
Floating shelves look clean, but I’m picky because kids bump things. I use rounded front edges and sturdy hidden brackets so the shelf feels solid when a child grabs it. The finish matters too — matte paint hides scuffs better than glossy. I keep items on top in a “stack” pattern: one taller book, one medium basket, and one small display so the shelf doesn’t look like a pile. This suits kids rooms that need organization without turning into storage bins everywhere.
Start by cutting your shelf board to size and rounding the front edge with sandpaper or a router. Prime raw wood first, then paint with two thin coats of matte interior paint. Install heavy-duty wall brackets inside the shelf opening so they anchor to studs if possible. Hang the shelf at a height where the bottom is around 48-52 inches from the floor, then add a small ledge or lip so books don’t slide forward.
Use clear shelf liner or felt dots under decor so it doesn’t rattle.
Avoid cheap drywall-only anchors — the shelf will sag and look unsafe.
6. Fabric rope wall garland that doesn't droop
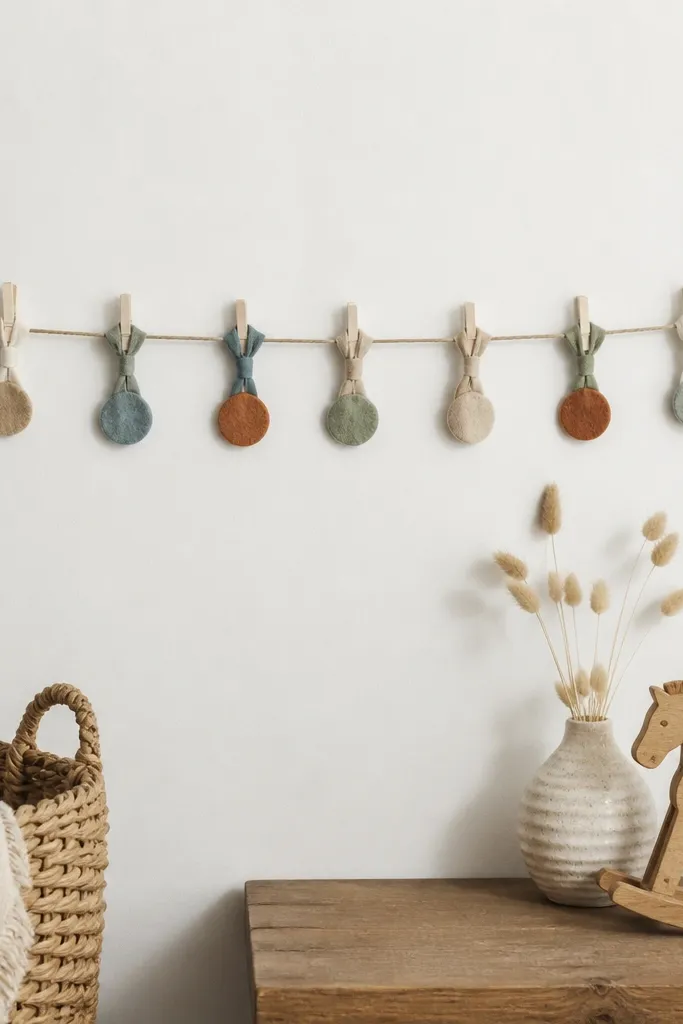
Start by measuring your wall span and cutting rope slightly longer so you can tension it. Attach rope ends to wall hooks or screw eyes anchored into studs if possible. Make fabric knots by cutting 3-inch strips, tying tight knots, and trimming ends so they look uniform. Clip or stitch felt circles onto the rope using small binder clips while you position them, then secure permanently once spacing looks right.
Rope garlands can look cute or messy depending on how you attach them. I like fabric knots and felt accents because they add texture without needing perfect symmetry. The rope should be stiff enough to hold shape; if it flops, the whole thing looks like a craft project. I keep colors to two accents plus neutral rope — for example, natural jute with navy and cream felt. This works for kids rooms because it’s soft visually and doesn’t have sharp edges, and it also covers awkward wall space above a dresser.
One warningAvoid using floppy twine — it droops and makes the garland look sloppy.
Quick tipDo a dry run with binder clips first — you’ll fix spacing before anything is permanent.
7. Crayon holder desk caddy with wipeable base
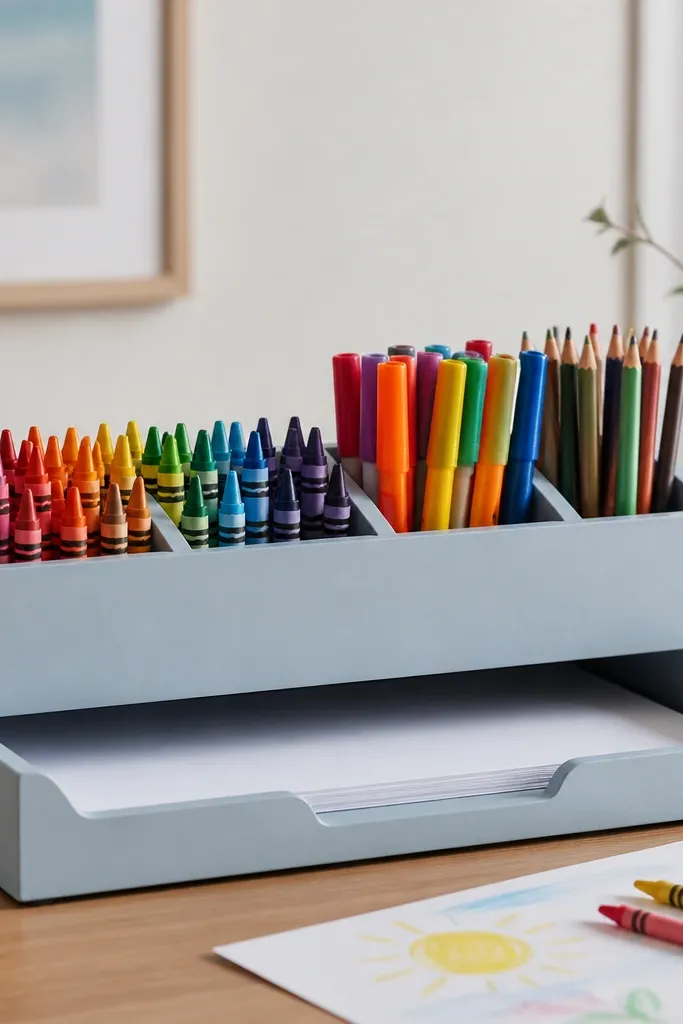
A desk caddy is one of the most practical decor items you can DIY because it controls the chaos. I build mine with a wipeable finish because marker spills are not rare — they’re a schedule. Wood is fine, but you need a topcoat that doesn’t soak stains. I prefer satin polyurethane over high-gloss because it hides tiny scuffs better. Color-wise, I keep the base a neutral like warm gray or white, and I add one accent compartment in the room’s main color so it looks intentional.
Start by cutting a base board and sanding it smooth, then paint or stain it and let it dry completely. Add compartments using wood dividers or sturdy cardboard sealed with a clear coat. Seal everything with two coats of wipeable topcoat, letting it cure between coats. Finally, line the bottom with a thin felt sheet or silicone mat so crayons don’t scrape and slip.
Put a small tray in the front for erasers and sharpener scraps — it stops the desk from turning into a pile.
Avoid unfinished wood — it stains from marker and looks dingy fast.
8. Laminated "growth chart" wall strip with removable clips
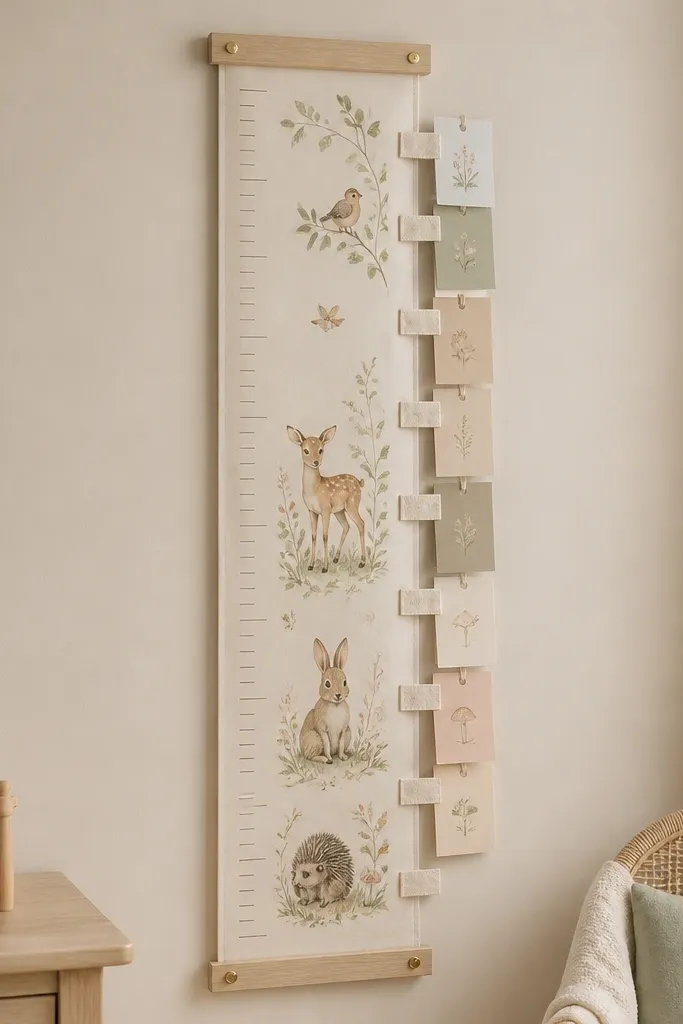
Growth charts are cute until they become a sticker-y mess or a wall that gets drilled every year. I use a laminated print because it wipes clean and it doesn’t tear when kids tug at it. Removable clips let you swap out monthly photos or milestones without redoing the whole project. I mount it with a simple rail system so it hangs straight and doesn’t warp. This works for kids of all ages because you can change what you track — height, reading goals, or chores — without changing the decor vibe.
Start by printing your chart on cardstock, then laminate it with a clear pouch for a smooth surface. Punch holes at consistent intervals along the chart margin so clips line up. Mount two picture rails on the wall, aligned with a level, then hang the laminated chart using clip hooks. Add small laminated cards for each milestone and clip them in place so updates take minutes, not hours.
Use fabric clips with a matte finish so they don’t reflect light and distract from the chart.
Avoid permanent adhesive mounts on painted walls — they peel and pull paint when you remove the chart.
9. Bedside wall lights using fabric shade and cord cover
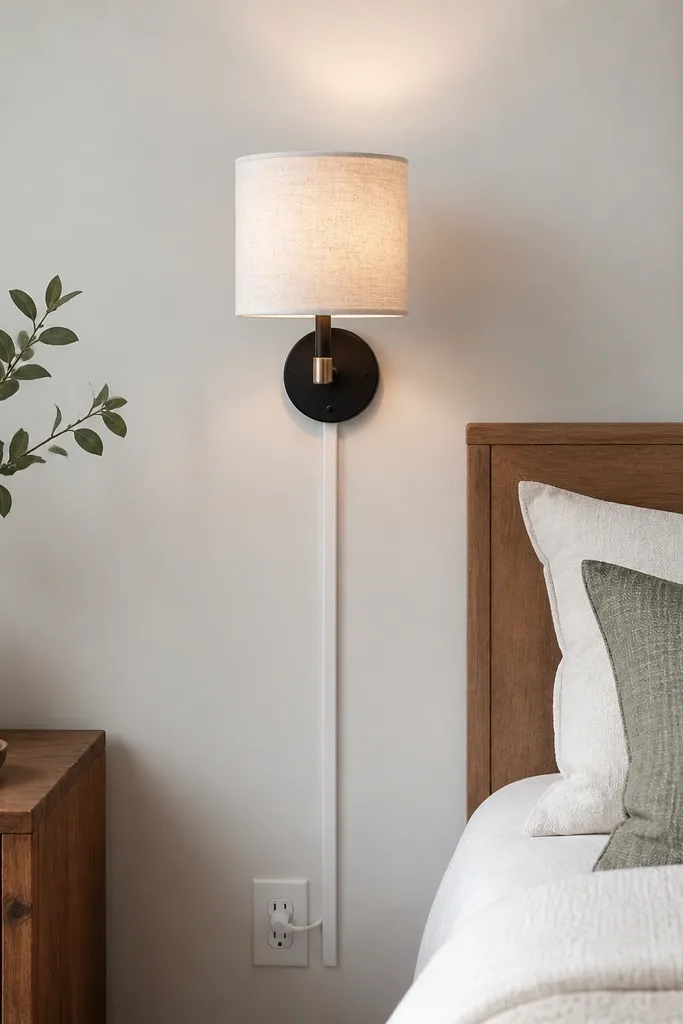
Start with a wall-mount light kit that matches your outlet setup, and plan cord routing before you drill anything. Choose a fabric shade in a light neutral or the room’s accent color, then assemble the fixture. Install a cord cover along the wall edge from the outlet to the light, cutting it to length with a clean end cap. Finally, test the light height so the bottom of the shade sits above a child’s reach and the beam hits the wall, not the eyes.
Kids rooms need lighting that feels safe and calm. I’ve learned not to rely on temporary plug-in lamps with dangling cords because they get yanked during bedtime routines. A small wall sconce look with a fabric shade softens the room and makes bedtime feel less harsh. The fabric shade hides the bulb glare, and the cord cover keeps the line clean and out of reach. This works best in rooms where the bed is against a wall and the child can reach the floor outlet area.
One warningAvoid exposed cords — they look unfinished and they invite constant tugging.
Quick tipPick a warm bulb around 2700K for bedtime — it keeps the room calm and makes colors look softer.



