
1. Thrift Frame Collage With Book-Page Matting
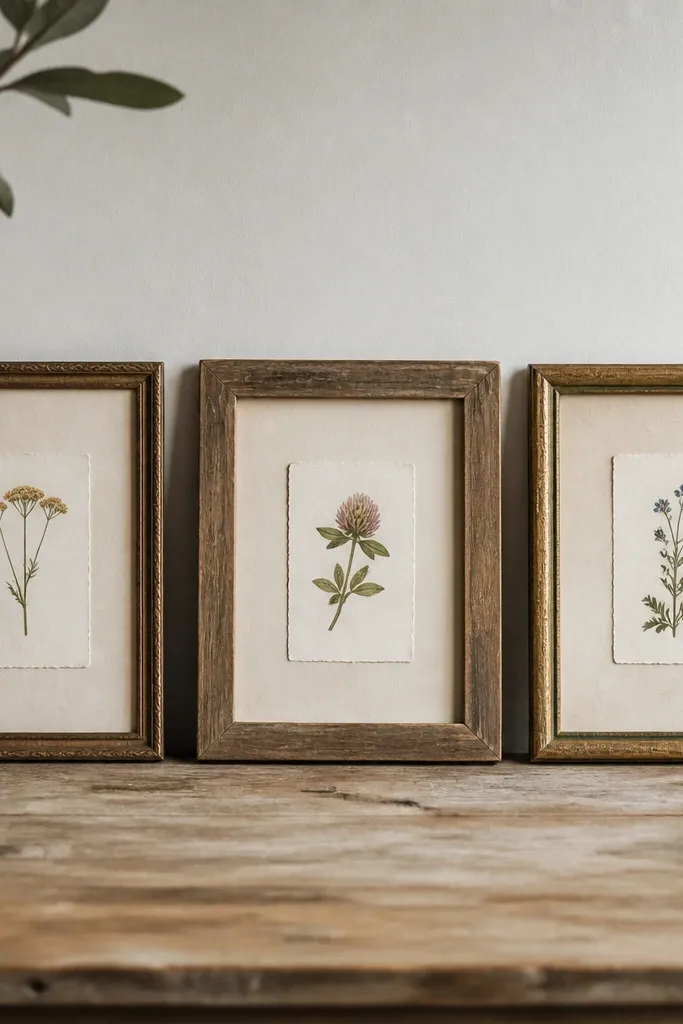
This works because it looks curated without needing matching frames. The book pages add a soft, vintage texture, while the botanical cuts give you a clear focal point. I like using cream or off-white pages so the room feels warm even if your walls are gray. The uneven mat edges also hide small cutting mistakes.
Pick 3 frames with similar outer colors (black, dark wood, or brass) even if the sizes differ. Cut book pages into mats sized to leave a 1 cm border around the artwork. Glue the paper to a backing board with a thin layer of Mod Podge, then press under a book for 10 minutes before reinserting into the frame.
Quick tipLay everything on the floor first and keep the gaps between frames consistent at about 6-8 cm.
One warningAvoid using shiny glue blobs on the paper — they show through once the mat catches light.
2. Fabric Scraps Wall Pocket Organizer
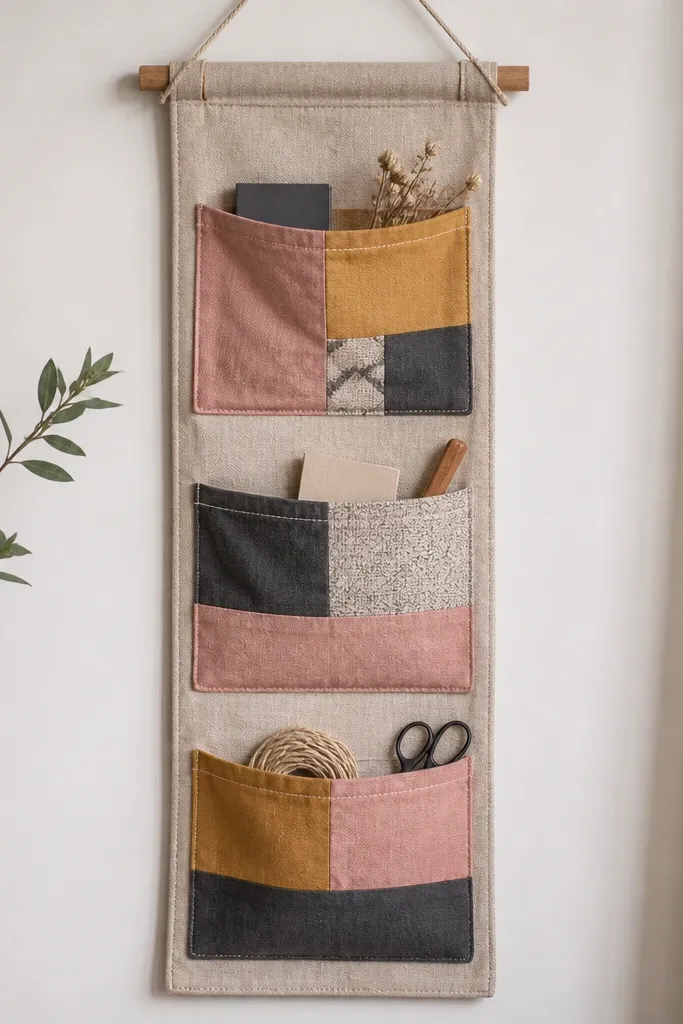
Wall pockets make decor useful, and they look intentional because fabric has natural softness. The pockets also break up blank wall space with vertical lines. I’ve used this in entryways for keys and in craft rooms for scissors because you can see what’s inside. Mixing solids and small prints keeps it from looking like a random scrap pile.
Cut a backing rectangle from medium-weight canvas or upholstery fabric (about 18 x 28 inches). Cut pocket panels to 7 x 9 inches each, then fold the top edge down 1 inch and stitch. Mount the backing to a board with a staple gun or sew on a strip of velcro to keep it removable.
Quick tipUse a fabric marker to draw pocket placement lines so the tops line up before you stitch.
One warningSkip thin slippery scraps — they sag and make the pockets look messy.
3. No-Sew Rope Knot Coaster Set for a Shelf Accent
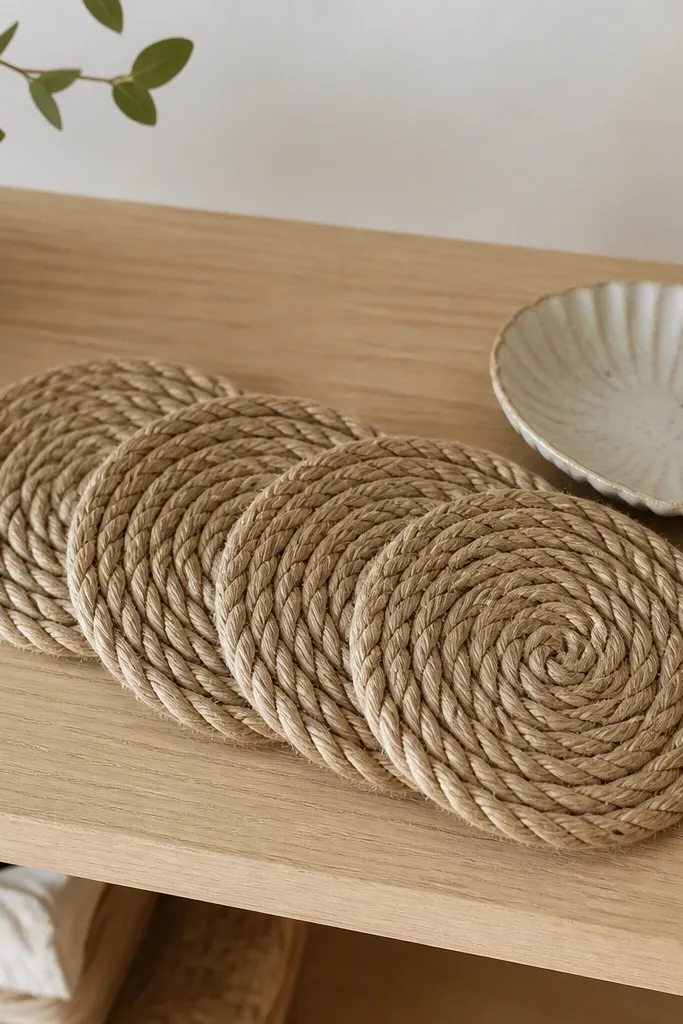
Coasters are small, but they change how a shelf looks because they add texture right where your eyes land. Rope knots create a handmade pattern without needing paint or precision. Natural rope also pairs with almost every color palette since it reads as neutral. When you arrange them as a set, they look like a designed object.
Use 10-12 mm thick cotton rope. Create a tight spiral coil around a 3-inch circle template, then tack each coil with hot glue on the underside only. Once set, trim the edges and glue a small fabric strip underneath for grip. Arrange on a tray or directly on a shelf surface.
Quick tipPress each knot section for 15 seconds after gluing so it doesn’t loosen when you handle it.
One warningDon’t glue the top surface — it makes shiny spots that look sloppy.
4. Acrylic Paint Color-Block Planter Pot
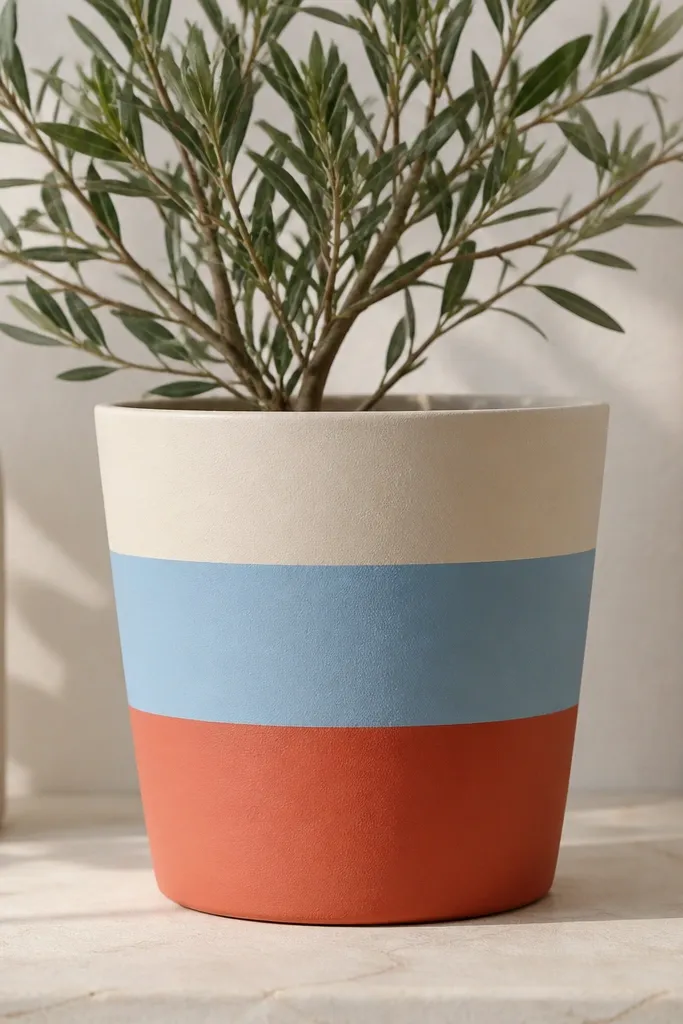
This is the fastest way to make a plant corner look styled. Color-blocking with painter’s tape gives you sharp lines that store-bought pots usually have. I like using matte acrylic because it looks soft on terracotta instead of plastic. The result makes your plant look like it belongs in the room theme.
Clean the pot with rubbing alcohol, then let it dry 5 minutes. Tape off horizontal bands and paint with acrylic craft paint. Apply two coats, remove tape while paint is still slightly tacky, then seal with matte clear spray after 24 hours.
If your tape edges bleed, paint a thin “primer coat” of the base color first, then tape.
Avoid painting over dusty terracotta — the finish turns patchy.
5. Book Spine Name Banner With Washi Tape Edges
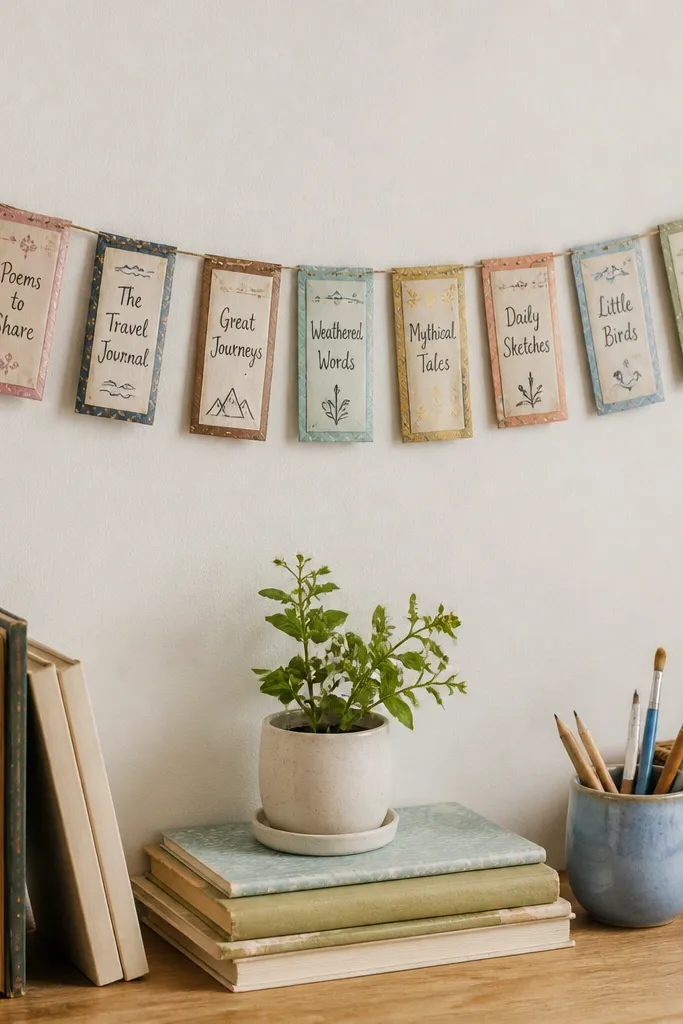
A name banner looks cute, but the trick is making it look like a set. Using washi tape as an edge frame gives each card a clean border even if your lettering isn’t perfect. It also adds color without covering the whole card. The book-spine illusion makes it feel cozy in bedrooms and reading corners.
Cut cardstock or thick paper rectangles around 2.5 x 6 inches. Lightly pencil guidelines, then letter with a fine-tip paint pen or black marker. Frame the edges with 2-3 mm washi tape strips, then punch two holes and attach to twine with mini clothespins or thread.
Write the same letter height on every card using a ruler — it makes the banner look designed.
Skip glitter pens — they catch light unevenly and make the banner look cheap.
6. Wire Basket Floating Shelf With Wooden Dowel Front
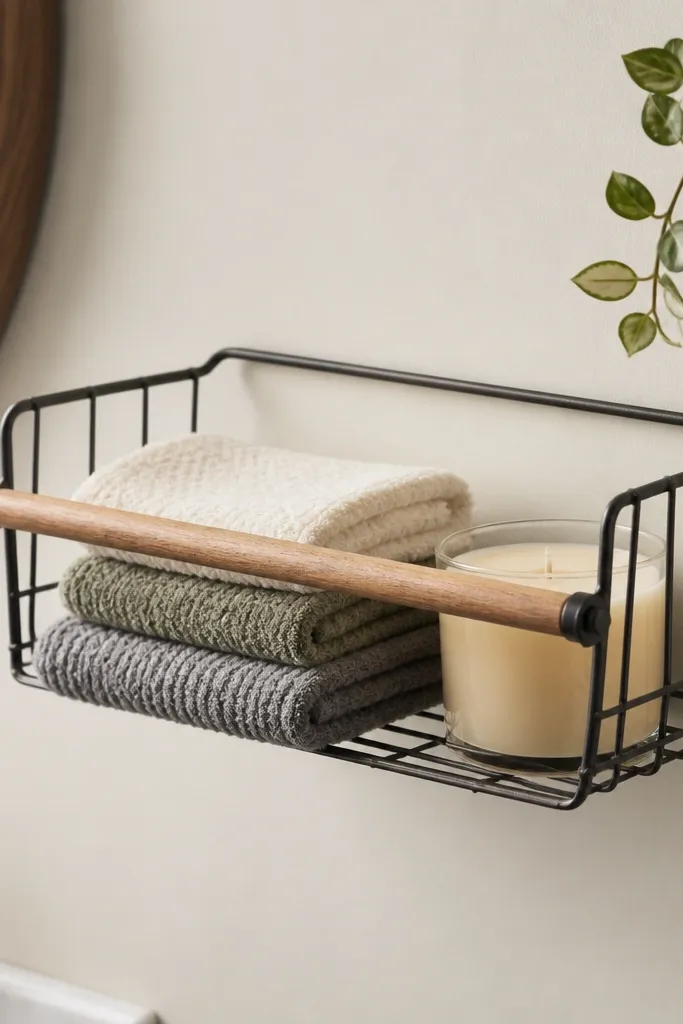
This gives you a shelf look without building a full cabinet. The wire basket adds a light, airy feel, and the wooden dowel front makes it look finished. I’ve used this in bathrooms and kitchens because it holds small items without cluttering a countertop. The contrast between metal and wood looks good in almost any room.
Mount a wire basket to the wall using a metal wall bracket and screws. Add a 1-inch wooden dowel across the front, secured with two small wood screws into the bracket supports or with strong industrial adhesive plus clamps. Sand the dowel lightly and stain it one shade darker than your trim.
Quick tipUse a level and mark the bracket holes with painter’s tape so the dowel sits perfectly straight.
One warningDon’t skip a dowel — leaving the wire edges exposed makes it look temporary.
7. Paper Flower Shadow Box for a Nightstand
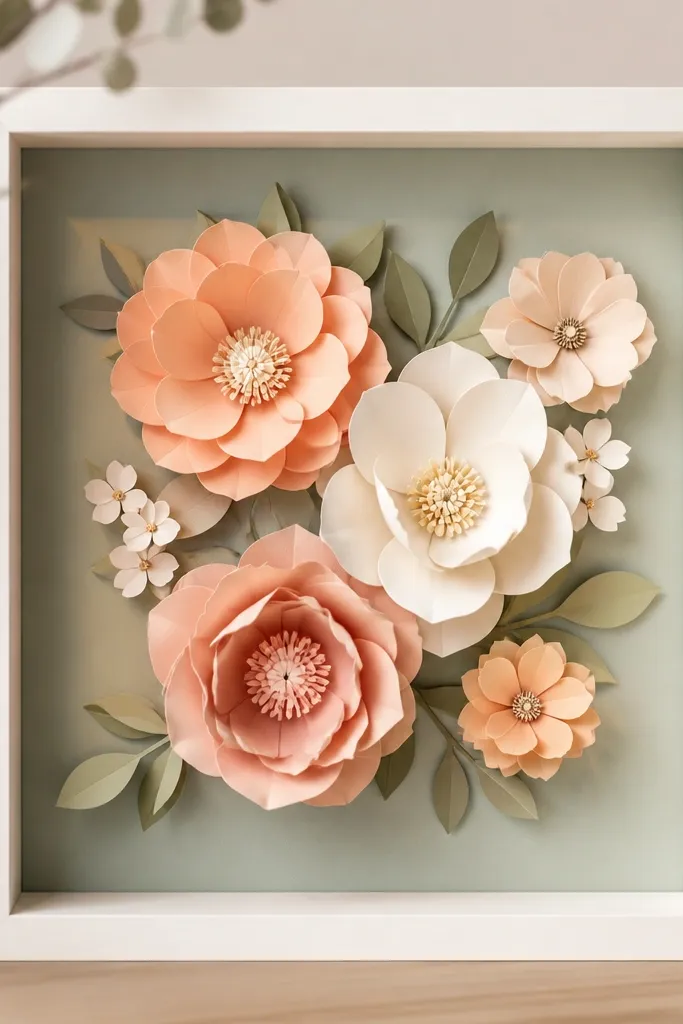
Shadow boxes make crafts look expensive because depth is built in. Layered paper flowers create a 3D effect without bulky materials. Peach + cream looks warm, while sage background calms it down. This is one of those pieces that makes a nightstand feel styled even if you have no other decor.
Use a shadow box with about 2 inches of depth. Cut flower layers from cardstock and curl petals with a pencil for a gentle curve. Glue the center last so it locks the layers. Background can be colored paper or painted foam board.
Quick tipSpray a light matte fixative on the finished paper flowers to reduce curling after handling.
One warningDon’t glue flowers flat to the back — you need a gap between layers for the shadow effect.
8. Pom-Pom Trim Curtain Tiebacks
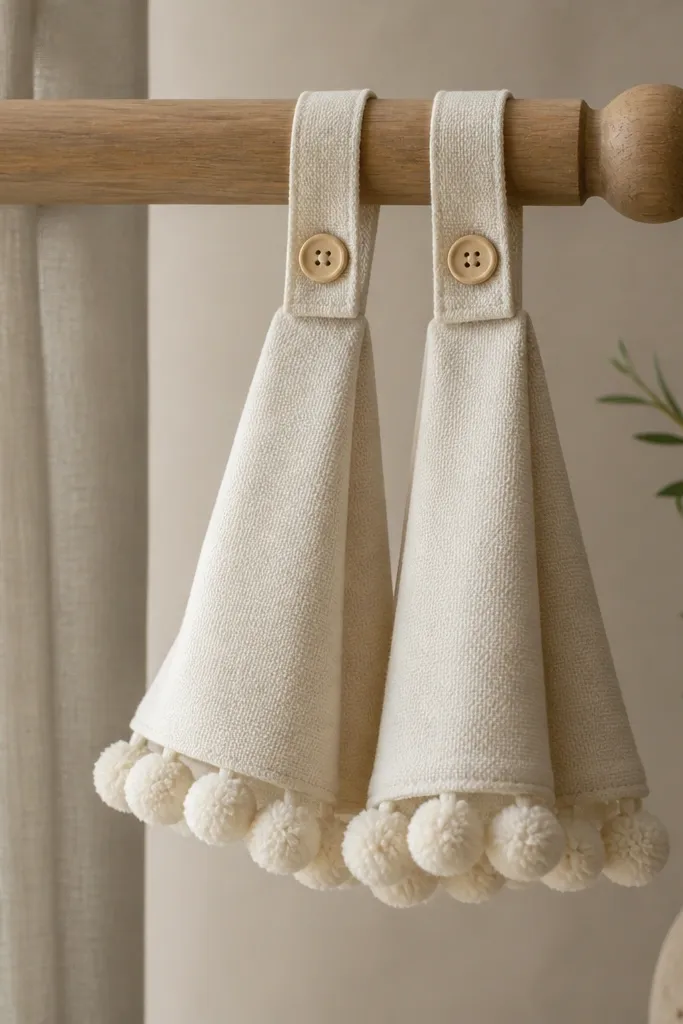
Tiebacks are small, but they change how curtains frame the room. Pom-poms add playful texture and make the fabric look more intentional. I like using a neutral strap color and a single accent pom color so it reads clean. This works best in bedrooms, nurseries, and any window with plain curtains.
Cut two straps from cotton or linen about 1.5 inches wide and 14 inches long. Sew or glue the pom-pom trim along one long edge, then fold and secure the strap ends. Attach a loop on one end and a button or snap on the other so you can adjust tightness.
Quick tipMatch the pom color to a small element in the room, like a throw pillow or plant pot.
One warningAvoid tiebacks that are too short — they bunch and pull the curtain out of shape.
9. Linen Bookmark Wall Hanging With Clothespins
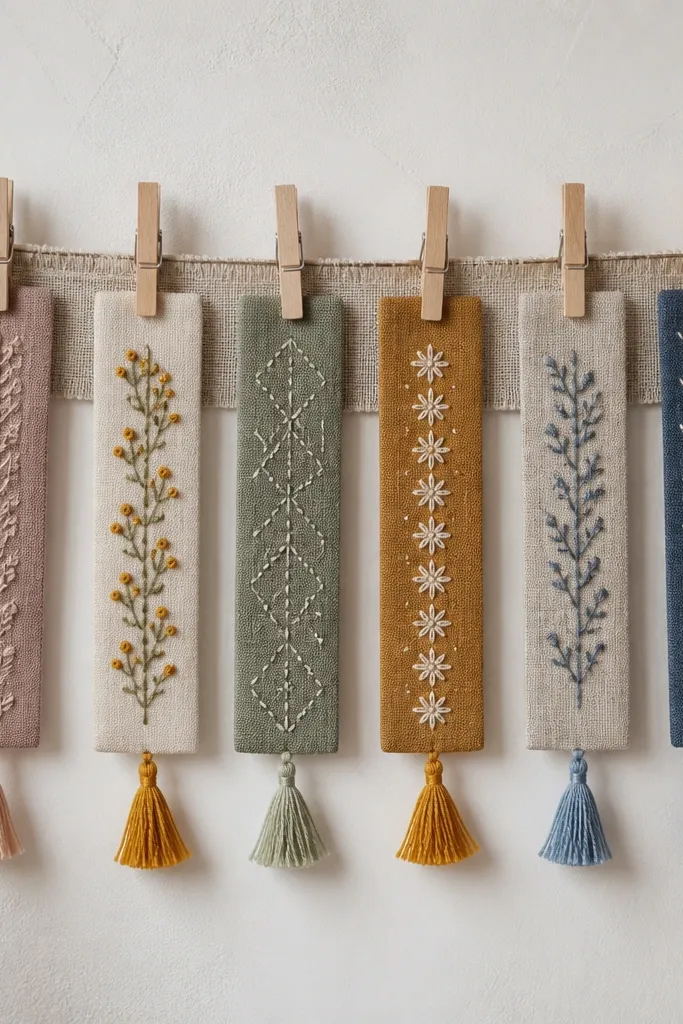
This turns wall decor into a rotating display. The linen base looks calm, while the bookmarks add movement and texture. Clothespins keep it flexible, so you can swap designs when you get bored. It’s a great solution for renters because you can hang it with a single hook.
Mount a linen strip (about 6 inches wide) to the wall using a tension rod or a picture hook and a backing board. Cut bookmark pieces from scraps of linen/cotton (about 3 x 10 inches). Add simple stitched lines with contrasting thread, then clip each bookmark with clothespins.
Quick tipKeep each bookmark width within 1/4 inch of each other for a tidy look.
One warningSkip heavy bulky fabric — it pulls the linen strip and makes the whole line droop.
10. Dowel and Twine Hanging Photo Grid
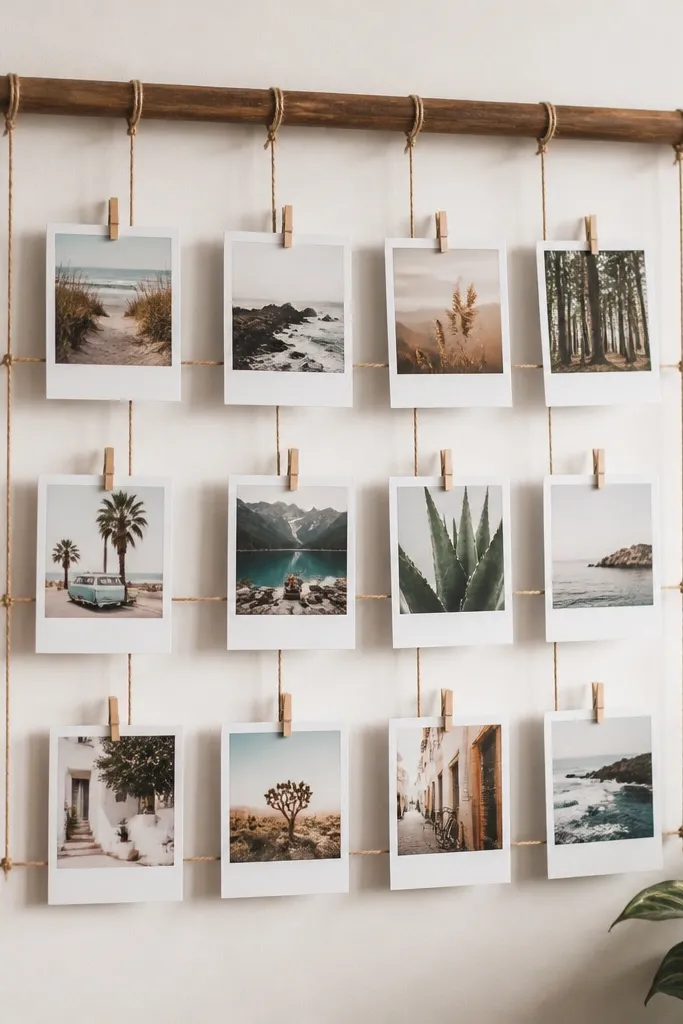
This looks creative because it’s visibly handmade, but it stays organized because the grid is measured. Twine grids create a gentle pattern that works with both black-and-white and color photos. I’ve used it in offices because it feels personal without taking up shelf space. The dowel also hides messy knots.
Use a 1.25-inch dowel, mount it with two brackets, then tie 6-8 vertical twine lines from the dowel down. Space vertical lines about 4 inches apart. Clip photos using mini clothespins at consistent heights so the grid looks even.
Hang it 62 inches from the floor for easy viewing without leaning.
Don’t let the twine lines sag — tighten each line before clipping the first photo.
11. Painted Cork Bulletin Board With Geometric Pushpins
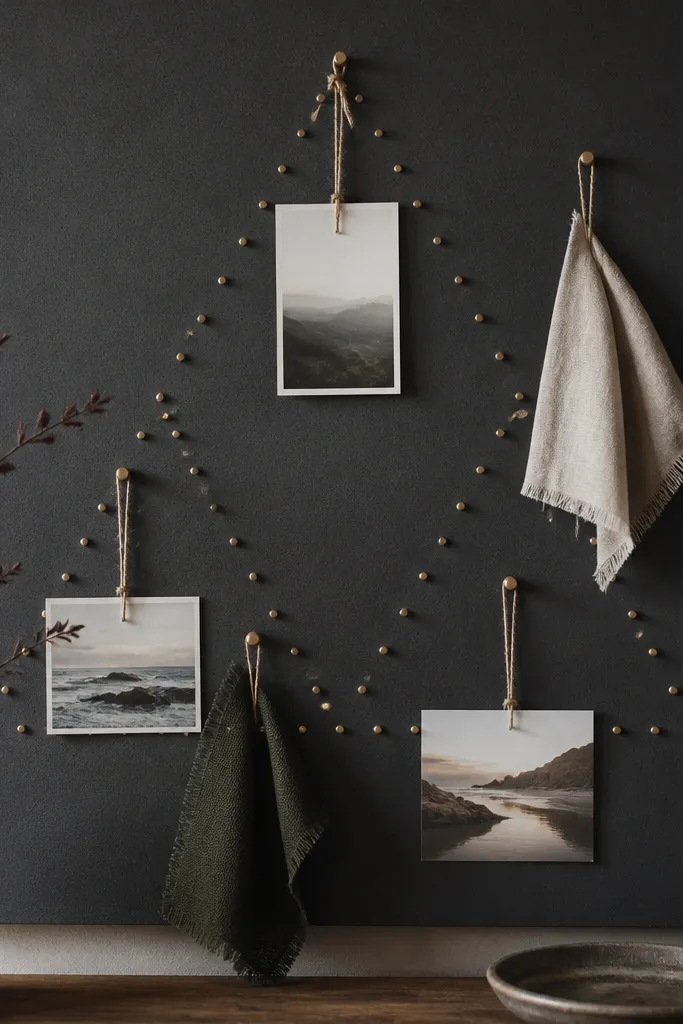
A bulletin board usually looks like clutter. Painting it matte charcoal makes the cork disappear visually and turns pushpins into the design. Geometric pin patterns look crisp and intentional, and the board still stays practical for notes. It’s perfect for kitchens, home offices, and craft rooms where you need quick access.
Sand the cork lightly, then wipe with rubbing alcohol. Paint with matte acrylic in two thin coats. Once dry, plan your triangle pattern with a pencil grid, then insert pushpins. Add one or two fabric swatches clipped with mini binder clips for softness.
Use pushpins in two colors and keep them to one shape pattern so it reads as decor, not random pinning.
Avoid glossy paint on cork — it reflects light and makes the surface look uneven.
12. Mason Jar Desk Organizer With Wrapping Paper Labels
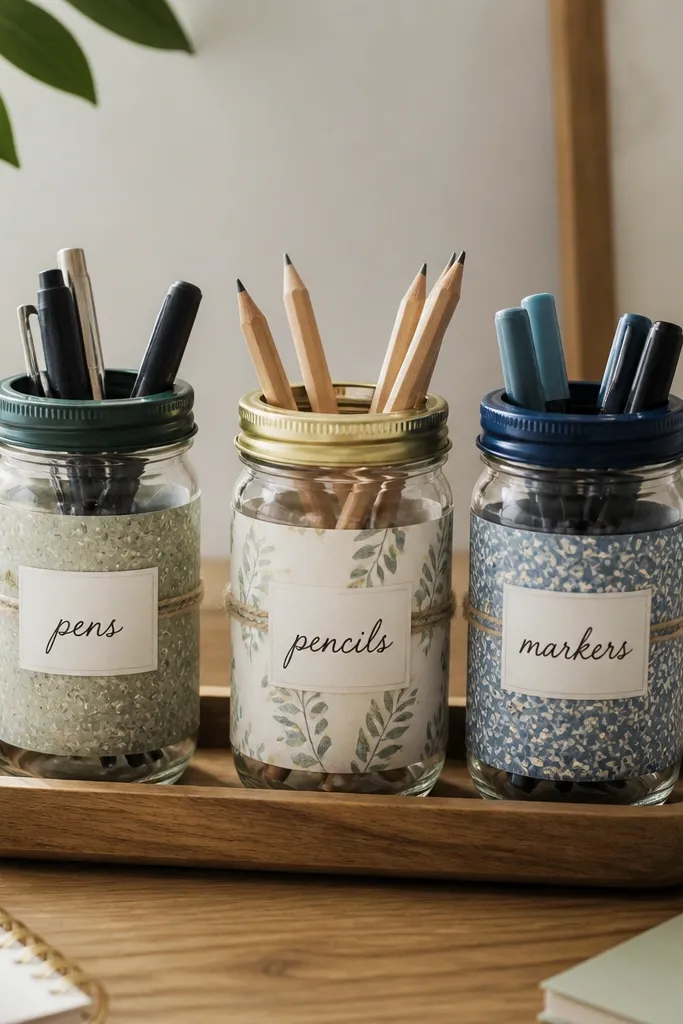
This turns boring desk storage into room decor because the labels act like a mini art piece. Wrapping paper gives you pattern without committing to a full paint job. I like handwriting with a black paint pen because it looks crisp on paper. It’s a clean way to make your craft supplies feel planned.
Clean jars and dry them completely. Wrap a 1-inch wide strip of wrapping paper around the jar upper section and secure with double-sided tape or mod podge. Seal the label edges with a thin brush of Mod Podge. Put jars in a tray so the whole setup reads like one unit.
Write labels after the paper is sealed so the ink doesn’t smear.
Don’t use glossy wrapping paper — it can peel at the edges when it gets handled.
13. Mini Macrame Plant Hanger Using Store-Bought Cord
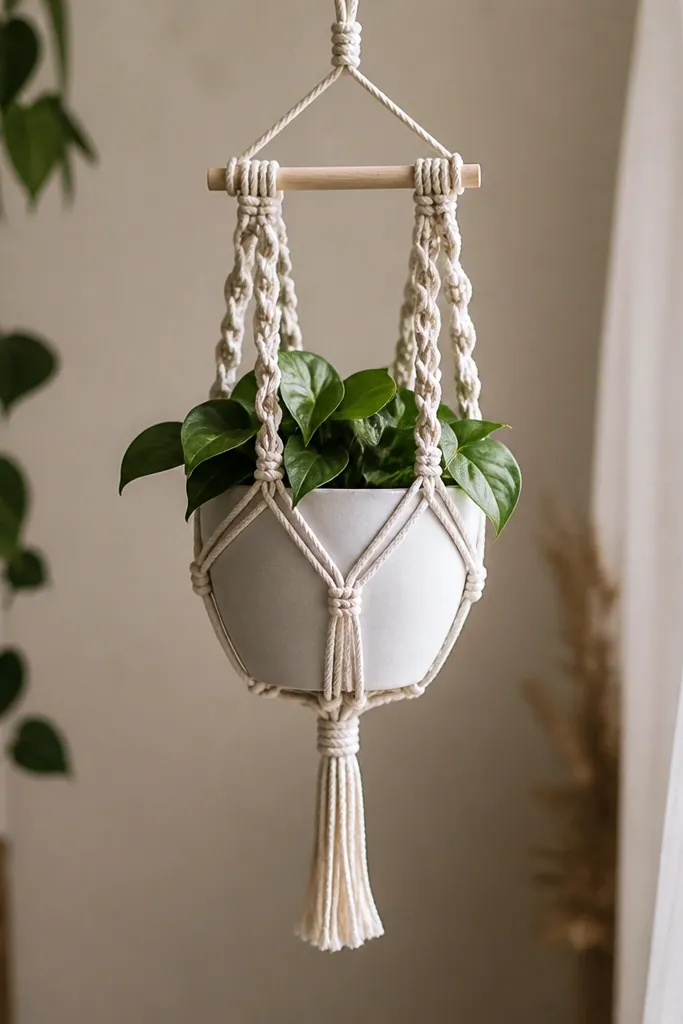
Macrame looks hard, but a small hanger is a quick win. The key is tight, even knots so it reads neat instead of messy. A mini scale keeps it from overpowering a shelf or bedside window. Natural cord also softens hard lines in modern rooms.
Buy 3 mm macrame cord and a small wooden dowel. Cut 8 strands each 70 inches, fold in half, and tie to the dowel. Use square knots for the main braid, then fan out strands and tie a loop at the bottom to hold the pot hanger ring or the pot handle.
Quick tipSteam the knots lightly with a kettle and your hand — it helps the shape settle.
One warningSkip uneven knot tension — one loose strand makes the whole hanger look off.
14. Wood Slice Lettering On a Scrap Board
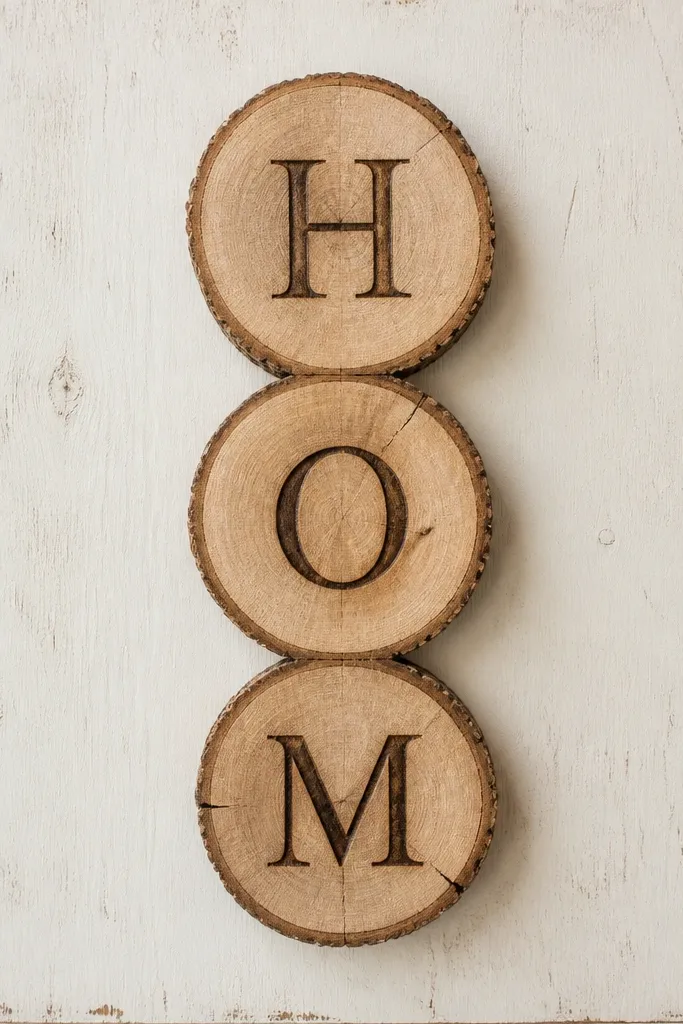
Wood slice lettering adds warmth and makes your wall look handmade even if your board is simple. Burning letters gives a texture-rich look that paint can’t match. The off-white board keeps it bright and makes the burned marks stand out. It’s a great decor choice for entryways and above a desk.
Paint or stain a scrap board with off-white matte. Arrange 3-5 wood slices and trace letter shapes lightly with pencil. Use a wood-burning tool set to medium heat, then seal with matte clear spray after cooling. Glue slices with wood glue or strong craft adhesive.
Do test burns on a spare slice first so you know how dark your tool will go.
Avoid thick glue squeeze-out — it shows as shiny edges around the slices.
15. Sticker-Resist Acrylic Wall Dot Pattern
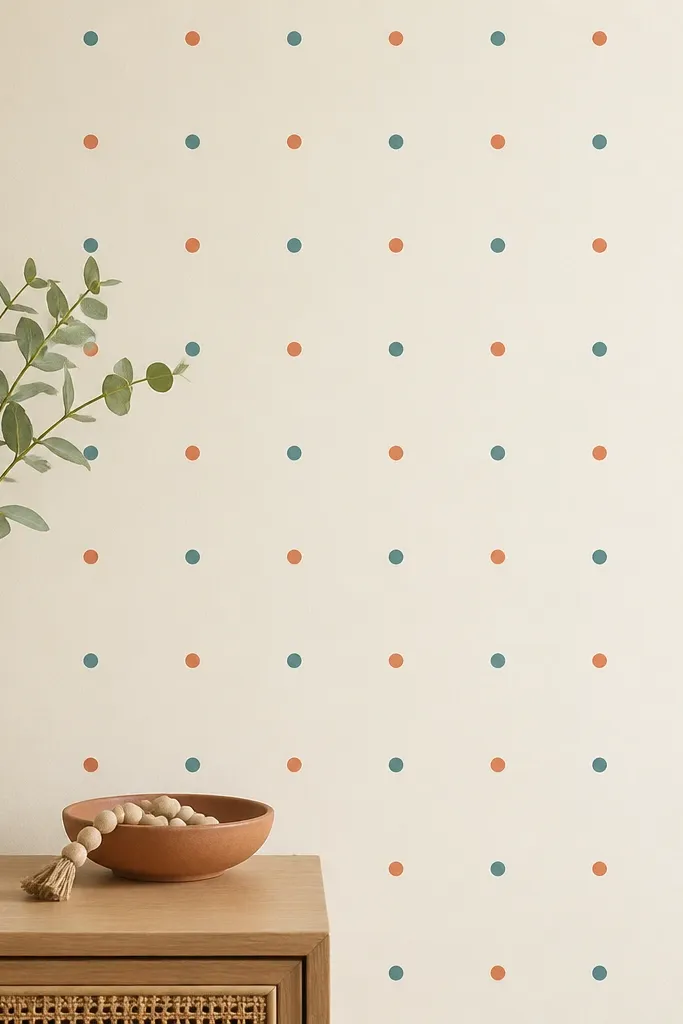
Dot patterns look graphic and creative because they repeat cleanly. Sticker-resist is the trick: it stops paint bleed and gives you sharp circles without fancy tools. Muted teal and terracotta keep it warm and not too loud. This is a strong option when you want decor that feels modern but still handmade.
Use painter’s tape or vinyl dot stickers in a grid spacing of 4 inches. Paint the base color first, let it dry fully, then press stickers down. Spray or sponge the second color over the dots, remove stickers while slightly tacky, then let cure before touching the wall again.
Mark your grid with a light pencil line and tape a level guide so your rows stay straight.
Don’t rush sticker removal — peeling too late smears edges.



